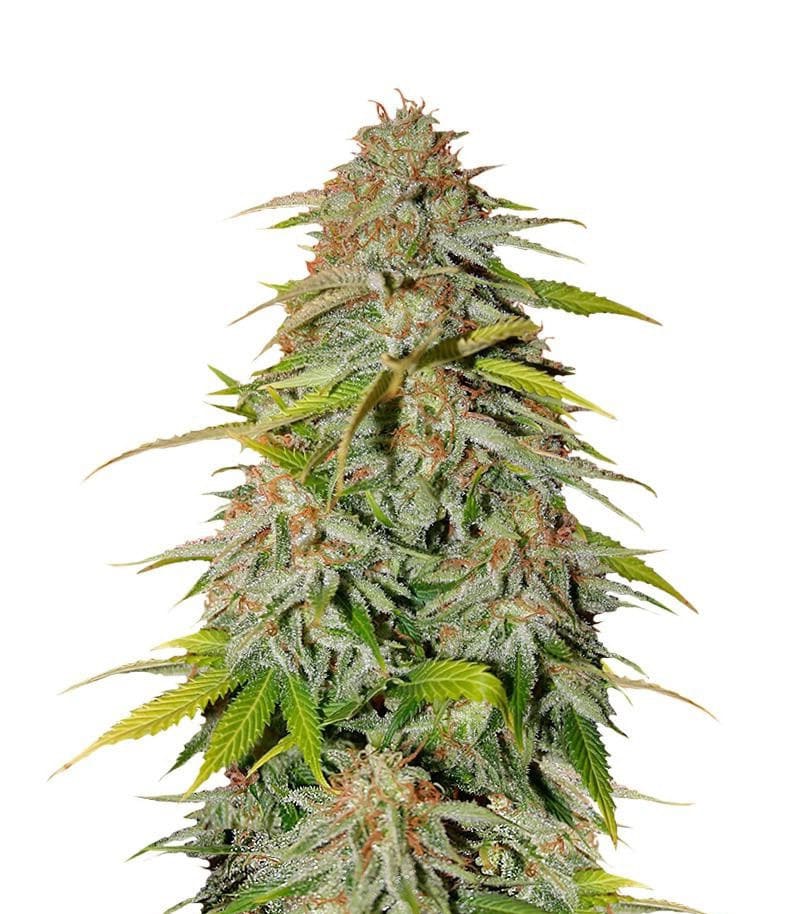
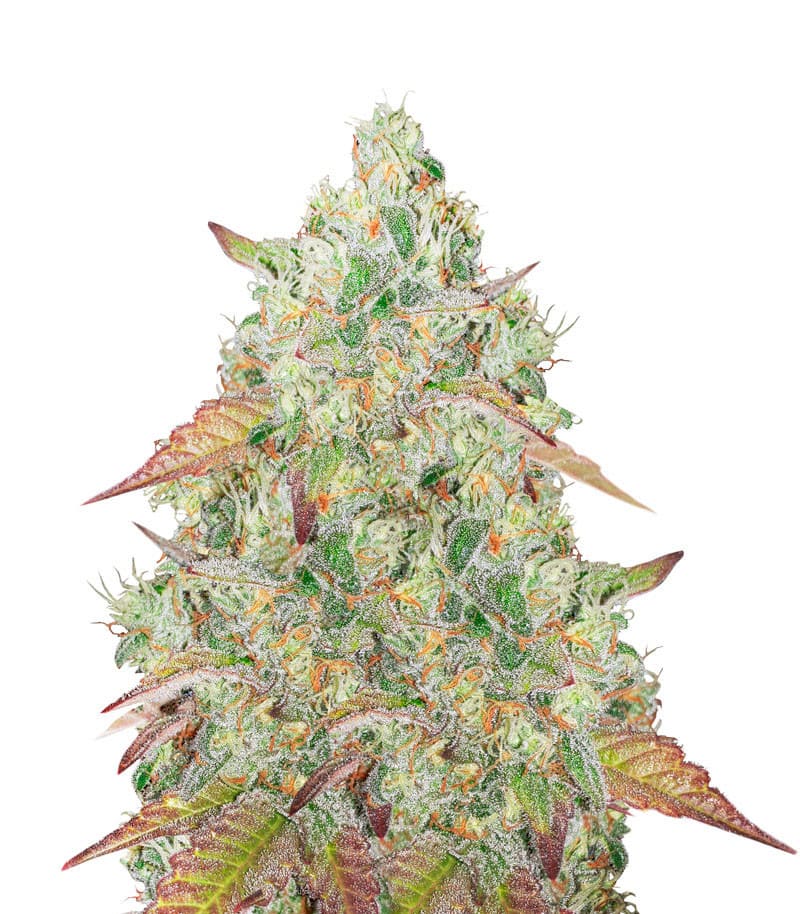
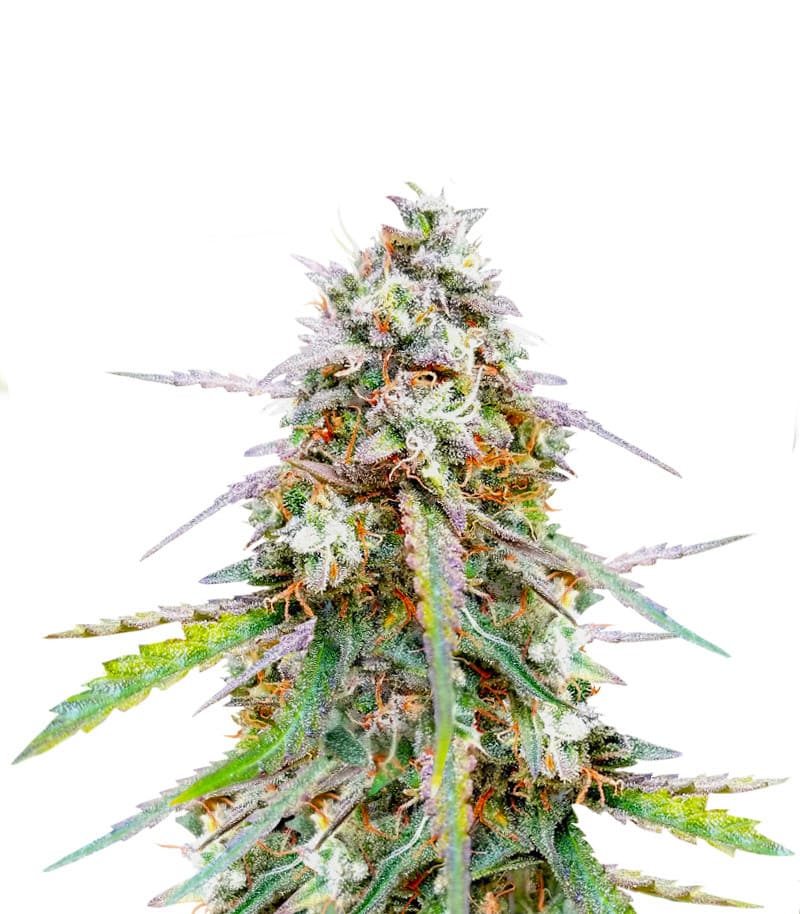
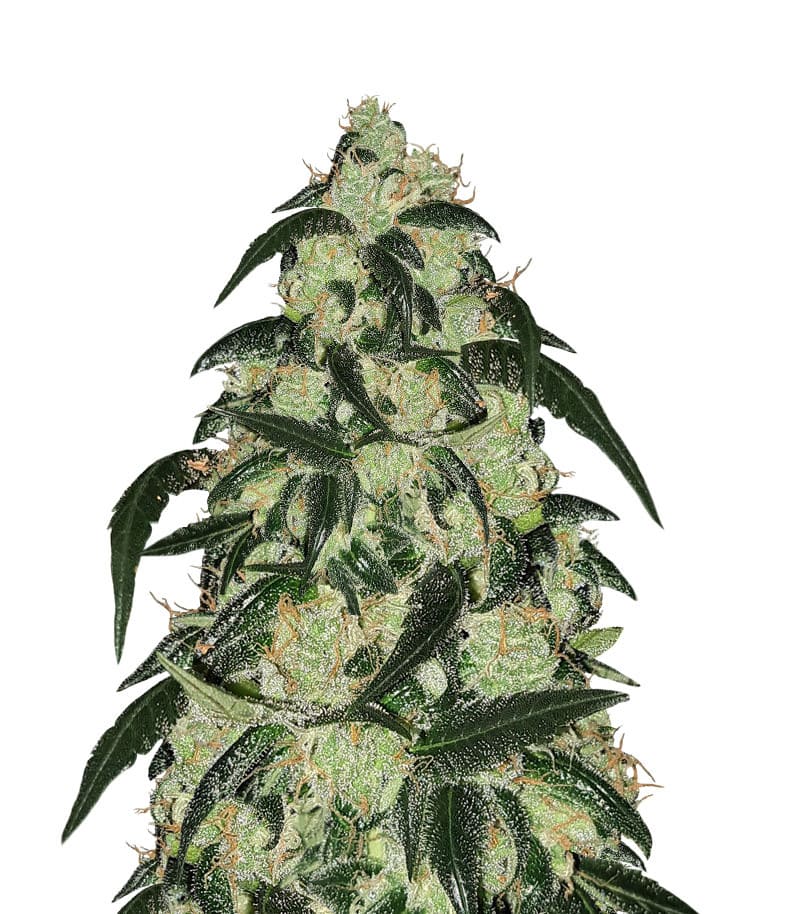
This is a complete guide to growing Gorilla Glue week by week indoors. In it, we go into details of this strain’s cultivation from seed to harvest, using one real-life Gorilla Glue #4 grow journal as an example and occasionally drawing on data from other grow reports.
Canadian (Master, 159 likes, 27 diaries)
“This girl has been a complete pleasure to grow he is very easy very resiting to nutrients and a very hight-quality flower”
We describe a grow cycle that took 14 weeks from seed (10 weeks of flowering) and yielded 159 grams (5.62 ounces) of premium bud. Along the way, we discuss what’s needed to successfully grow Gorilla Glue #4 indoors, how to maintain perfect conditions, and what nutrients and cultivation methods to use.
You’ll see for yourself that Gorilla Glue 4 isn’t hard to grow. She’s resilient to stress and responds well to topping, LST, and super cropping but may stretch too much in flower and needs smart canopy management. And she doesn’t require fancy nutrient schedules to deliver above-average yields.
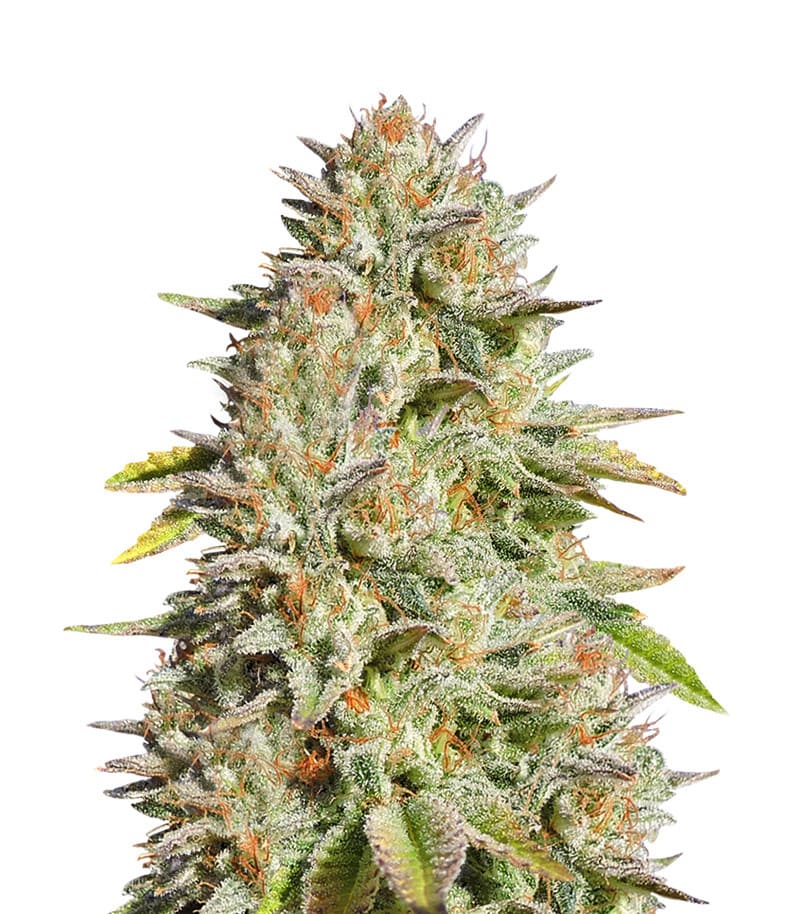
Gorilla Glue #4 (Original Sensible Seeds)
The GG#4 cannabis seeds are continuously astonishing us with their impressive results! It’s remarkable that indoor growers can yield up to 800g/m2 (2.2oz/ft2) with this strain, and outdoor cultivators can obtain up to a kilogram (2.2lb) per plant. The Gorilla Glue #4 only requires 56 to 63 days to complete flowering after switching to a 12/12 light cycle.
Buy Seeds
Setup Highlights
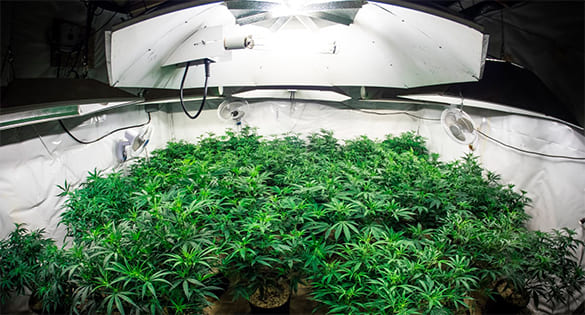
For our review, we’ve chosen a Gorilla Glue #4 grow journal by Canadian. The guy uses a 3’x3’ tent equipped with a 400W HPS. It’s a pretty much standard setup, an old tried warhorse of millions of weed growers worldwide.
Even if you don’t smoke much, we recommend starting with a similar-size grow tent because in smaller spaces, it’s more difficult to control temperature and you can’t fit it with a powerful light. And weaker lights produce insubstantial yields of smaller and airier buds. Bigger tents are also more convenient in terms of watering and canopy management.
| Surface Area |
Light |
| 9.8 ft2 (0.91 m2) |
400W |
| No. of Plants |
Overall Yield |
| 3 |
15.63 oz (443 g) |
| Yield per Plant |
Yield per Watt |
| 5.22 oz (148 g) |
1.1 g |
Gorilla Glue Veg Time
We’ll start our Gorilla Glue #4 grow journal by describing the plant’s progress through the vegetative phase.
Gorilla Glue #4 is a classic photoperiod variety which means that it’s up to you to decide on its veg time. This particular grower was vegging his plant for 4 weeks and then switched his timer to 12/12 to induce flowering.
In grow reports available online, people veg GG4 for anywhere from 3 to 8 weeks. And even 15 weeks in one case.
As with any other strain, the duration of the veg for GG4 depends on a lot of factors, for example, the number of transplants or the volume of the final pot. But the most important factor is the height of the plant at harvest which is limited by your available vertical space. Please note that Gorilla Glue #4 is a rather leggy plant and stretches A LOT in flower. In this instance, she went from 16 to 68 inches (41 to 173 cm), more than quadrupling in size.
But let’s not get ahead of ourselves and start with germination.
Week 1: What Are the Best Conditions for a GG4 Seedling?
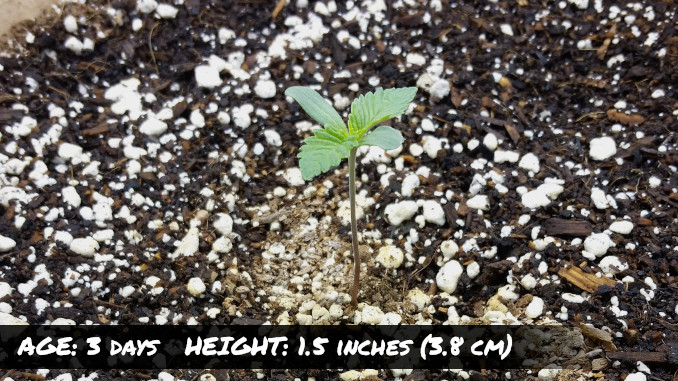
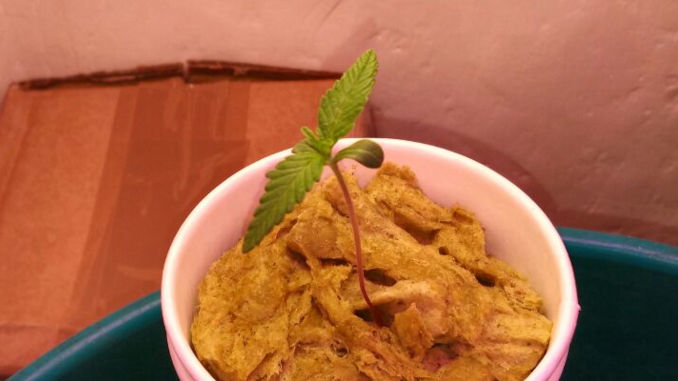
Three days out of the soil, and our Gorilla Glue grow report begins. © Growdiaries © Canadian
There are a lot of ways to germinate cannabis seeds, and even the crudest, intentionally low-tech methods give you good results if you follow three simple rules: moisture, warmth, and darkness.
You may simply germinate your Gorilla Glue bean by placing it into moistened soil about half an inch (1 cm) deep. It will usually take about 3 days to see the sprout. Aim for 23-26 °C (73-79 °F) for best results.
We understand that it’s too much anxiety for a newbie gardener to wait that long without any feedback. That’s why most people prefer to first germinate a bean between wet paper towels and monitor it as often as they want. Good viable seeds can show the taproot in just 12 hours, and then you can put the sprout in the soil.
After your Gorilla seedling has popped above the surface try to make sure that she sheds the helmet head as soon as possible. Otherwise, it will delay growth. Make the outer shell wet and soft, and you will remove it easily with your fingers.
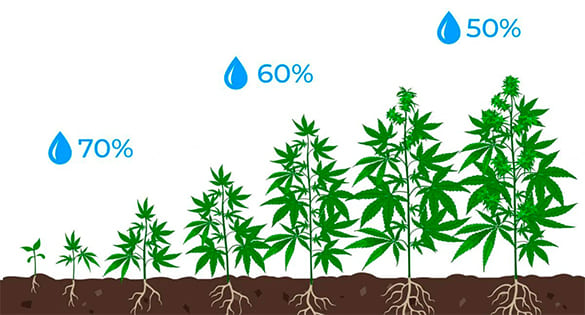
Keep the environment warm and humid, and use a humidity dome if necessary. The perfect relative humidity for cannabis is the same as recommended for people to be comfortable indoors—between 40 and 60 percent. You can go higher than that for the seedling stage (up to 80%), but the more mature your plant gets, the lower the RH should be.
Cannabis Seedling Care: Tips and Optimal Conditions
READ NOW

And when the flowering stages begin for your Gorilla Glue, it’s all the more important to keep the air on the dry side. Beginner growers may find it hard to believe, but marijuana buds can get as moldy as a strawberry or a plum that you left in the fridge for too long. Only with buds, it can happen practically overnight.
In the chart below, you can compare the actual RH in our Gorilla Glue #4 grow journal and the optimal levels that you should aim for:
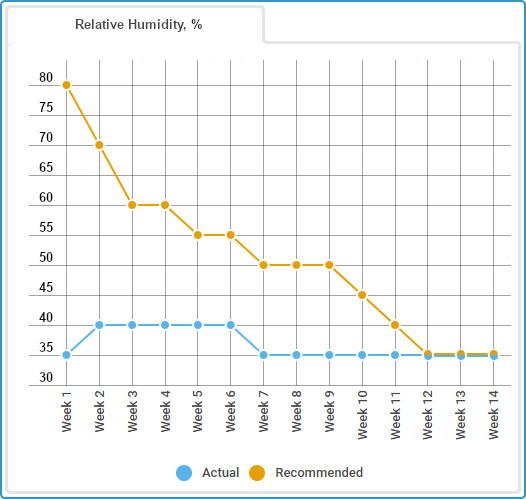
Actual and recommended RH levels for Gorilla Glue week by week.
In the first week from seed, your Gorilla Glue won’t drink much. So spray the surface or water something like half a cup around the base of the stem every couple of days. Of course, if you have pre-moistened the whole volume of your medium in advance.
If you grow your GG4 in soil, she will now find enough nutrients to flourish. In the grow report that we review here, the gardener used a coco/perlite mix (Fox Farm Ko Ko Bop) with a classical ratio of 70/30 percent.
Coco coir is best at retaining water, while perlite creates air pockets in the medium so that roots have oxygen to breathe. Together they make the winning combo. For the same reason, perlite is also beneficial in soil grows.
Some ready-made coco mixes (like this one) are amended with calcium and magnesium and pre-loaded with other essential nutrients. Others are sterile and so require using nutrients (very small doses at first) from practically day one. Starting from the second week, most growers—no matter what medium they use—start giving their cannabis extra nutrients when watering.
A very important consideration in the seedling stage is the distance from the light. Make sure it’s far enough that the little baby is reaching toward the light but doesn’t get too stretchy to topple over.
Let’s have a look at how the light distance was changing for this Gorilla Glue week by week. (Note that she was growing under a 400W HPS; for other lights, you’ll have to find the optimal distance experimentally.)
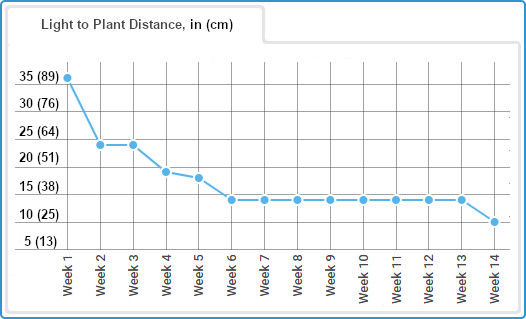
Light distance for the whole of Gorilla Glue 4 grow report.
Week 2: GG4 Grows Huge Fan Leaves
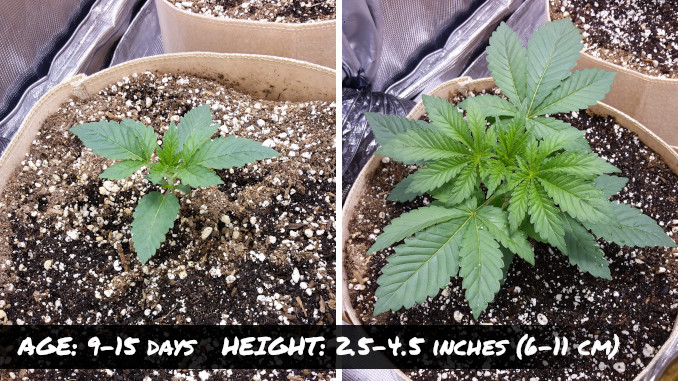
A vigorous progress in week 2 © Growdiaries © Canadian
In the second week from seed, most of the development is still happening underground as roots spread through the medium in search of water and nutrients. The leaves are growing only imperceptibly. Look at their size on day 10: if the first and the second pair span about the same, you’re on schedule.
The more the surface area of fan leaves, the faster they grow. Until something clicks and they explode, which for this Gorilla Glue #4 happened at the beginning of the third week.
The grower noted how quickly his 7 liters of Fox Farm Ko Ko Bop medium was drying. On the one hand, it means more work for you because you’ll have to water more often. On the other, frequently going through wet/dry cycles gives roots the opportunity to both drink and breathe all the time. Cannabis just loves that and grows like crazy. Install an automatic drip system, and you’ll get the maximum benefit from growing in coco.
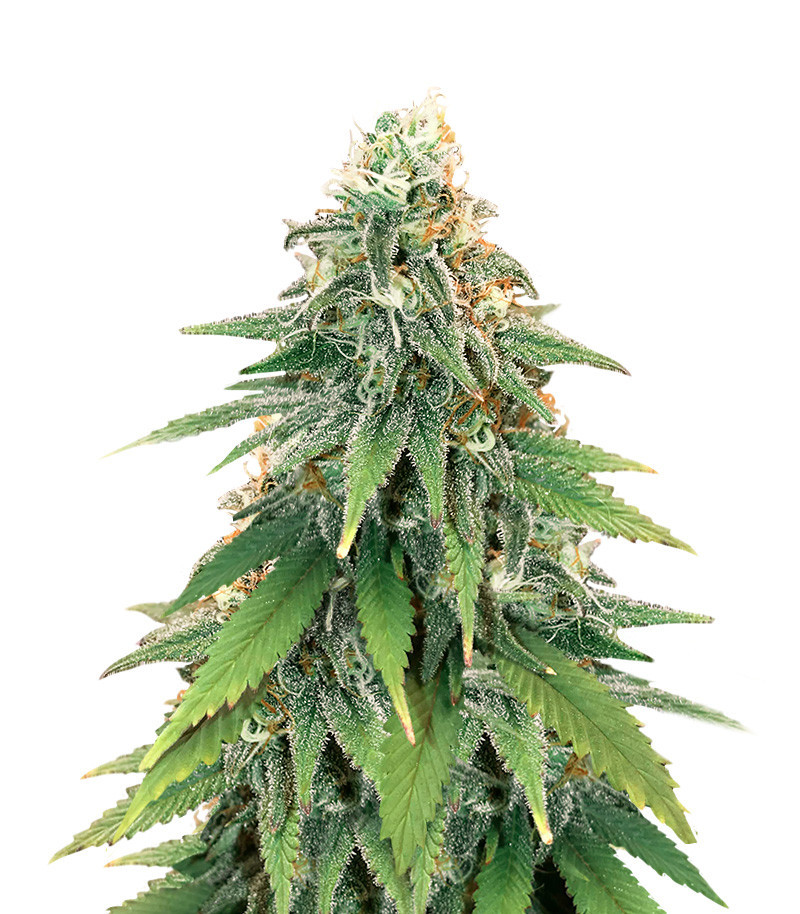
Godzilla Glue (Herbies Seeds)
THC – 29%
Feminized
50% Sativa/50% Indica
Buy Seeds
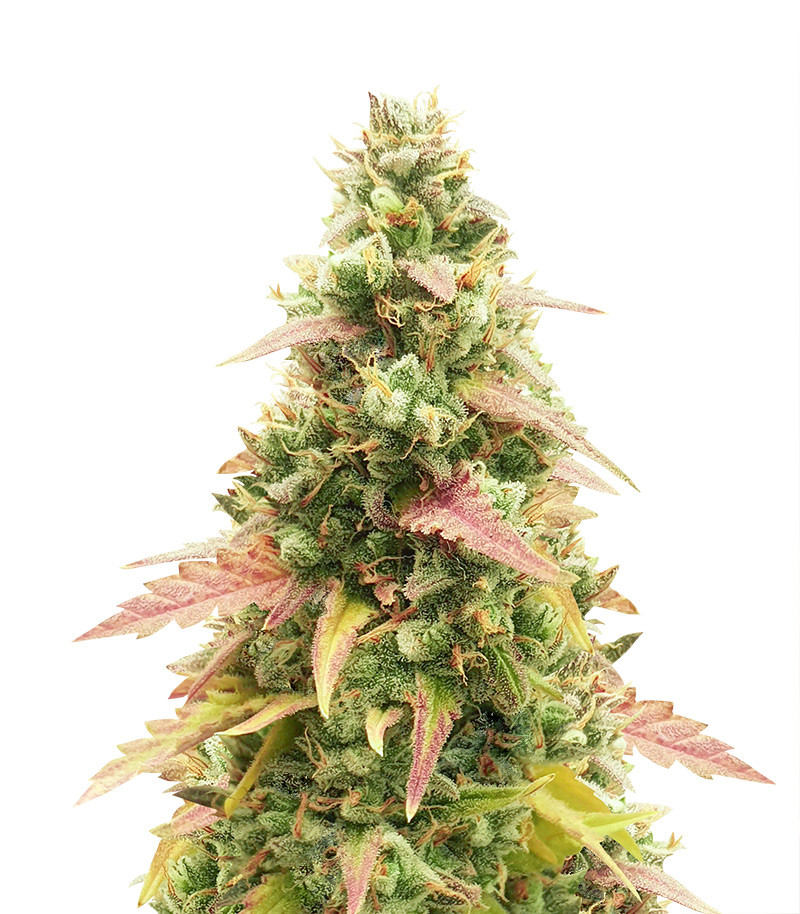
Gorilla Glue Auto (FastBuds)
THC – 24%
Autoflowering
65% Sativa/35% Indica
Buy Seeds
However, in this Gorilla Glue 4 grow, all watering was done by hand and starting from week 2, the gardener began feeding his girl nutrients. You should keep in mind that weed plants need more nitrogen than phosphorus and potassium in veg. And if you grow in coco, be sure to add lots of calcium and magnesium throughout the life cycle.
It’s safer to start with lower doses of nutrients than their manufacturer recommends. This way you’ll avoid burning young and sensitive roots. Later, if all is well, you’ll get to the recommended values.
Week 3: Topping GG4 And Then Defoliating
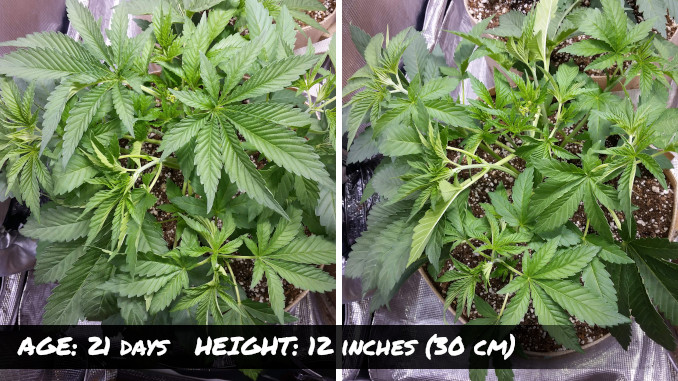
Gorilla Glue #4 at the end of week 3 (before and after defoliation) © Growdiaries © Canadian
In the third week from seed, Gorilla Glue 4 looked so well-developed that the grower began to high-stress train her without second thoughts. The purpose of training—both low- and high-stress—is to stimulate side growth, making a bushier and more low-profile plant. It’s of utmost importance indoors where you better keep all the tops at exactly the same distance from the light. This way, you get many buds of the same size and quality.
He started with FIMming. The legend says that this curious procedure was discovered by chance—when a grower “botched” his attempt at regular topping and exclaimed “Fuck, I missed!”, or FIM for short.
When topping cannabis in a usual way, you cut the tip clean, leaving intact two tiny shoots below the cut. These will grow into two full-fledged new apexes (tops) instead of just one.
With fimming, you make the cut either a bit higher or a bit lower, cutting through the side shoots as well. At first, they grow all fucked up and mangled but then recover and—together with the two shoots just below—form four (!) apexes instead of one. And while this process is underway, the lower side shoots also get a major boost.
In the pic below, we have shown in red where the cut for a regular topping could have been made.
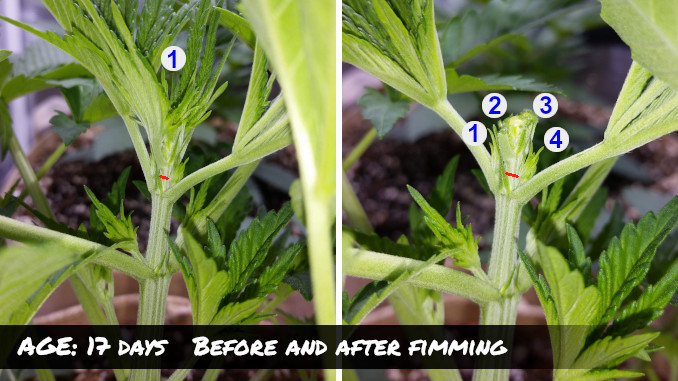
The number of apexes (tops) goes from 1 to 4 when you FIM your cannabis © Growdiaries © Canadian
Several days after the topping, the guy also defoliated his GG4, and rather heavily. The purpose of defoliation is to expose those growing points that are shaded by fan leaves. It’s a perfectly reasonable consideration, but we think many growers get carried away playing Edward Scissorhands.
When plants are stripped down next to nothing, they may LOOK all gorgeous and curvy in flower, suggesting enormous production, but in our experience, extreme defoliation rarely leads to better yields. With that said, the jury’s still out.
USE PROMOCODE GET 5% - WEEDKB5
GET 5%

Week 4: Gorilla Glue #4 Veg Time is Coming to an End
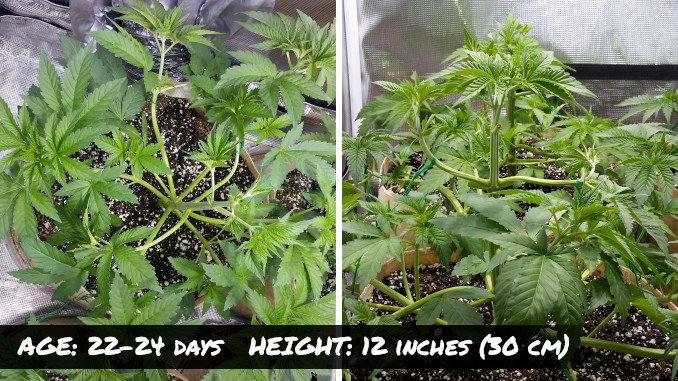
GG4 is topped, defoliated, tied-down, and ready for 12/12 © Growdiaries © Canadian
The grower would switch to 12/12 (for flowering initiation) by the end of the first month from seed. Four weeks is not terribly long veg, but in this case, it was the right move to end it so early because even at this point the plant was stretchy.
The guy had to work now all the time, adjusting the ties and trying to keep his Gorilla Glue stretch from getting out of hand. (Btw, using an HPS with all those reds in the spectrum contributes to stretching.) He was also taking pains not to stress his girl too much by LST because he was afraid she could hermie on him.
He also made a change to the diet by adding GHE FloraNectar Fruit-n-Fusion. This supplement contains different carbohydrates from things like cane sugar and molasses, is rich in potassium, magnesium, and sulfur, and is a good way to prepare for the needs of the flowering stage.
Besides, all those sugars are a great source of energy for a plant that is being constantly defoliated. Remember that leaves produce energy in the form of sugars and starches. If you pluck them all the time, be sure to substitute the loss with something else.
And here is the feeding schedule for the whole of the vegetative phase and the first week of 12/12.
| Nutrients, ml/gal |
Week 2 |
Week 3 |
Week 4 |
Week 5 |
| CALiMAGic |
4 |
4 |
5 |
5 |
| FloraMicro |
2.5 |
2.5 |
3 |
3 |
| FloraGro |
2 |
2 |
2.5 |
3 |
| FloraBloom |
1 |
1 |
2.5 |
3 |
| FloraNectar Fruit-n-Fusion |
|
|
3.79 |
3.79 |
The nutrient schedule for the veg part of GG4 grow diary.
Gorilla Glue Flowering Stages
To induce flowering in Gorilla Glue #4 (or any other photoperiod strain) you need to reprogram your timer to 12 hrs of light and 12 hrs of darkness (12/12). Some growers start counting flowering time from the day they flip the switch but bear in mind that the budding doesn’t start right away.
Depending on the genetics, it may take anywhere from one to two weeks before you even see the first signs of flowering—the so-called pistils, or female hairs. This process may be even slower if there’s only been short veg and the plant hasn’t had a chance to mature.
Gorilla Glue is a quite fast variety. The flowering stage is about 8–10 weeks long. At least, that’s how many weeks of 12/12 you’ll need. The first one or two weeks are a transition period, and then Gorilla Glue starts to bud for real.
Week 5: Gorilla Glue Stretch Continues
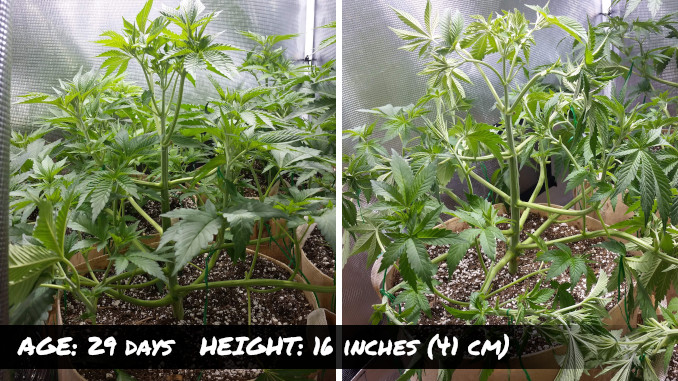
Gorilla Glue 4 before and after defoliation © Growdiaries © Canadian
At this point in the timeline, Gorilla Glue was the tallest among 4 different strains. Her height and legginess were the reason the gardener had ended the veg so early. He was simply afraid she would otherwise use up all available vertical space and also spread sideways.
He continued with heavy defoliation. When plucking the leaves, he noted their very dank smell. This is by the way how professional breeders choose the most promising phenotypes early on—by rubbing and smelling their leaves.
On day 30, the guy undid all the ties. From now on, the girl would continue to grow untrained. Besides being tall and stretchy, GG4 was also the thirstiest plant in the garden. She was still in her initial 7-liter (1.85-gal) smart pot.
Week 6: After Many Haircuts, GG4 is Still Very Bushy
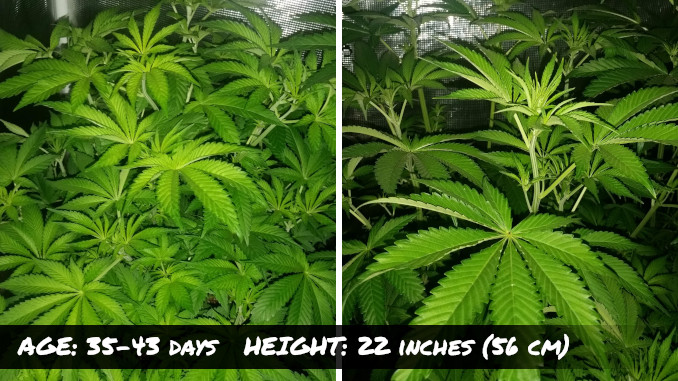
After two weeks of 12/12, the flowering stretch is in, but there’s still no budding © Growdiaries © Canadian
The photos above give you an idea of how quickly a healthy weed plant bounces back after even extreme defoliation. And how quickly everything reverts back to the “jungle” state. Which raises the question of whether removing the fan leaves is worth it in the first place.
Maybe all you really need is to prune the excess branches: those that are too far down the stem and those that grow inside the canopy.
Related Post: Top Cannabis Stores in Your Country
READ HOW

It’s very easy to spot the branches that won’t amount to anything. They’re much thinner; they stretch like crazy and form very long internodes but still have no chance of making the canopy. Their destiny is to remain in the shadows. So why keep them?
Week 7: Gorilla Glue Still Stretches Like Crazy
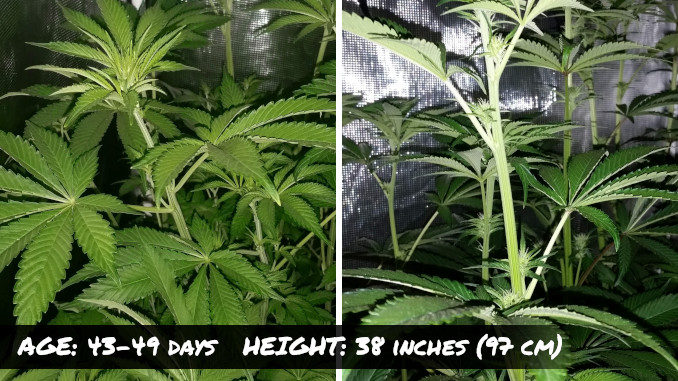
Gorilla Glue #4 progress in the third week of 12/12 © Growdiaries © Canadian
Three weeks into 12/12, Gorilla Glue was still focusing on the stretch rather than on producing the first flowers. (Although, those started to appear too—see the right pic above.) The gardener’s job was to raise the light a bit each morning. This was quite an issue because the other strains in the tent were nowhere near as tall.
And, unbelievably, the Gorilla Glue stretch continued for another two weeks until she reached a final height of 68 inches (1,73 m). Let’s have a look at the height chart of this GG4 from seed to harvest:
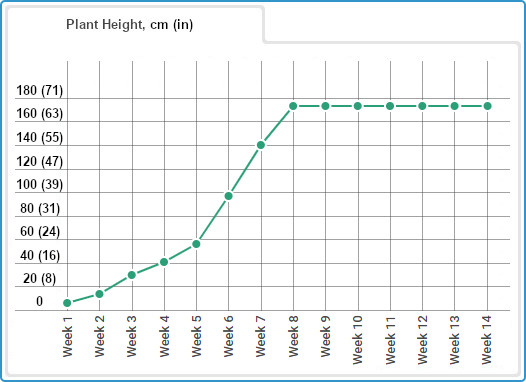
Height of Gorilla Glue week by week.
Week 8: Running Out of Headroom
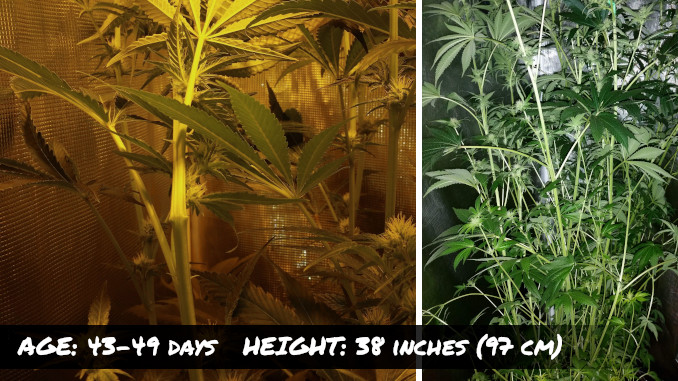
Super cropping as the last line of defense against GG4 stretch © Growdiaries © Canadian
Four weeks into flowering, the stretch got so out of hand that several tops were growing straight into the light and getting burned in the process. The grower had to bend the tallest tops, using the super cropping technique.
To super crop means to crush a branch between your thumb and forefinger so that the branch can be bent in any direction, including downwards. This is a high-stress training (HST) method and is mostly used in veg for canopy management.
The gardener also suspected that he was feeding his Gorilla Glue too much nitrogen and micronutrients (which contributed to the stretch). So he stopped using both, and now the girl was receiving only those formulas that are needed in flower. Plus CALiMAGic.
| Nutrients, ml/gal |
6 |
7 |
8 |
9 |
10 |
11 |
12 |
13 |
14 |
| CALiMAGic |
4 |
4 |
4 |
4 |
4 |
4 |
4 |
4 |
4 |
| FloraMicro |
1.5 |
1.5 |
1.5 |
|
|
|
1 |
|
|
| FloraGro |
0.25 |
0.25 |
0.25 |
|
|
|
|
|
|
| FloraBloom |
3 |
3 |
3 |
3 |
3 |
3 |
3 |
3 |
3 |
| FloraNectar Fruit-n-Fusion |
2 |
3 |
3 |
3 |
3 |
3 |
3 |
3 |
3 |
| Liquid KoolBloom |
1.5 |
1.5 |
1.5 |
1.5 |
1.5 |
1.5 |
1.5 |
1.5 |
1.5 |
The feeding schedule for Gorilla Glue flowering stages.
Week 9: The Flowering Stretch is Over
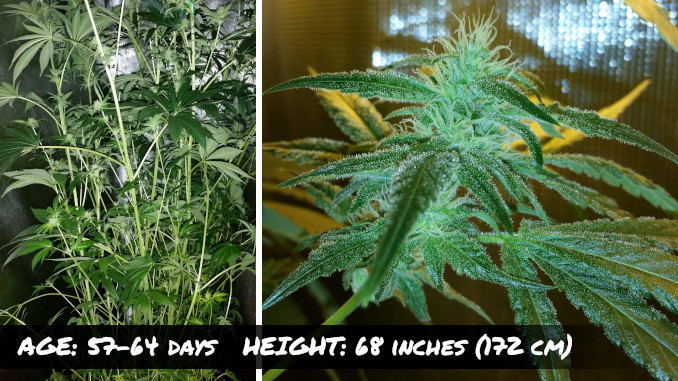
Gorilla Glue stretch stopped in week 5 of 12/12 © Growdiaries © Canadian
As a high-stress technique, super cropping could have stressed Gorilla Glue and made her hermie, but that didn’t happen. She finally stopped stretching but reached a height of 68 inches (1.72 m) which is a nuisance for an indoor grow.
Even if your tent is tall enough, having a stretchy plant like this leads to lower yields. Here’s why:
- The lower bud sites are outside the effective range of the light.
- They are in the shadow of the above growth.
- The plant has diverted too many resources from budding to stretching.
- It spends too much energy on the transport of water and nutrients through too long branches.
For all these reasons, it’s in your best interests to minimize the stretch indoors if you can.
Besides lower yields, the quality of buds is also inconsistent in stretchy cannabis. While the top flowers get enough light to become fat and dense, the lowers are tiny and fluffy. They’re often referred to as “popcorn” buds.
Many gardeners remedy this by lollipopping (removing bud sites and leaves in the lower third of the bush). This redirects the available resources to tops making them even bigger and heavier.
This grower however preferred not to go down this road. He explained that he liked to push the levels of nutrients to the limit, and whenever he went overboard with feeding, the lower bud sites were the first to show signs of trouble. So he left them as an “overfeeding fuse”.
Having said this, we don’t think he ever got carried away with nutrients in this grow cycle (see the chart below). Some people up the doses to 1000 or even 1200 ppm sometimes and get away with it.
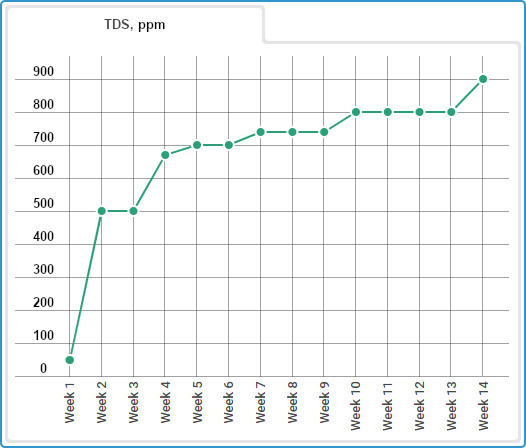
TDS measurements for the whole Gorilla Glue diary.
Week 10: Getting Resinous and Smelly
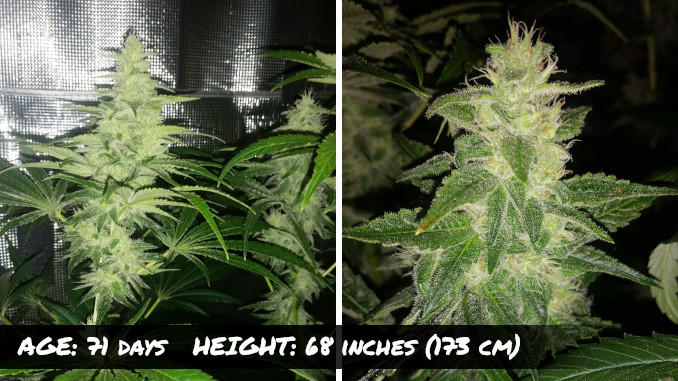
Even the base of fan leaves gets covered in trichomes © Growdiaries © Canadian
After the flowering stretch has finished, cannabis focuses on stacking up the buds and producing trichomes.
Trichomes (people often call them crystals) are tiny mushroom-like glands that cover the calyces as well as little leaves sticking out the flower clusters. Note that the most resinous of strains, such as Gorilla Glue #4, can have trichomes even on those large fan leaves that are NOT in contact with flowers (see the left pic above).
Trichs are choke-full of THC and other cannabinoids as well as terpenoids and flavonoids. The latter are responsible for the plant’s smell and taste. Naturally, when the plant starts to get covered in resin, it begins to smell too. In this grow, GG4 wasn’t the smelliest of the bunch, though.
Btw, the smell of buds depends on the temperature during flowering. When it’s too hot, flowers evaporate their terpenes at a higher rate which will result in a bland-smelling smoke. And it’s one of the reasons why you should lower day temps to something like 23–25 °C (73–77 °F). In this grow cycle, the temps were not quite ideal but at least consistent.
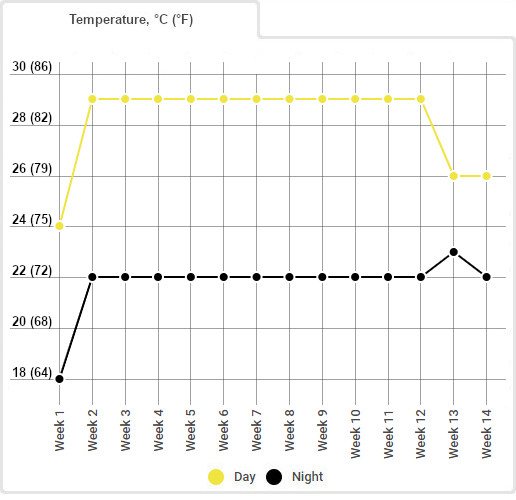
Day and night temps for the whole Gorilla Glue timeline.
Week 11: Lower Buds Removed After All
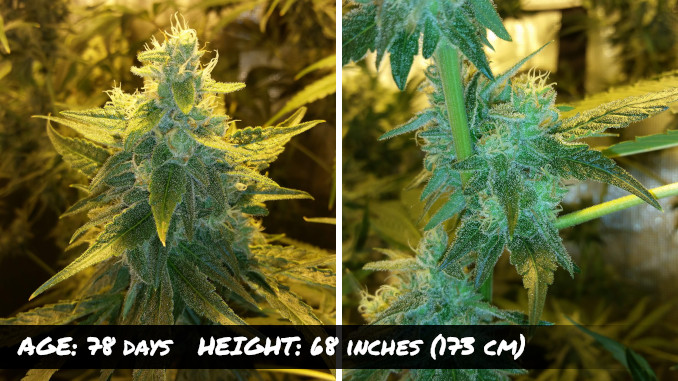
Gorilla Glue trichomes coverage is impressive © Growdiaries © Canadian
This point in the timeline marks a lull in your activities. You have dealt with the stretch, changed the diet to one suitable for flowering, dialed in all conditions. On the other hand, it is yet too early to start watching the trichomes for signs of approaching harvest. Fertigation remains your only chore.
The only other thing that the grower did for his Gorilla Glue at this stage was lollipopping. He decided that she’d be better off without lower bud sites after all.
Week 12: Sideways and Upside Down
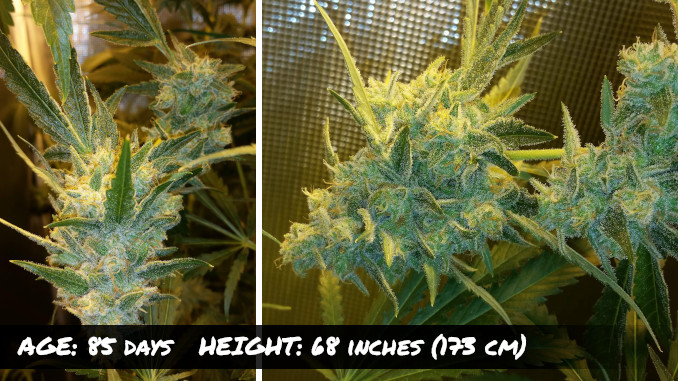
Gorilla Glue flowering stages coming to an end © Growdiaries © Canadian
By this point in the timeline, you’ll probably start to anticipate your Gorilla Glue #4 harvest time. At least, the specs of the strain that you’ve seen on the product page tell you that harvest is near.
You can start by looking at the state of pistils. These “female hairs” sticking out of buds are white when they first emerge. But by harvest time, they change their color, most often to orange, but more exotic hues are also possible. Anyway, mature pistils also look twisted and dry which signals that your GG4 harvest is fast approaching.
A word of caution: Under an HPS light, pistils tend to look more immature. So inspect your plant under natural light too: the difference may surprise you.
When you see that the pistils are far along enough, you can start inspecting your Gorilla Glue trichomes under a hand microscope. But in this run, it was yet too early.
However, the buds were extremely resinous and so heavy that the branches were bending under the weight. It’s another reason not to let the stretch spin out of control. And when the damage is already done, at least provide some kind of support in the form of stakes, trellises, yo-yos, ScrOG net, etc.
Week 13: Got Milk? What About Amber?
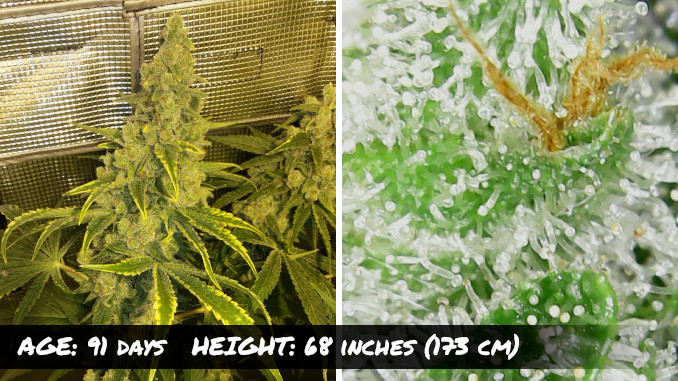
Gorilla Glue trichomes look almost ready but not quite © Growdiaries © Canadian
Now, when the pistils are all orange, twisted, and dry, it’s time to watch the state of the trichomes in earnest. Because it is them that will tell you if your Gorilla Glue is ready to pick.
You should harvest your Gorilla Glue at the peak of her potency which is easy to determine by the color of trichomes. When they are clear, it’s too early because they can produce yet more THC as well as other cannabinoids and terpenes. The presence of all these substances makes trichomes appear milky/cloudy. And this marks the perfect moment to harvest your buds.
Please bear in mind that the color of trichomes determines not only the potency but also the character of the high. After most or all of the trichs have become cloudy, a few of them will start to turn amber. Look closely at the macro shots above and below to see what we mean.
No amber means that your Gorilla Glue will produce a more heady effect. And the longer you wait and the more ambers you see, the more your Gorilla Glue will make you relaxed and sleepy. It’s because, in amber trichomes, THC starts to degrade to cannabinol which doesn’t so much warp your mind as sedates you.
Mostly clear trichomes will produce a high that is felt mostly in the head and without much body buzz, but it can make you paranoid and can be weaker compared to more mature buds.
The state of the trichomes will also tell you when to flush Gorilla Glue. It all depends on the medium you grow in because, in hydroponics and soilless mixes, such as coco, it only takes one week to flush. In soil, you may need as much as two weeks. So we suggest starting the flush in soil when the first cloudy trichomes appear. In coco and similar mediums, you may start flushing when most of them are cloudy or even when you see the first ambers.
Week 14: Gorilla Glue Harvest
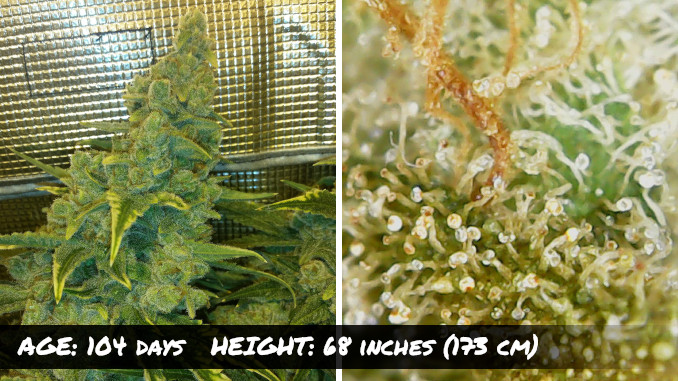
After 10 weeks of 12/12, it’s Gorilla Glue #4 harvest time © Growdiaries © Canadian
As we said earlier, in the last week or two before your Gorilla Glue harvest, you should give her nothing but pH’d water. This will give her a chance to uptake the remaining chemicals from the medium and use up those that were already in her system. After a proper flush like this, the smoke will be pure, tasty, and smooth, the joint won’t need relighting, and will leave snow-white ash.
If you dry your cannabis in the same tent, you can cut the plant as a whole and hang it upside down. Make sure to control the temperature and relative humidity. They should be the same as during the Gorilla Glue flowering stages. Another important thing is darkness, and you should probably leave the oscillating fan on.
Related Post: The Best Cannabis Seeds
READ HOW

The initial drying usually takes anywhere from 5 to 10 days depending on the conditions. The longer it is, the better (potentially) the quality, but watch out for mold. You can slow down the process by wet-trimming both the fan leaves and the “sugar” leaves because this would drastically reduce the evaporation surface.
When the surface of the buds is dry to the touch, try to bend the branch. If it snaps, it’s time to cut the nuggets from the branches and put them into glass jars for curing.
Curing serves not only to slowly evaporate the remaining water from flowers. It also gives them time to degrade chlorophyll, sugars, starches, and other organic compounds. You don’t want all those in your smoke because they make it smell like hay, taste terrible, and cause coughing.
Gorilla Glue takes at least 3 weeks to cure properly. This may include the week or so of drying and another two in the jars. However, chemical reactions don’t stop after 3 weeks, and you may find the buds taste better and better the longer you cure them. Curing also makes Gorilla Glue more potent.
The End Result
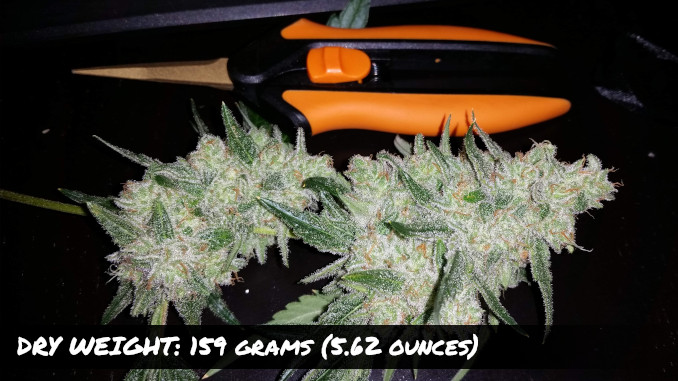
Gorilla Glue #4 yield per plant is quite impressive at 159g © Growdiaries © Canadian
For this Gorilla Glue #4, harvest time was a happy time because buds were big, very dense, and thus massive. The grower harvested 159 g (5.62 oz) from just one of 3 plants grown under a 400W HPS. The overall yields per watt for GG4 and other plants in the tent were through the roof.
The grower noted an extremely potent high once the buds were cured, and the earthy and flowery smell produced a combination that was hard to describe but very pleasant.
We have analyzed GG4 yields in other grows too and compiled them in a table:
| Yield per Plant |
Weeks, Total |
Weeks in Flower |
Type of Light |
Wattage |
| 53g (1.87oz) |
16 |
10 |
LED |
450 |
| 92g (3.25oz) |
24 |
9 |
LED |
400 |
| 45g (1.57oz) |
12 |
7 |
HPS |
400 |
| 38g (1.34oz) |
14 |
9 |
LED |
400 |
| 100g (3.53oz) |
14 |
7 |
HPS |
400 |
| 31g (1.1oz) |
13 |
8 |
LED |
340 |
| 129g (4.55oz) |
18 |
9 |
LED |
300 |
| 76g (2.68oz) |
13 |
7 |
LED |
280 |
| 164g (5.78oz) |
19 |
9 |
LED |
340 |
As you can see, on average, Gorilla Glue #4 yields 81g (2.85oz) per plant after 8.3 weeks of flowering. Gorilla Glue #4 veg time depends on the setup and growing methods, and in our sample, the whole life cycle takes from 12 to 24 weeks, with about 16 weeks on average.
Main Takeaways From Gorilla Glue #4 Grow Journal
Gorilla Glue genetics is strong, vigorous, and easy to grow. This strain doesn’t take long to flower, but you might come across a stretchier (and longer) GG4 phenotype. In this case, we recommend shorter veg.
You can get away with feeding your Gorilla Glue 4 higher doses of nutes, but the nutrient schedule doesn’t need to be very sophisticated to get good results (as we’ve seen in this GG4 grow diary). She’s also a very thirsty variety.
The smell isn’t overwhelming, but you’ll still need a good carbon filter during flowering stages. Gorilla Glue #4 responds well to any high-stress training methods and yields way above average.
As for the quality, the buds have a very complex and nuanced flavor that is not so easy to describe, and the smoke is insanely potent. But it’s what you may expect from one of the most resinous genetics out there. Happy growing!
All images in this post were taken from GrowDiaries, the world’s largest weed-growing community.
