Autoflower Defoliation Sweet Spot: When and How Much?

Not long ago, people used to think of autoflowers as something fragile, finicky, tiny, and potentially low-yielding. The common stance was that anything could shock and stunt them. Hence, the autoflower defoliation was a big no-no, the same as transplanting and various high- and low-stress techniques. Luckily, that has changed.

Autoflower defoliation has become a standard canopy-management method, and we’ll show you how and when to perform it. Armed with these guidelines, you’ll learn to use autoflowers trimming as the means to achieve bigger plants and over-the-top production.

The Most Important Question — Why?

Autoflower defoliation shouldn’t be thought of as some devilishly clever way to cheat Nature. We don’t need to cheat. We just see a problem and help plants deal with it. If there’s no problem, we leave them alone.

So let’s look at the situations where you can benefit your autoflowers by trimming and defoliating them:

  1. Better canopy ventilation. If you’re afraid there’s a lack of air movement in the bottom part of the bush or inside it, remove the excess foliage. Or else you can run into problems with mold.
  2. Increasing light exposure. Probably the main reason for autoflower defoliation indoors. Make sure that fan leaves don’t shade any bud sites. And if they do, remove them.
  3. Getting rid of old leaves. When a plant has sucked all the juices out of lower fan leaves, there is no reason whatsoever to leave them on branches. If the lower leaves are still green, don’t shade anything, nor block air movement, it’s okay to leave them.
  4. Slowing down a particular branch. Sometimes one of the top shoots is growing too fast and is overtaking all the rest. One of the ways to curb its growth and allow the rest of the branches to catch up is to defoliate it.
  5. Reducing overall perspiration during drought. I used to do this in my guerilla growing days. I prefer to let my outdoor plants grow naturally, but during a heat wave I defoliate more generously. The less foliage, the less precious water the plant loses.
Related Post: XXL Autoflower Strains 2023

READ NOW

Drawbacks of Autoflower Defoliation

There are definitely quite a few cons to autoflower defoliation. Let’s look at them too.

  • Each leaf contributes to photosynthesis. Chemical reactions inside leaves produce building materials and energy to be used elsewhere in the plant. So defoliate only if you think that the benefits of defoliation outweigh the leaf’s contribution to photosynthesis.
  • Each leaf is a depo of essential elements. So-called mobile nutrients (N, P, K, Mg, and Mo) can be transported from older leaves to new growth as needed. So if you notice a deficiency of any of these nutrients, you’ll only make things worse by defoliation.
  • Slowed down growth due to stress. Autoflower defoliation, pruning, topping—they all produce a spike in jasmonic acid. It’s a kind of a stress hormone which makes plants temporarily suspend growth and direct the saved energy to wound healing. On the other hand, the right amount of stress can produce just enough jasmonic acid to actually make weed more potent, as one study suggests.
  • Risk of hermaphroditism due to stress. It’s not the worst kind of stress (not as bad as chaotic light cycle, for example), but in weaker genetics it can be enough to make female plants produce male flowers (hermies).

These drawbacks don’t give enough reason to forget about autoflower defoliation altogether, but you should always make sure the good outweighs the bad. And sometimes you might prefer a little less invasive and stressful procedure like leaf tucking.

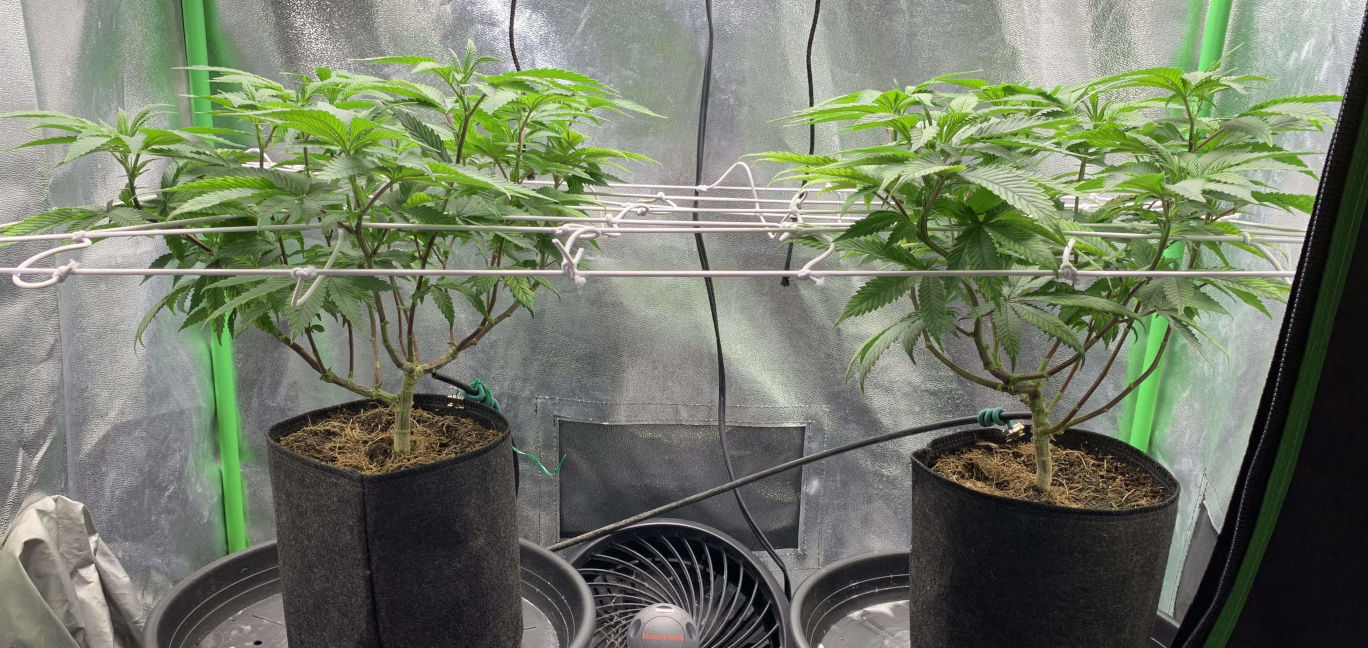
Leaf Tucking: The Alternative to Autoflower Defoliation

leaf tucking

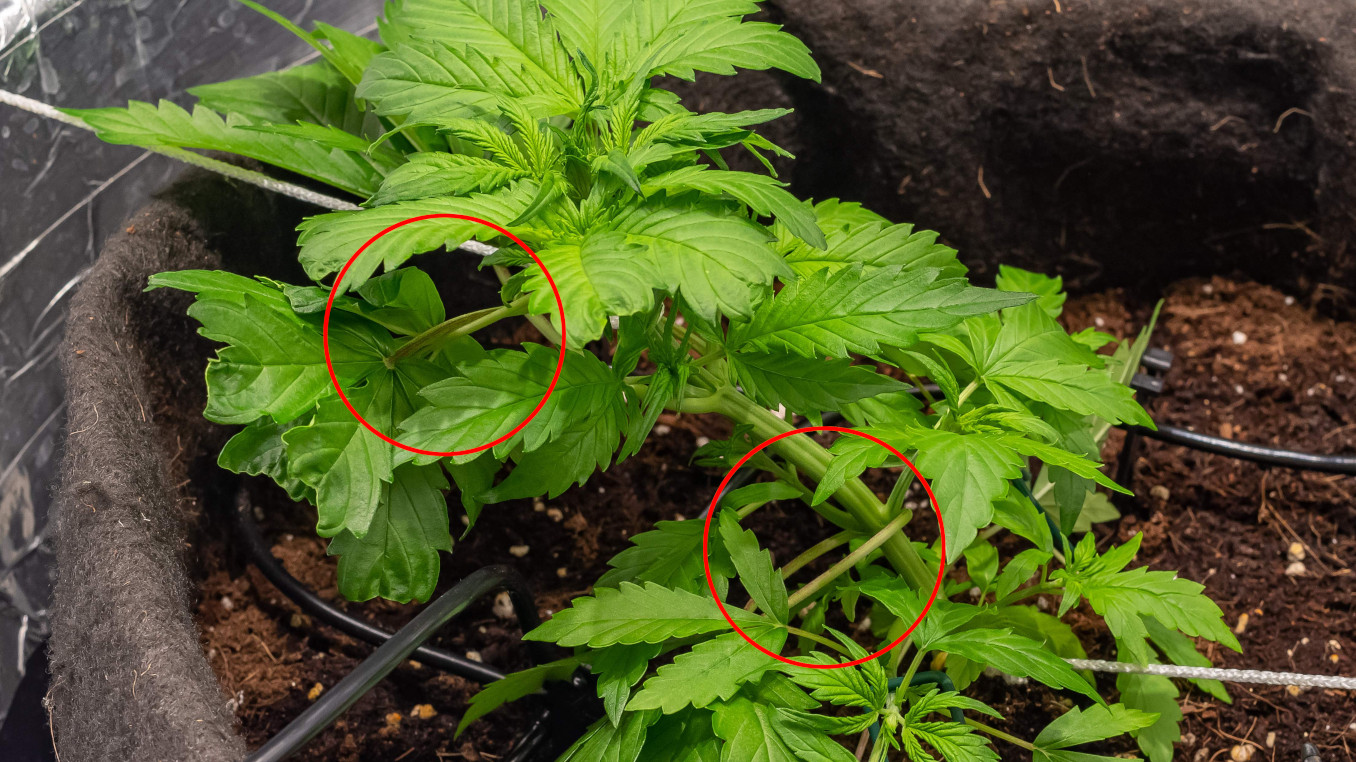
Red circles show where leaves were tucked and tied together instead of defoliation. © Growdiaries

If larger fan leaves are in the way but you think it’s best to leave them on the plant for now, you can tuck them under a branch. Let’s have a look at one way this can be done.

A skillful grower who calls himself Bloombuster obviously hates autoflowering defoliation and uses the ‘x-leaves’ technique instead. He takes two opposing fan leaves, tucks them under a branch and ties them together by their petioles.

At harvest, the plant is a monster. Maybe too leafy to some people’s taste, but a very generous producer.

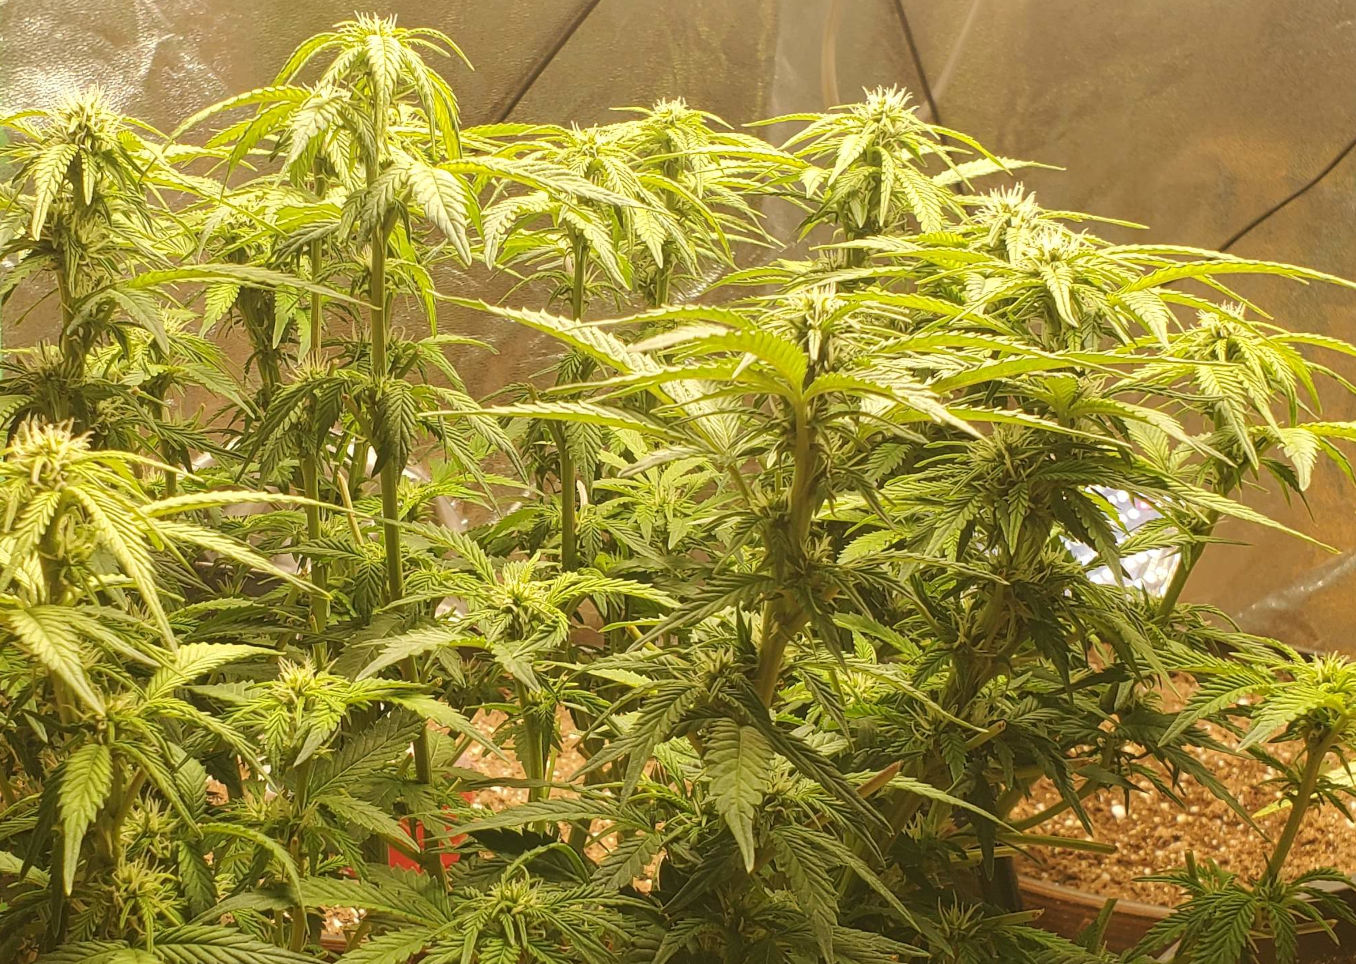
Gorilla Cookies Auto (FastBuds)

The yield of this monster from FastBuds is 220 g (7.76 oz) from 1 plant. This indoor garden is actually just one autoflower, grown without heavy defoliation. © Growdiaries

Heavy Autoflower Defoliation as a Yield Boosting Technique

So far, we’ve only been talking about selective defoliation of autoflowers. You cast a critical eye on your plant and remove only those parts that don’t fit your vision.

However, many growers see defoliation (especially heavy defoliation) as a kind of a magic bullet As if it somehow could automatically transform your plant into a super producer. This view was given a boost by the rise of schwazzing, a form of extreme defoliation.

Schwazzing was popularized by the book Three a Light. The name obviously means ‘three pounds of dry bud per a 1000W light’. The book describes at what stages in a plant ‘s cycle heavy defoliation should be performed and how many days of rest to give your plants between sessions and what nutrients to feed them. People love clear and easy-to-follow guidelines like this.

Related Post: Where to buy the best Gorilla Glue

READ NOW

Btw, schwazzing was developed for photoperiod genetics, not autoflowers.

Nevertheless, some growers experiment with extreme forms of autoflower defoliation too. Obviously, they hope to come up with some step-by-step instructions that will guarantee bigger yields every time. We’d say it’s wishful thinking because every strain is different. Moreover, every batch of seeds in a strain and every seed in a batch are different. So it’s a flip of a coin how your particular autoflower will react to heavy defoliation

Having said that, we’ve compiled a short list of guidelines that most autoflower defoliation enthusiasts agree on:

  • don’t remove more than ⅓ of fan leaves at a time,
  • remove only those leaves that have stopped growing,
  • allow for at least a week between sessions,
  • you can defoliate in veg but not just before the transition to flowering,
  • it’s okay to defoliate during flowering (weeks 2-3) but only before the stretch is over,
  • never trim leaves in late flower (after approx. week 8 from seed).

A Sample Autoflower Defoliation Schedule for the Whole Life Cycle

Defoliation: Selective Heavy Pre-Harvest
Weeks 1
2
3
4
5
6
7
8
9
10

As you can see in the table above, a special case is defoliating an autoflower before harvest. If you do this right before chopping your plant or right before subjecting her to a dark period before harvest, it’s not really defoliation. It’s rather a form of wet trimming. You’re going to remove all fan leaves anyway, and often it’s more convenient to do this while the plant is still standing in her container.

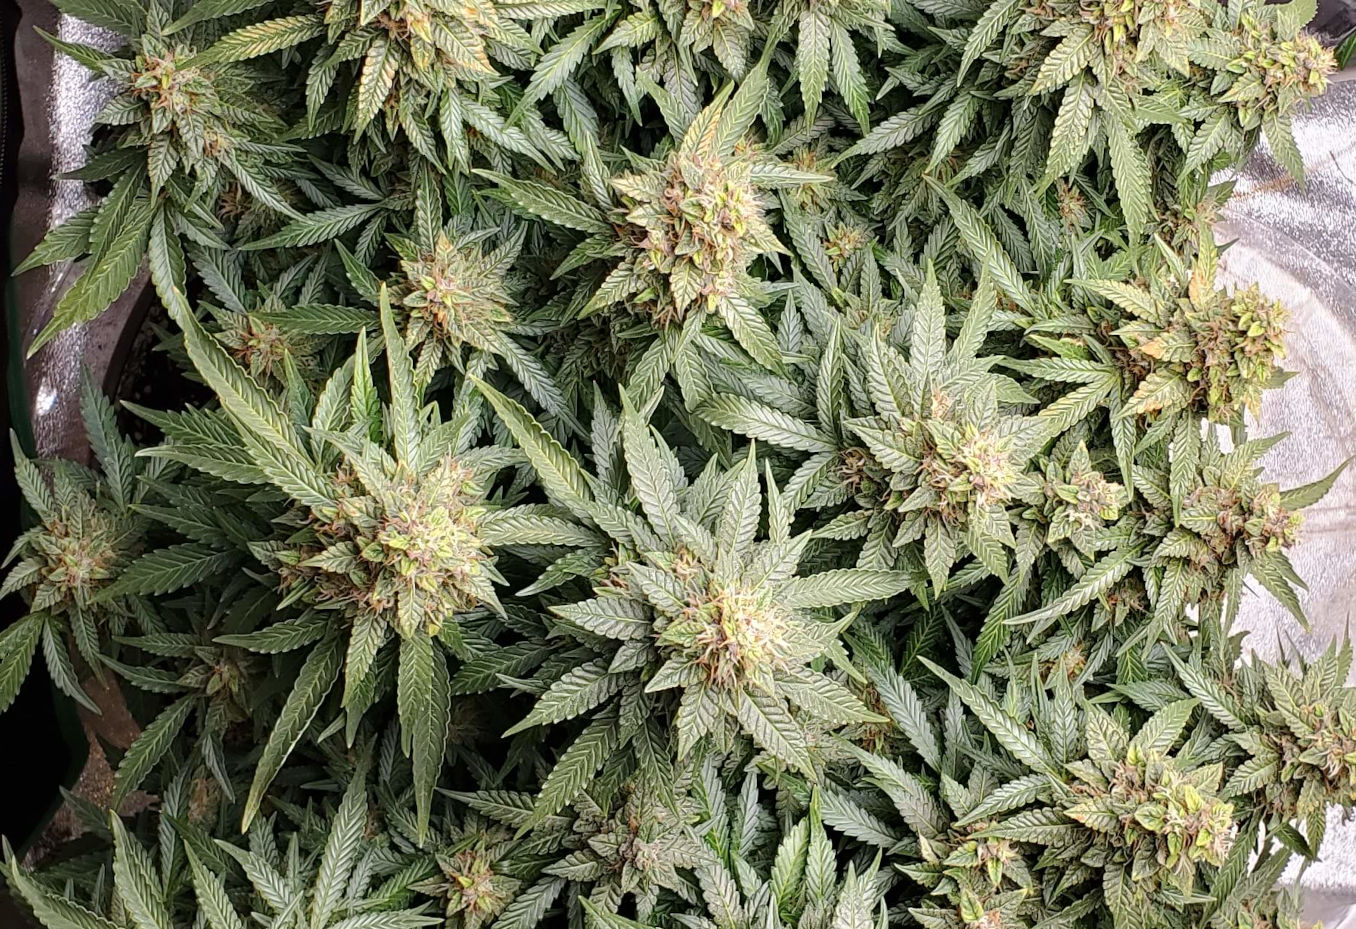
LSD Auto (Barney’s Farm)

And even if you give her a day or two to mature under the light after this heavy trimming, it’s really okay. The stress might actually make buds even more potent. Grower ClubRiot removes all fan leaves and trim before harvest because it’s a convenient way to manicure buds. © Growdiaries

And even if you give her a day or two to mature under the light after this heavy trimming, it’s really okay. The stress might actually make buds even more potent.

A Few Examples of Heavy Autoflower Defoliation

Suboptimal Results

In our first example, a grower who calls himself chubbs decided to subject his autoflower to heavy defoliation in week 7. For many reasons, this auto hadn’t been growing vigorously from the start, and the heavy defoliation hardly helped. Besides, the guy chose to defoliate his autoflower before harvest a little too early — at least one full week before the chop. The yield wasn’t spectacular, but the quality of the buds was top-notch. Probably, thanks to the strong genetics.

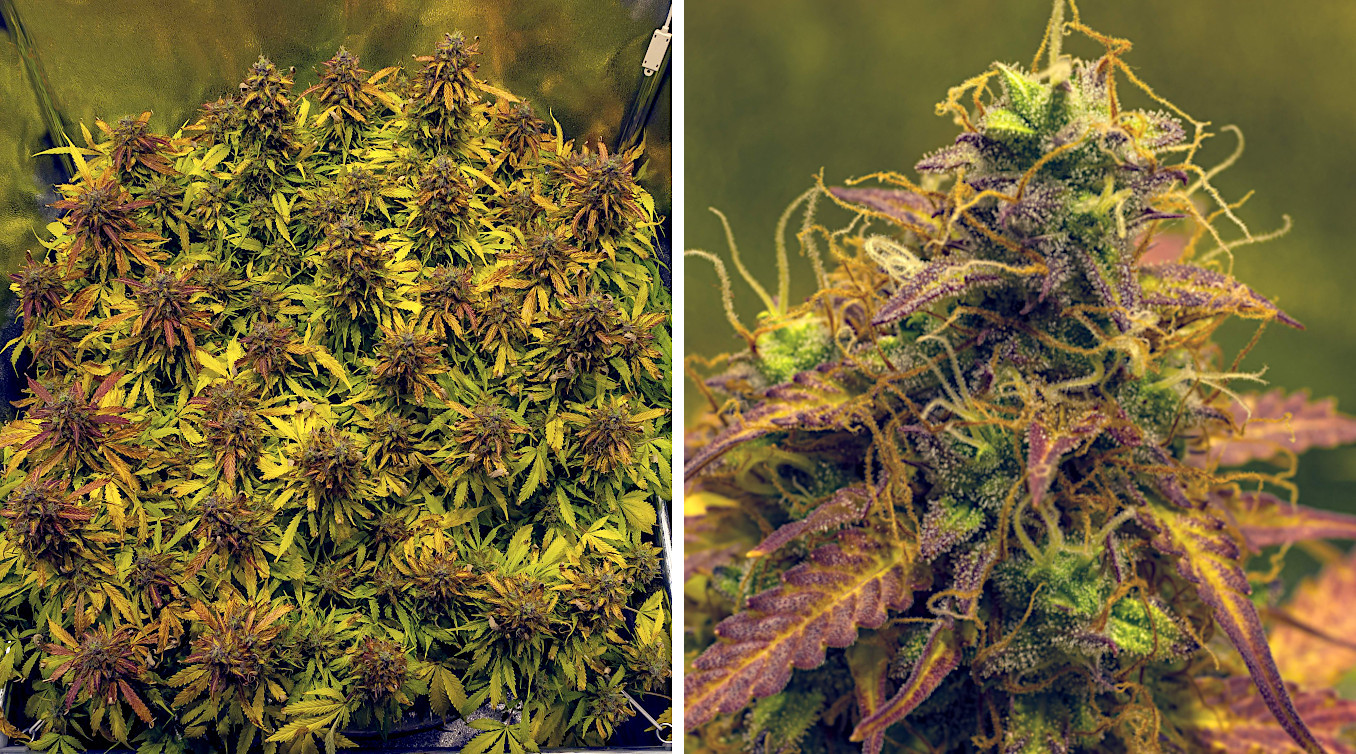
Forbidden Runtz Auto (FastBuds)

The yield of this monster from FastBuds is 17 g (0.6 oz) from 1 plant. Heavy defoliation in week 7 and another radical one a week or two before harvest. © Growdiaries

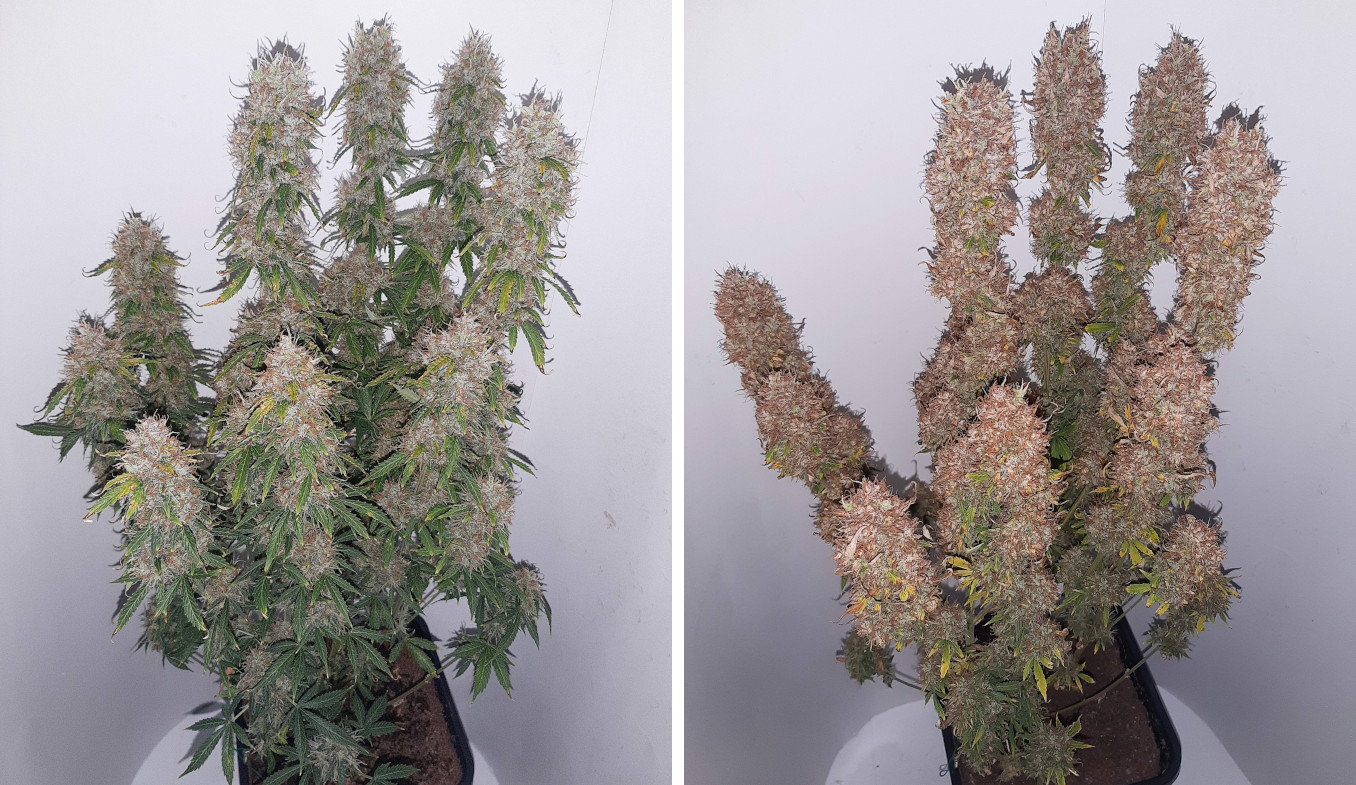
Example 2. In addition to topping and mainlining a Girl Scout Cookies Auto by Fastbuds, the grower calling himself HobbitGDF defoliated her heavily in week 5. All these high-stress training techniques probably delayed the start of flowering—till week 7. As a result, the buds were only ready after a full 13 weeks from seed.

Girl Scout Cookies Auto (FastBuds)

71g (2.5oz) from 1 plant. The harvest pic looks nice, but it’s debatable whether heavy defoliation has helped with the yield. © Growdiaries

Lucky Outcomes

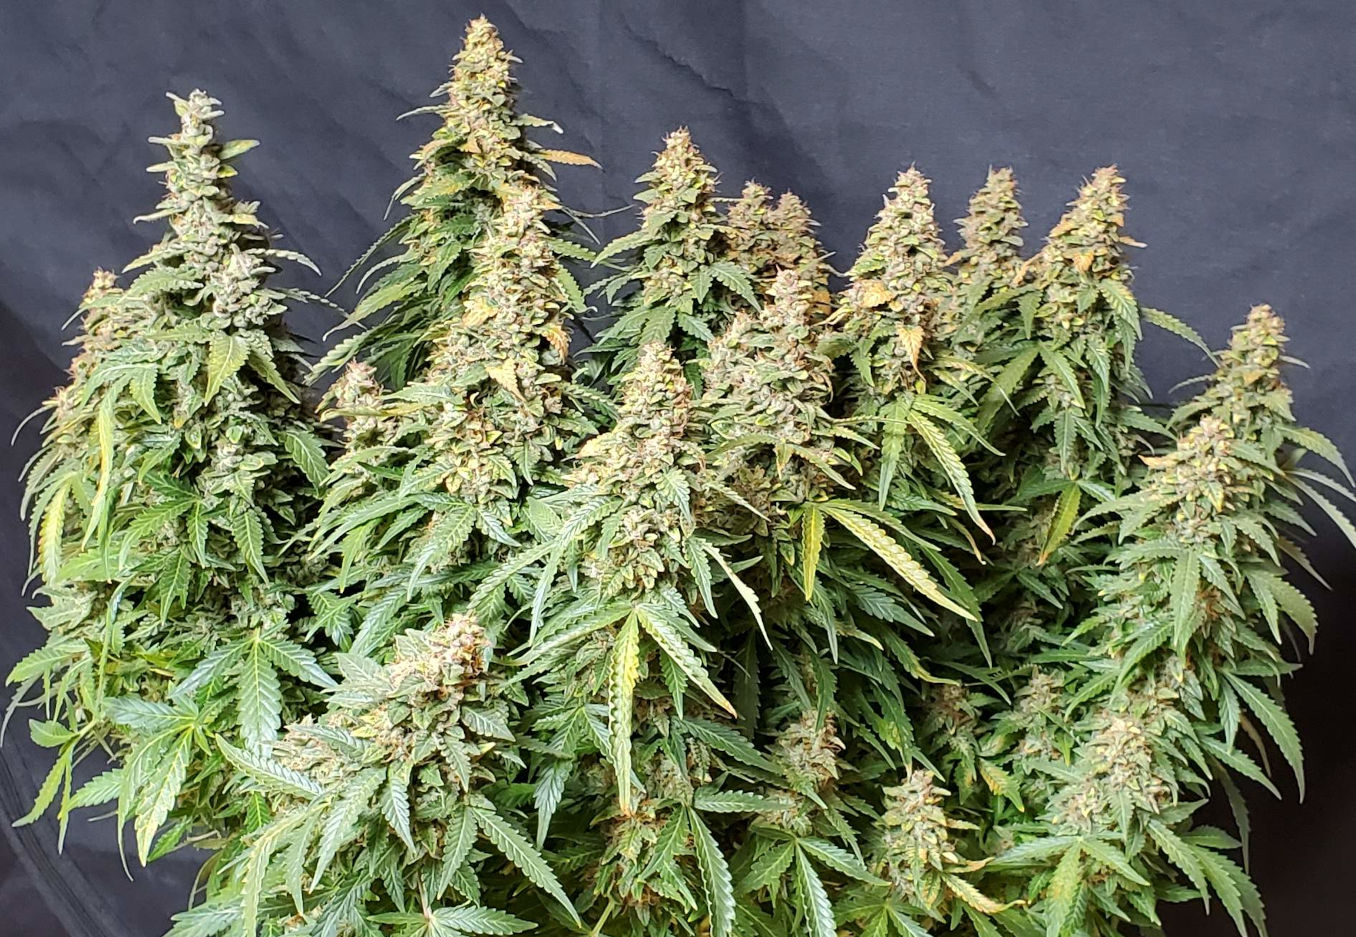
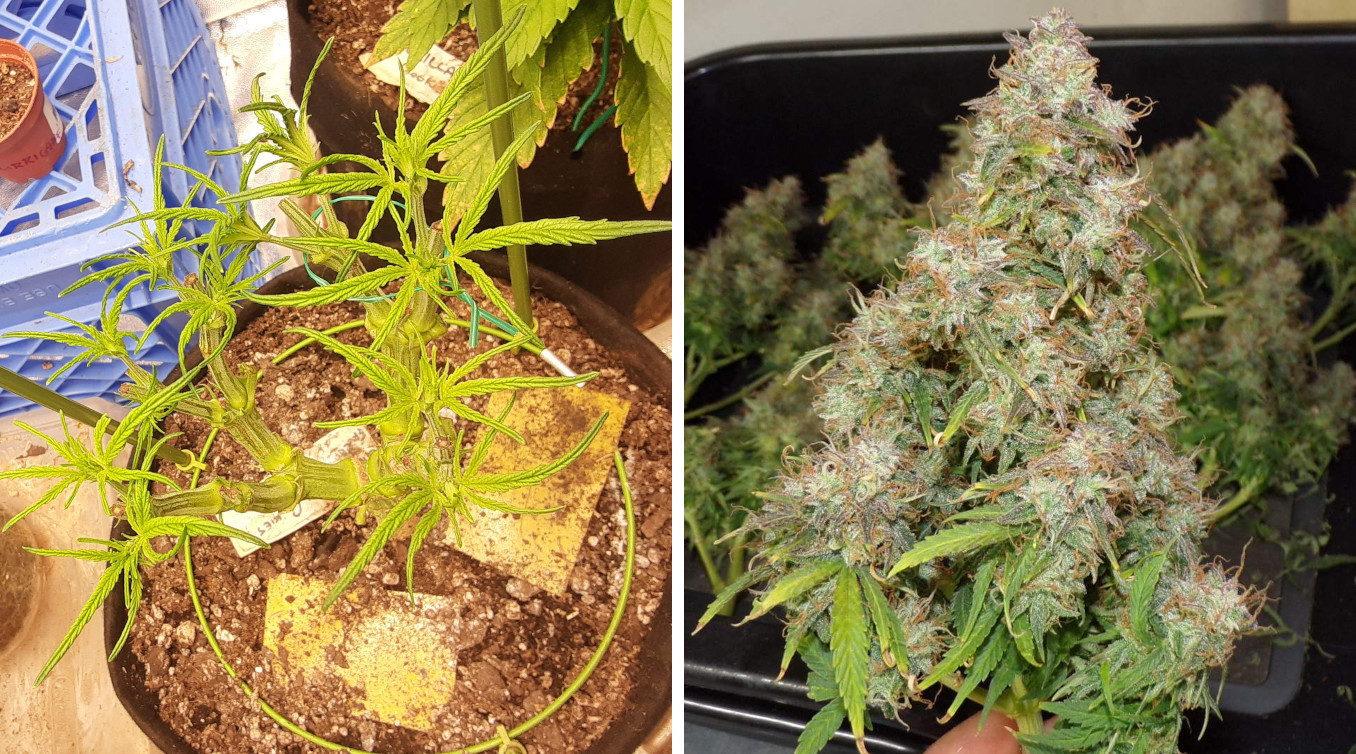
In our third example, the grower (Canamatoes) did multiple toppings and mainlining and performed a thorough defoliation on several occasions. The one in the picture is in week 6 (the second week of flowering). The Kosher Cake Auto by FastBuds responded great and yielded 261g (9.21oz) of top-shelf bud.

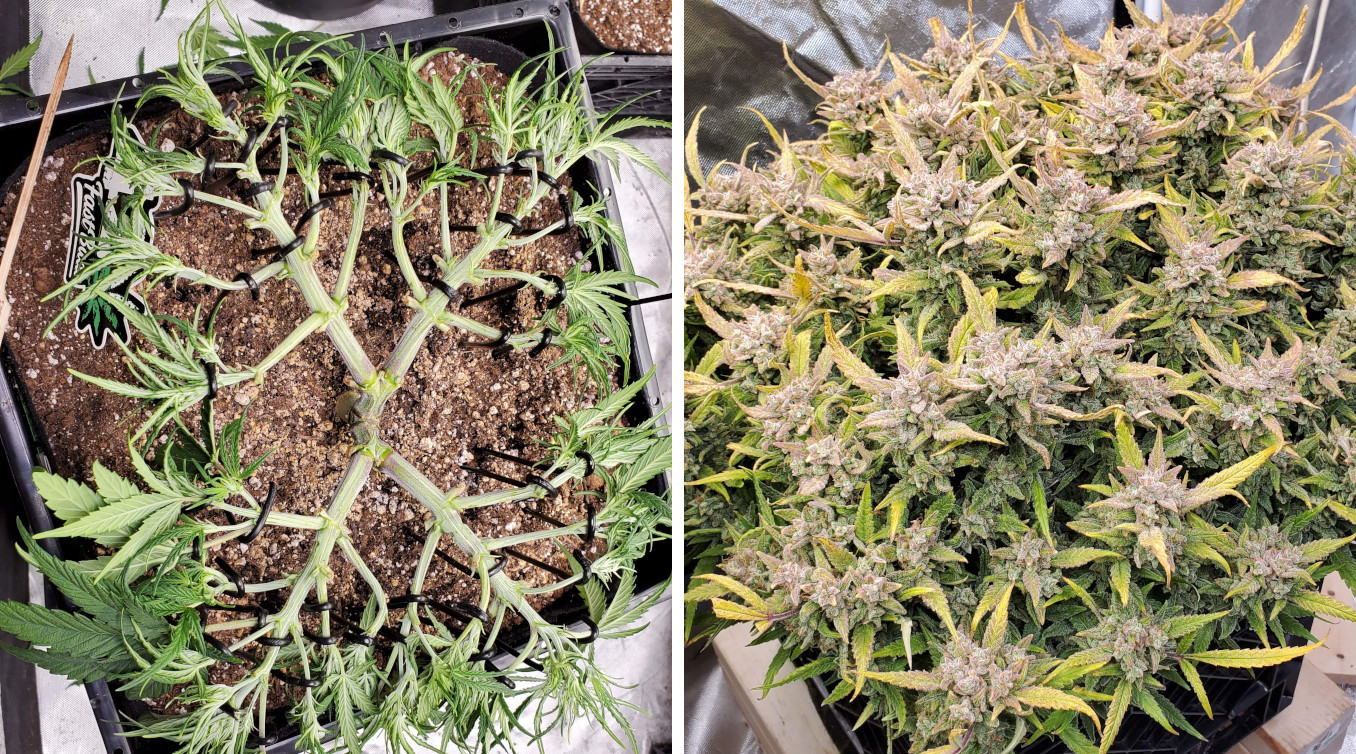
Kosher Cake Auto (FastBuds)

261g (9.21oz) from 1 plant. It’s not every genetics that can take so much abuse and still come out on top. © Growdiaries

And finally, the grower (Cali_Grown_420) used less stressful methods, such as FIMming, and defoliated more lightly and only once—in week 5 (the first week of flowering). In the picture, you can see one of three plants. All three have yielded 308g (10.9oz).

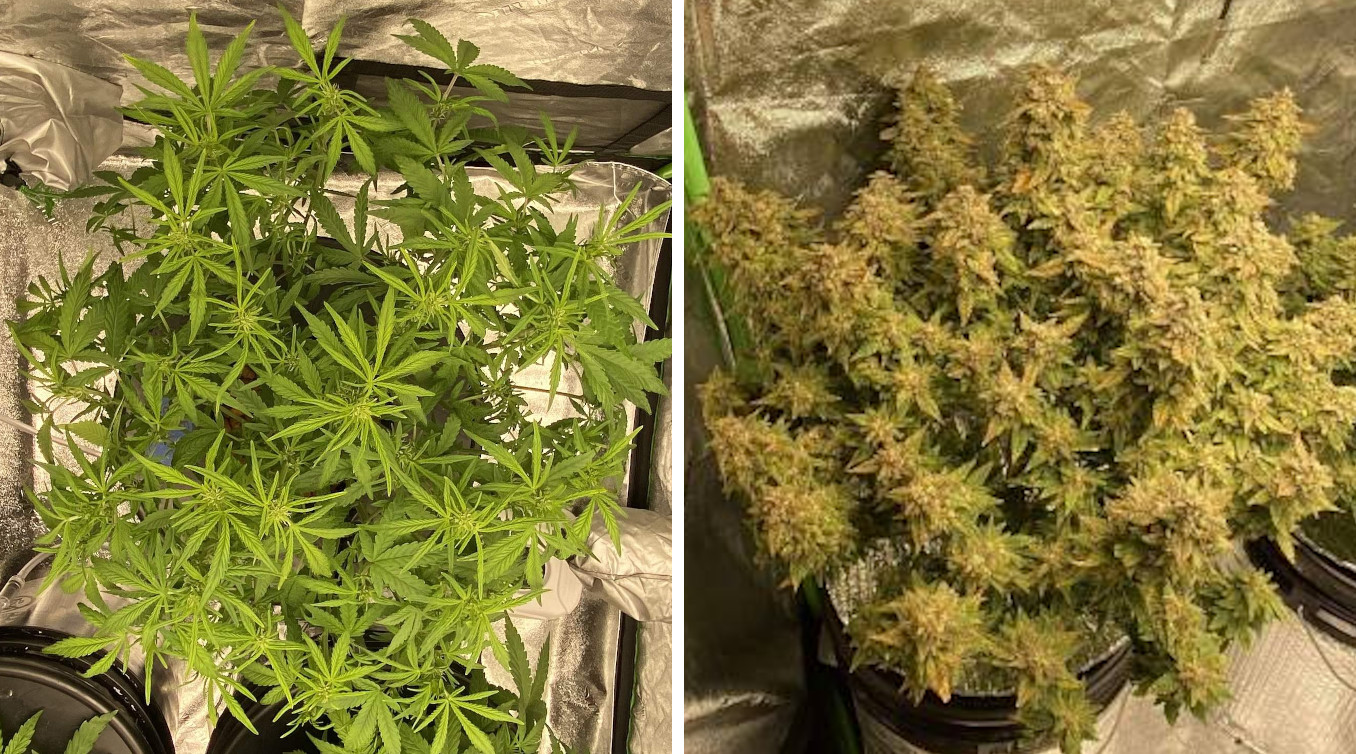
Cream Cookies Auto (FastBuds)

308g (10.9oz) from 3 plants. This gardener has chosen selective defoliation, and the result is spectacular. © Growdiaries

Don’t Get Carried Away!

Combing through Growdiaries, we have seen quite a few successful autoflower grows involving heavy defoliation. At the same time, many results were less than spectacular. Sometimes, it seemed that a simpler approach would lead to a more generous yield.

Often, when a grow journal shows a MONSTER bush at harvest, it’s impossible to find a picture where you can tell that the plant has just been defoliated. Because the grower defoliated only moderately, a few leaves here and there, nothing radical.

This smart approach to autoflower defoliation seems to work best. But maybe you have a different opinion. Tell us what you think in the comments.


The Best Cannabis Srore

Price: from $5

Pack: from 1 seed

Shipping worldwide

Price: from $15

Pack: from 1 seed

Fast ship US only - 1 day

Price: from $80

Pack: from 5 seeds

Shipping US only

Price: from $50

Pack: from 5 seeds

Shipping worldwide

Monster Cropping Weed Plants: Everything You Need to Know

For an advanced grower, monster cropping is another powerful weapon in the ongoing battle for every additional gram per watt. Read on and decide for yourself whether this unconventional method of weed growing suits your needs and is worth trying.

Monster Cropping Definition

Monster cropping simply means growing cannabis from clones that have been taken from a flowering plant.

Most of you know that taking cuttings from a plant you like is a great way to keep its genetics. You simply cut off a branch, make it root, and thus get a true copy of the original. Some of you also know that cloning should normally be done during the vegetative stage, before the flowering begins. Clones that are still in veg are very easy to root, and even beginners can use this technique successfully on their first attempt.

A monster cropping clone, on the other hand, is taken from a pot plant that has been in the flowering mode for 2-3 weeks and already has some noticeable bud growth. This results in some difficulties: mostly with rooting, but also with reverting the clone back to veg.

WHY going to all this trouble then is an altogether different question, and we’ll answer it presently (see below), but for now let us explain what the word ‘monster’ means in the name of this method.

Well, first of all, your cuttings will look like ugly little monsters once you have reverted them back to veg. They WILL grow new leaves, but they’ll look like mutants: single leaflet, with round shape, and smooth edges. Only after some time, leaves of normal shape will appear.

Another monstrosity is the number of side branches. Some people say that every pistil (female hair) on the bud transforms into a separate side shoot. It’s hardly true, but certainly seems that way.

monster crop cropping early flower

And finally come the monster harvests that you’ll (hopefully) get if you use this technique.

Does Monster Cropping Work All the Time?

Monster cropping does work for skilled and experienced growers, but the results depend on the genetics of the plant. Some are very difficult to monster crop, and others impossible.

Monster Cropping Autoflowers

This is the case where the method doesn’t work. The reason is that once autoflowers have begun to flower, they cannot be reverted back to the vegetative stage. There’s simply no way to make them do it.

For photoperiod plants, you can change the light cycle from 12/12 to 18/6 and thus signal them to stop producing flowers and resume the vegetative growth. Autos, on the other hand, don’t have any inbuilt mechanism to react to light schedule. No matter how many hours of light you give them each day, they simply do their thing according to their own inner clock.

For the same reason, it’s not worth your while to clone an autoflowering strain BEFORE it begins to bloom. If you manage to root your cutting, it’ll never grow into a big plant, but rather stay the same size, with no side growth, and very few bud sites. The yield from such a clone would be even smaller than if you had simply left the branch on the parent plant.

Click on the link to learn more about the difference between autoflowering vs normal (photoperiod) weed.

Monster Cropping Sativa vs Indica

Sativas and sativa-dominant hybrids clone more easily than indicas and indica doms. Just put a sativa cutting into a glass of water (or stick it into soil), and it will probably take root in no time. Indicas require much more time and effort. Also in terms of your convenience it’s much easier to monster crop plants with open structure and long internodes (sativa strains again).

So, you may experiment with any photoperiod variety (not autoflowers though), but keep in mind that the ease and the success rate will be very much different for different genetics.

Monster Cropping Pros and Cons

Pros

Your second chance to save the genetics you like. Suppose you didn’t expect much from a plant until it began to flower. Now you see that it smells and looks awesome and has more promising buds than the rest, and so you want to have another go with exactly the same genetics. It’s too late for normal cloning, but monster cropping gives you another chance.

No need to keep a mother. Normally, a grower who prefers to work with clones rather than seeds has to keep a collection of mother plants to take cuttings from. This requires a separate grow space which not everybody can afford. Monster cropping allows you to have a perpetual growing cycle where you take cuttings from your current plant and use one of them for the next grow.

Take as many clones as you need. Monster cropping plants makes them so branchy that you can trim and prune them without affecting their health, growth rate, and yields. Note that this will work only starting with the second generation (in the first one, you’ll have just an ordinary plant, with a ‘normal’ amount of side shoots).

Numerous bud sites and insane yields. What does monster cropping do is it makes clones develop an intimidating amount of branches. You have a perfect opportunity to make each of them covered with buds, and thus your harvests could be spectacular.

cannabis plant with multiple branches with a huge yield potential

Compact, bushy plants with an even canopy. As an indoor grower, you know the importance of keeping your tops at an equal distance from lights. This is rather difficult to achieve with tree-like plants, but if your marijuana is a short and wide bush, your gram-per-watt ratios will skyrocket.

It works in hydro as well as in soil. You can try monster cropping in almost any setup, including soil, coco, hydroponics, and even outdoors (see below).

You can use any method of training. Once your clones have rooted and returned to veg, you can start to shape the canopy using your favorite training technique: LST, topping, fimming, supercropping, lollipopping. The best method (in terms of yields) seems to be ScrOG because you will have so many branches to fill your net with.

Bigger harvests with fewer plants. This is especially important where there are legal limits as to the number of plants that you can grow for your personal needs. With monster cropping, a single plant has the potential to fill your whole grow space.

Cons

YOU CAN’T DO MONSTER CROPPING WITH AUTOS. We’ve already covered that (see above).

Not all your clones will root. As we have already mentioned, flowering branches need more time to root, and the conditions must be close to perfect. The success rate will never be 100%. So, depending on your skills and the genetics you work with, take at least 25% more cuttings than you intend to keep.

Rooting and reveg take time. With regular clones, rooting may take anywhere from 5 to 7 days, and then you can veg them like regular seedlings. With monster cropping clones, rooting itself takes longer. And then the cuttings need to change gears from budding back to vegging which takes even more time.

Short and dense varieties are difficult to work with. We’ve already touched upon this subject while discussing the difficulty level of monster cropping sativa vs indica. This method makes any strain more dense and compact. With shorter varieties, this tendency can be too much .

There’s a risk of stress and hermies, as a result. This is a high-stress technique, and if your plant is predisposed to hermaphroditism, as some feminized genetics unfortunately are, you risk seeing some male bananas in your buds.

Is Monster Cropping Worth It?

This method is definitely not for every situation, nor every setup. Read carefully the pros and cons above and choose the best course of action. Don’t think that monster cropping AUTOMATICALLY means monster harvests. It may be so in some contexts, but not every time.

Monster Cropping Yield

Your yield per plant will definitely be spectacular because every plant grown this way will be huge, but not tall at the same time. As for grams per watt, there’s no guarantee. With so many branches and bud sites, and an even canopy, the potential for better yields is definitely there. However, you’ll have to go an extra mile to match this potential with good growing practices.

monster cropping many fat and dense colas

Monster Cropping Step by Step

  1. Choose a plant to be cloned, make it start flowering at 12/12 for 2-3 weeks. Some people say that even one week after the 12/12 flip is enough, but probably it isn’t. After just one week, all you see are only hints of future buds on plant tops, and you need real flowers for monster cropping to be successful.
  2. Choose a branch closer to the bottom part of the plant. These branches are usually better for cloning than the ones on top. The length should be at least 4 inches (10 cm). Shorter branches work, too, but the success rate is lower. Cut off the chosen branch with scissors and immediately put it into a glass of water, the colder, the better. Your goal is to prevent air bubbles from forming inside the branch, or else it could rot.
  3. Cut every leaflet in half, the same way as you do with regular clones. This helps reduce evaporation from the leaves. If the leaves are left intact, they will droop, especially under low humidity conditions. As for the buds, some people say that they should be removed, but better leave them be.
  4. Take a sharp knife and make a long, diagonal cut just above the original cut. This is the place where roots will appear, so the more surface area the cut has, the more potential roots you’ll get. Some people also scratch the surface of the stem above the cut. Or make shallow vertical cuts with the tip of the knife. New roots can grow from these damaged places as well. It’s best to perform all these procedures underwater.
  5. Quickly dip the cut into a rooting gel (or powder) and stick the clone into its rooting medium. It can be a rockwool plug, 1x1x2 inches (2,5×2,5×5 cm) or a bit bigger. Of course some clones can be rooted in a glass of water, but probably not the flowering ones. Besides, rooting in a glass of water generally takes more time and has a lower success rate.
  6. Keep the clones under a humidity dome and reduced light (T5s or CFLs would be perfect) until you see new roots appearing through the sides and at the bottom of the rockwool plug. Don’t let the rockwool dry out. From Day 1 of cloning and all the way through the reveg, the lighting schedule should be at least 18 hours of day and 6 hours of light. This will signal the plants that they should switch from the flowering mode back to vegging.
  7. Wait till the ‘mutant’ growth is finally replaced with normal leaves and veg the plants until they reach the desired proportions. At this step, you do what you would normally do with vegging cannabis: transplant it into containers of appropriate size, feed it nutrients with a lot of nitrogen, train it until you get a flat and even canopy. Or better yet install a ScrOG net and weave the branches through the mesh.
  8. Flip to 12/12 and don’t forget to take another batch of cuttings in 2-3 weeks (if you want yet another cycle of monster cropping).
unknown indica monster cropped grow diaries
An unknown indica strain monster cropped and put into the flowering room. See the journal on Grow Diaries.

These are two clones that were monster cropped off the plant in my first dairy… They were revegged for probably 3 months under insufficient light… I did some extensive pruning to remove the crazy growth near the main stems and small bud sites that won’t develop. Because of the spread out structure of the plants I didn’t have to top them.

Thanas_Garden

Using This Technique on Outdoor Plants

You can do monster cropping for outdoor weed as well, but only in those mild, warm, and sunny climates where the growing season is extra long.

You should start the first generation of plants some time at the end of winter: when days are still short, so your cannabis can start flowering.

In spring, when days get longer, you can take some flowering cuttings and make them root. Then your goal is to induce revegging. Depending on the time of year, it can either be done under natural light, or you can extend daytime to at least 18/6 with artificial light. By the time the clones are vegging again, days will already be long enough so that there is no danger of any premature flowering.

The flowering will actually start at the end of summer and will be over in fall (when you get your second harvest).

As you may guess, monster cropping outdoor plants is very tricky: too much depends on the correct timing, so you’ll probably need some trial and error before you come up with a perfect schedule for a particular strain.

How Long Does Monster Cropping Take?

Let us compare the timeline of monster cropping with that of regular growing from clones. The process of rooting takes up to 7 days for normal clones and a bit more – for clones with buds on it. Let’s say 10 days.

Monster Cropping Reveg

For normal clones, you can start vegging them as soon as they have formed roots. With monster cropping clones you can’t do that right away. You must first let them reveg for 2-3 weeks or more.

Monster Cropping Veg Time

This stage is no different from any other cannabis plants grown from clones or seeds. It all depends on the final size that you aim for. Since the goal of monster cropping is usually to grow a big plant with a lot of girth, the vegetative stage will probably take you several weeks, 3 at least. Note that if you decide to top your plants to make them bushier, each topping instance will extend the veg by 1 week or so.

Monster Cropping Flower Period Duration

Again, it is exactly the same as with other growing methods. There is a small difference between plants grown from seeds and from clones. Clones are more mature (genetically) than seedlings of the same size and so they start to flower sooner after you switch to 12/12. They also probably finish a bit faster. However, the difference isn’t really significant.

So, compared to regular clones, you’ll need about 2.5-3.5 weeks more which is the time mostly needed for re-vegging.

Now You Know Enough to Decide if This Will Work for You

Though no magic bullet, this method can work miracles in some situations. In others, it will just make things harder for you. So weigh in all advantages and disadvantages before you decide to use this unorthodox and rather complicated technique.