Not every weed grower can afford a full-fledged indoor grow-op. And not all of us need XXL yields. Sometimes, our best or only option is a micro grow. The question is how much such a micro grow can yield.
Based on our analysis, the average micro grow yield in a 1’x1’ (30 cm x 30 cm) space is 28.5 grams (1.01 ounces). The median micro grow yield is 25.5 g (0.9 oz). To come to these figures, we have reviewed several grow cycles performed in one and the same Ambient Q30 growbox.
We took all the data and pictures from Grow Diaries, the world’s largest online community of marijuana growers.
Micro Grow Yield Examples
As you can see from the table below, micro grow yield figures are all over the place. Some of the harvests are just puny, but a few grows show very respectable results. It’s these successful grows that we are going to describe in some detail so that you can maybe replicate them.
| Strain | Light | Weeks | Yield |
| Tutankhamon Pyramid Seeds |
75W LED Unknown Brand |
16 8 in flower |
60 g 2.12 oz |
| Super Skunk Automatic Sensi Seeds |
75W LED Invisible Sun |
14 9 in flower |
54.8 g 1.93 oz |
| Northern Lights Expert Seeds |
100W LED Unknown Brand |
17 8 in flower |
35 g 1.23 oz |
| Zkittlez Auto FastBuds |
100W LED FSGTEK |
10 6 in flower |
34 g 1.2 oz |
| Critical + 2.0 Auto Dinafem Seeds |
100W LED Unknown Brand |
10 6 in flower |
17 g* 0.6 oz |
* estimated dry yield (wet weight divided by 5)
** combined yield of two plants grown in the same run
Tutankhamon Grow Journal: Yield – 60 g (2.12 oz)
A grower with the nickname mr4ton chose to grow a photoperiod Tutankhamon in a micro setup. It took him 16 weeks from seed to harvest, but the yield was spectacular.
Swipe to see all images in the gallery.
Carefully Planned Fertigation and Heavy Training
The grower used a 4.5-liter (1.19-gallon) pot which he filled with Ugro Rhizo peat/coco medium mixed with perlite. He gave his plant 60W in veg and 75W in flower on average. The dimmer on his LED light allowed him to ramp it up to 100W, but it was too much and leaf tips would start to burn. 70-75W would be just right.
The light schedule was 18/6 in veg, but in weeks 6 through 7, the guy began to gradually shorten the day: 18/6 -> 16/8 -> 14/10 -> 12/12.
For watering, he installed a homemade drip system and turned it on every morning for 15 minutes or until he saw some runoff.
For feeding, he used General Hydroponics nutrients: 3-in-1 Flora Series and some other supplements like BioRoot and Diamond Nectar. Sometimes, he also foliar-fed his bonsai plant with BioProtect. And during the flowering stage, he would use G.H. Bloom instead of Diamond Nectar.
The TDS readings were never very high: up to 600 ppm in veg and no more than 750 in flower. In the last couple of weeks of the life cycle, the grower decreased this number down to 400 ppm (when he was giving his micro bush GHE Ripen as her last dose of PK), and flushed the medium with tap water in the last 2 days before the chop.
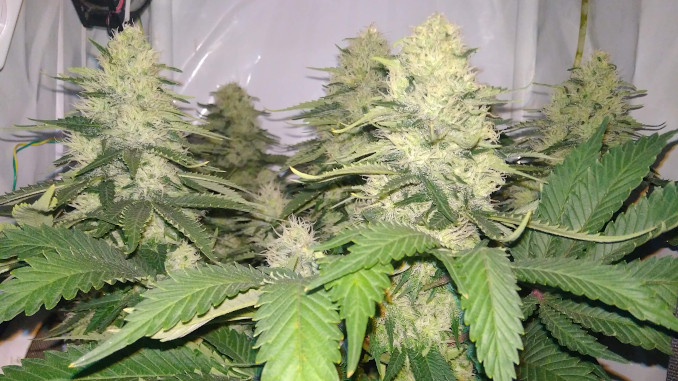
Throughout the grow, the guy performed a lot of canopy management. It was a form of mainlining but done without any plan or schedule. He started with topping in week 3 and then was pruning and defoliating and topping all the way through week 6. In the end, he would have 7 colas with very fat flowers on top but with everything removed down below.
Super Skunk Automatic Grow Journal: Yield – 54.8 g (1.93 oz)
Autoflowering genetics are probably more suitable for micro grows than photoperiod ones, and this grow cycle by NanoGrow seems to be proof of that. This micro grow yield was almost as impressive as the previous one, but it took 2 weeks less to achieve this result.
Swipe to see all images in the gallery.
The Only Issue Was High Humidity
The grower used a 1-gallon (3.8-liter) smart pot which he filled with an 80/20 coco/perlite mix. He also added some hydroton on top and in the drainage saucer under the pot to slow down evaporation.
He had to add a dehumidifier bag in week 6 and was glad to see the RH getting lower (40%) in week 10, just as the buds began to really swell up. Unfortunately, humidity started to creep up soon, and he discovered a spot of stem rot. The treatment with H2O2 and candle wax didn’t help. He had to cut off one side branch in week 11 and then the main cola in week 12.
The grower was also combating high humidity with defoliation. He didn’t like removing more leaves than absolutely necessary. So he started with tucking them, but in week 9, had to defoliate those that were overlapping. The only other form of training was LST, and it was enough to give the canopy a perfectly flat shape.
He was watering the medium with 400 ml every other day, then (in week 5) switched to daily watering with 200 ml to reduce runoff. However, eventually (starting from week 6), the plant got thirsty and began to drink 450-600 ml a day without much runoff.
The staple of her diet was Bio Nova Coco Forte A & B which she received from week 1. And in flower, she additionally got P 20 (20% phosphorus) starting from week 6 and K 20 (17% potassium) starting from week 9. In the final 14th week, she was flushed with pH’d water.
Beyond high humidity and related problems, the only issue was a few male flowers discovered in week 10.
Northern Lights Grow Journal: Yield – 35 g (1.23 oz)
With the Northern Lights genetics, a grower calling himself YungSmoke was aiming at the ounce-per-square-foot target. And he made his micro grow yield even more.
Swipe to see all images in the gallery.
Great Genetics Made This Run Trouble-Free
This grow started outdoors, and in week 4 the plant was rather lanky and had long internodes. (Low outdoor temperatures often have this effect.) The little plant was transferred indoors in week 5 and began to receive training right away. The goal was to keep the canopy flat and all the colas at the same distance from the light (a 100W LED). Besides LST, the gardener performed only very light defoliation, plucking some old leaves in the bottom part. Otherwise, he preferred the leaves to senesce and fall off on their own.
After long spring days outdoors, the light schedule in the tent was 22/2 for the whole of the vegetative phase, then, in week 9, the grower started to reduce light hours a couple of hours at a time. And starting from week 10, it was 12/12 till the end of the flowering stage which lasted 8 weeks.
Through most of the life cycle, the grower struggled with high temps, and the relative humidity was on a high side — around 50% during flowering. The gardener did not report any issues with mold or bud rot, but the heat resulted in some foxtailing closer to the harvest.
He used a very small (4-liter/1.06-gallon) plastic pot filled with soil with some coarse perlite mixed in and had to water every day. It was very inconvenient to do manually, so in flower, he installed an automatic drip system.
He started with no nutrients at all during the outdoor stage, then top-dressed the pot with some generic slow-release fertilizer. Finally, he started using the 3-part BioBizz nutrients: Bio-Grow from week 8, Bio-Bloom from week 9, and Top-Max from week 11. He dialed back Bio-Grow when the stretch slowed down in week 13 and then stopped altogether. And in the last week, he flushed the medium with tap water.
Zkittlez Auto Grow Journal: Yield – 34 g (1.2 oz)
The grower martiniii had to keep his Zkittlez Auto small for this micro grow, so he fimmed and then topped his autoflower and performed a lot of LST and defoliation. The guy was learning on the go, and there was some loss of bud due to mold, but overall the plant performed quite well.
Swipe to see all images in the gallery.
A Lot of Equipment for Such a Small Grow
The grow began in the window, but in week 2, the Ambient Q30 tent was ready for use. The grower equipped it with a dimmable FSGTEK 100W LED quantum board and a 120 mm PC fan for ventilation (which he could ramp up or slow down to regulate the temperature and humidity).
He also fashioned a DIY carbon filter out of a 110-to-125 mm pipe reducer and a 35 mm layer of activated charcoal. Unfortunately, the PC fan did a poor job pushing the air through the filter. Probably because of too thick fabric.
So, the gardener had to rethink the design of his carbon scrubber. He used the casing of a PC fan and two dust filter meshes and filled the space between those with activated charcoal. This time it worked but was far from perfect. Sometimes, the humidity and temps got out of control, the filter needed to be removed, and this micro grow smelled up the whole room.
The guy planted the germinated seed in a 5.5-liter (1.45-gallon) fabric pot filled with an 85/15 soil/perlite mix. As a result, he had a 38 cm (15”) available distance from the pot to the light. A micro grow indeed.
He started with hand-watering the pot every 3-4 days, but in flower, he began to use an Arduino Uno automatic watering system. It would turn on a 5V DC pump every 12 hours when a sensor signaled that the soil was getting too dry.
Strong Genetics and Subpar Conditions
The grower had absolutely no idea what to expect from his setup. He used a smartphone app to measure the light intensity of his dimmable LED. And he probably didn’t dial it in perfectly because the plant was quite leggy from the start. He fimmed her in week 3 but didn’t like the result. So he soon removed the mangled leaves—making it a classical topping—and began to tie down the side branches.
The plant still had an open structure with long internodes and not too dense foliage, but luckily, she stopped stretching in the 2nd week of flowering, not quite touching the light.
She received BIOCANNA Bio Vega throughout the vegetative stage and 1 week into flowering and then Bio Flores from week 7. A very simple (and organic) grow.
It wasn’t so simple with the temperature and humidity control. It was constantly too hot, and the RH never dropped below 55%. In late flower, this led to mold, and the grower had to prematurely cut two fattest colas. Also, for reasons unknown, he let the plant dry out in the last week. These troubles probably affected the final yield very much.
Some Micro Grow Tips Gleaned From These Journals
Even a micro grow like this may require a carbon filter to get rid of the smell. And whether you make a DIY filter or buy a ready-made one, you’ll need an extractor fan that is able to push through enough air. And this means that even a micro grow can create some noise.
In most of the micro grows we’ve reviewed, the gardeners struggled with maintaining optimal temperature and humidity. This seems to be a drawback of a small grow space. One way to reduce humidity is to defoliate as it decreases the evaporation surface of the foliage. The other is to cover the medium with some sort of mulch. Two of the growers used humidity bags, but at least one of them reported no difference.
A micro grow means the use of a small container. That’s why coco coir seems to be a better alternative to soil. When growing in coco, you can water/feed your plants very often, so you don’t need a large pot and a lot of medium. In other words, coco enables you to achieve the same yield with a smaller root structure.
Naturally, the smaller the pot, the more frequently you need to water your plant. That’s why your best bet is to use some basic automatic drip system.
As you have seen, a micro grow yield can be quite high. (If you do everything right, of course.) It can produce enough bud for a casual smoker. But if you smoke more than a half-ounce (about 15 grams) per month, a micro grow probably isn’t for you. You’ll find it more convenient and rewarding to choose a bigger setup. Happy growing!




Comments