Review of CBD for the People from AskGrowers Experts

The cannabis market is rapidly expanding, and many companies are penetrating the market with innovative and fresh products. Ultimately, all cannabis enthusiasts want to deal with a brand that puts the interests of customers first. 

However, even though numerous brands manufacture top-quality items, you can always find several mediocre brands in the industry. Thus, finding a brand committed to providing exceptional products and great customer service is challenging. 

CBD For The People is one such brand that values customer satisfaction, quality, and affordability. Besides, the company rides on transparency and ensures all products undergo third-party lab tests. 

This comprehensive CBD For The People review provides valuable insights about the brand, its vape cartridges, and principles of choosing the best vaping device. 

CBD For The People Uncut Cartridge with Terpenes – 400mg

As the name suggests, CBD For The People offers a wide array of CBD-infused products. Vape cartridges are among the products from this brand that offer enthusiasts a discreet and convenient way of consuming cannabis. 

Main Features

Below is an overview of the main features of CBD For The People Uncut Cartridge

  • Brand: CBD For The People 
  • 400 mg CBD Strength 
  • 0% THC Content 
  • Quantity: 1 Cartridge 
  • Pineapple Express Flavor
  • Non-GMO
  • Lab Tested 

Product Description

CBD For The People Uncut Vape Cartridge contains an unadulterated CBD concentration of 400mg in a 1ml sophisticated pack. 

If you prefer vaping organic, THC-free products, this Uncut Cartridge with Terpenes is a perfect choice. Produced by CBD For The People, it contains 1,000mg CBD at 40% concentration, which translates into 400mg CBD potency. 

This vape cartridge is pre-filled with natural, additive-free components to deliver pure hits to users. The essential ingredients are raw, full-spectrum hemp oil blended with natural terpenes. 

You can use this vape cartridge with 510-threaded vaping devices. It also functions on a 4-hole intake technology, and you can easily adjust the voltage settings and airflow. 

OveralRating – 4.7 / 5

CBD For The People Uncut Vape Cartridge has an average star rating of 4.7, which is quite impressive for a vaping item. Such a positive social evaluation means that many customers are satisfied with the product quality and results. 

CBD Type

CBD For The People Uncut Vape Cartridge is pre-loaded with raw full-spectrum hemp oil containing all the essential cannabinoids. However, this CBD is pure and has no THC compound traces. 

Main Ingredients

The main ingredients in this vape cartridge are organically-grown hemp extracts and natural terpenes. 

Flavor

The brand’s Uncut Cartridge comes in 14 unique and aromatic flavors. The terpene profile of a cannabis strain determines each flavor composition. 

Potential Effects

CBD For The People Uncut Cartridge promotes relaxation. It calms the mind and body, giving users an incredible vaping experience. 

Brand Reputation

CBD For The People was founded in 2017 to deliver quality CBD products at affordable prices. True to its name, CBD For The People is a brand that truly cares for the people. It manufactures products using natural ingredients, organically grown and tested for purity in independent laboratories. Quality is of paramount importance at this company, which is why the end products are exceptional – no additives, pesticides, or toxic solvents. 

The company has a positive reputation and has impacted many people within a short period. 

What makes CBD For The People outstanding? Here are a few reasons:

  • High-quality CBD products
  • Natural ingredients 
  • Lab tested results 
  • Affordable prices 
  • Care for the customer satisfaction 

Therefore, CBD For The People is among the top-rated brands in the industry, delivering an uncut CBD experience to cannabis enthusiasts. 

CBD Vape Cartridge

Factors to Consider When Choosing a CBD Vape Cartridge

Whether you are a beginner or a seasoned vaper, knowing how to choose the right vape cartridge is imperative. With a wide array of vaping devices in the market, getting the best product can be challenging. Let us explore some of the factors you should consider when shopping for the perfect vape cartridge.

Brand Reliability

One of the important aspects to consider before purchasing any CBD product is brand reliability. Reputable CBD companies will deliver quality products. That is why you must do your due diligence before buying a vape device. Research online and check if the company has a physical address and genuine contacts. In case you purchase a substandard product, you will know where to find the company and who to call. 

Product Quality

Another aspect you must check out is the product’s quality. Choose a vape cartridge made with quality raw materials. For instance, a cartridge made from ceramics is better than one made from plastic or metal. Ceramic cartridges are durable, safe, and deliver great results due to an even heat distribution. Therefore, consider the cartridge’s quality if you want flavorful and satisfying hits.

Type of Cartridge

Understanding the type of vape cartridges in the market will help you make the right choice. There are different types, and finding the right one depends on your needs and preference. These include:

  • Disposable cartridge: This cartridge is produced with pre-filled CBD liquid and is disposed of after depletion.
  • Refillable cartridge: You can refill this cartridge with the CBD liquid of your choice. 

Moreover, you should consider if the CBD in the cartridge is full-spectrum, broad-spectrum, or CBD isolate. 

CBD Potency

CBD strength matters when it comes to choosing the right vape cartridge. The amount of CBD one should vape is determined by several factors – weight, age, purpose, and severity of the condition. 

Also, check for purity when buying the cartridge. The CBD oil should be pure, without additives, to guarantee a safe vaping experience. 

Lab Testing

As a beginner, you might trust the brand easily without verifying the contents of the vape cartridge. But it’s vital to do your due diligence and check if the company conducts lab tests at independent labs to ensure a safe vaping experience and a low risk of lung damage. Genuine cannabis companies often display each product’s Certificate of Analysis (COA) on their website. Such tests usually verify the CBD potency and authenticate the available cannabinoids and terpene profiles. Also, it is advisable to go for products with no toxic additives or chemicals. 

Design and Durability

Choose a vape cartridge with a user-friendly design. Even if you love sleek devices, go for one with straightforward features. Moreover, pick a durable device that can withstand daily use because you need a reliable vape cartridge that will not break down when you need it. Vape design is also vital to guarantee a fully functional device with consistent hits. Thus, research extensively and find the perfect one that works well for you. 

Read Reviews

Reading reviews is a sure way of knowing the quality of the vape cartridge you want to buy. Satisfied customers often leave positive testimonials on review sites or the company’s official website. In contrast, dissatisfied customers report complaints and leave bad reviews. Therefore, choose a brand that has numerous positive reviews because chances are high they offer quality products. 

Budget

Finally, your vaping budget will determine the type of vape cartridge you want to purchase. Fortunately, CBD For The People offers quality products at pocket-friendly prices. So you can have a great vaping experience without denting your pocket.

Conclusion

CBD For The People is a great brand with a primary objective of producing highly potent products at affordable rates. The Uncut Cartridge with Terpenes is one of the many top-tier products with a touch of quality and sophistication. If you are a newbie or experienced vaper looking for raw CBD-infused products, CBD For The People will sort your cannabis needs. Besides, the products undergo thorough tests in independent labs to verify purity and consistency. However, before you use the Uncut Vape Cartridge, it is advisable to consult a health expert or reliable vendor to understand the recommended dosage that will work just right for you. 

The author of this material is Lana Braslavska, an expert in cannabis vaping, a CBD brand advocate, and a passionate researcher of the CBD market. Lana writes blogs for the AskGrowers website and works with consumers interested in trying CBD to ensure everyone gets a safe, rewarding user experience. 

Top 5 Marijuana Strains That Won’t Cause Paranoia

Paranoia is an unpleasant experience that can result from smoking certain types of cannabis or consuming too much of it. Instead of feeling relaxed and content after a long day, you might find yourself nervously looking over your shoulder and feeling anxious about things that normally wouldn’t bother you.

So why does this happen? The culprit is THC, the main psychoactive compound in cannabis. When THC binds to the CB1 receptors in the brain, it can trigger the release of dopamine, a neurotransmitter associated with pleasure and reward, but also anxiety and paranoia in high doses.

The Connection between Cannabis and Paranoia

The Connection between Cannabis and Paranoia

Feeling paranoid, or the belief that one is being persecuted, is a common delusion that can be triggered by various factors. Our innate response to look out for danger is useful, but when this mechanism is impaired, paranoia can arise. One such factor that can cause paranoia is consuming cannabis.

The active ingredient in cannabis, tetrahydrocannabinol (THC), as well as some other cannabinoids, bind to the CB1-type receptors of the endocannabinoid signaling system, including the amygdala region of the brain. The amygdala is responsible for processing fear, and when it’s activated, it sends signals of distress to other parts of the brain, causing feelings of paranoia.

While a functioning amygdala is necessary for survival in nature, it can be uncomfortable in modern society. However, turning off the amygdala altogether can have severe consequences, making it a necessary but delicate balance.

Dosage and Anxiety

The relationship between THC and anxiety still puzzles scientists. Why does cannabis relax some people but make others paranoid? According to current research, it all depends on the dosage. THC-rich strains of cannabis can calm users in moderation, but overdoing it can have the opposite effect.

How to Avoid Paranoia when Consuming Cannabis

Those who are naturally fearful or distrusting are more likely to experience paranoia when consuming cannabis. If you find that you feel bone-chilling terror instead of warmth and relaxation after consuming cannabis, it may not be the right substance for you.

If you still want to try cannabis, it’s recommended that you choose a variety that contains high levels of cannabidiol (CBD), which is known for its calming effects. Additionally, terpenes, which are aromatic compounds found in cannabis, can also play a role in reducing paranoia. Some terpenes, such as caryophyllene, have been shown to decrease feelings of paranoia. Consuming black pepper, which is high in caryophyllene, is one way to mitigate the effects of paranoia.

Ultimately, the composition of the cannabis strain that you consume will impact your experience. The ratio of cannabinoids and the terpene profile can mean the difference between a relaxing experience and one filled with paranoia.

Top 5 Cannabis Strains That Don’t Induce Paranoia

Top 5 Cannabis Strains That Don't Induce Paranoia

Individuals prone to paranoia often believe certain types of weed won’t cause it. The belief is that Indicas create calmness, while Sativas create energy, jitters, and a greater chance of paranoia. Unfortunately, it’s not that straightforward. However, our list includes various strains, including Sativas, Indicas, and hybrids, that growers agree do not cause paranoia.

#1 Green Crack Auto

Green Crack Auto (FastBuds)

Green Crack Auto (FastBuds)

Green Crack is an excellent natural stimulant that can enhance your mood and motivation. It can help you stay focused on your tasks without feeling anxious, and it provides a mellow, relaxing effect once the initial burst of energy subsides. This auto strain is also easy to cultivate, quick to grow, and produces high yields, so there’s no need to worry about any growing-related stress.

#2 Runtz Punch

Green Crack Auto (FastBuds)

Runtz Punch (Herbies Seeds)

Rewritten: Runtz Punch, with a THC level of 29%, won’t induce paranoia even with excessive use. Overdoing it might only lead you to sleep, but with moderation, it’s perfect for thinkers, artists, and inventors. Your mind will be filled with positivity and creativity, and your intelligence will increase tremendously.

#3 Girl Scout Cookies Auto

Girl Scout Cookies Auto (FastBuds)

Experience euphoria instead of paranoia with Girl Scout Cookies Auto. This popular Indica strain not only offers a sweet baked goods aroma and flavor, but also a 20% THC content that induces giggles and grins. With a low-maintenance growing process, she delivers a bountiful yield in just 8-9 weeks from seed.

#4 Black Cherry Punch

Black Cherry Punch (Pyramid Seeds)

Black Cherry Punch (Pyramid Seeds)

Black Cherry Punch, a stunning Indica with white, frosty calyxes, won’t cause paranoia despite its beauty. Instead, it delivers a flood of euphoria to your mind, and its 25% THC content ensures the high lasts for hours.

#5 Blueberry Hill

Blueberry Hill (Herbies Seeds)

Blueberry Hill (Herbies Seeds)

Find inner peace and eliminate anxious thoughts with Blueberry Hill, an almost pure Indica strain. Derived from an Afghani landrace and crossed with Blueberry, this potent plant delivers exceptional flavor and abundant yields. Beyond its productivity, this strain also provides a potent therapeutic effect for both physical and mental well-being.

We encourage you to explore low paranoia strains that suit your needs. While predicting individual reactions to marijuana is complex, our list of such strains can help you start your search. Sharing your experience with strains that don’t cause paranoia in the comments below can help others too!

Price: from $5

Pack: from 1 seed

Shipping worldwide

Price: from $15

Pack: from 1 seed

Fast ship US only - 1 day

Price: from $80

Pack: from 5 seeds

Shipping US only

Price: from $50

Pack: from 5 seeds

Shipping worldwide

Growing Marijuana Outdoors: Guide for Beginners

Cultivating your own cannabis is a fulfilling and rewarding endeavor that can be challenging, time-consuming, and require a great deal of effort. For new growers, especially those with limited resources, indoor or greenhouse cultivation may be too expensive. Consequently, mastering the techniques of outdoor growing can save time, effort, and money while producing a bountiful harvest that will surely delight.

Is It Legal To Grow Weed Outdoors?

Before starting your cannabis growing journey, it’s essential to familiarize yourself with the local laws and regulations surrounding outdoor cultivation and assess the potential risks. In general, growing weed outdoors is often as legal as growing it indoors, but this can vary significantly from country to country and even state to state within the United States.

For instance, in Canada, adults can legally grow up to five marijuana plants, while in the Netherlands, the limit is six, and in South Africa, it’s unlimited. In the United States, recreational marijuana cultivation is legal in Alaska, California, Colorado, Maine, Massachusetts, Michigan, Nevada, Oregon, Vermont, and Washington D.C. However, the number of plants allowed for cultivation varies depending on the state and whether or not you have a medical prescription for cannabis, which can also double the number of plants you’re permitted to grow.

Is Growing Weed Outdoors Worth It?

Outdoor marijuana cultivation is undoubtedly a worthwhile endeavor, offering several unbeatable advantages that are sure to please any grower. Here are some of the most compelling benefits:

Low Cost

One of the major benefits of growing marijuana outdoors is its low cost. Unlike indoor growers who must create and maintain the optimal growing environment using electricity, outdoor growers can harness the power of the natural environment, including sunlight, wind, and rainwater, all for free. By selecting a suitable location, outdoor cultivators can rely on these natural resources to provide the ideal conditions for their plants, eliminating the need for costly equipment and utilities. In addition to the cost savings, outdoor growers typically only need to budget for seeds, pest control, and plant nutrients, making it an accessible option for those on a budget.

Yields

One of the biggest advantages of growing cannabis outdoors is the lack of growing space restrictions. Unlike indoor cultivation, outdoor cannabis plants have unlimited upward growth and root system development potential. Outdoor cannabis also benefits from the most powerful light source – the sun. The yield size is directly proportional to the amount of light absorbed, so outdoor cultivation enables marijuana plants to grow to their maximum potential and produce the largest possible harvests, which can reach up to 500g (1.1lbs) of dry buds.

Top-Shelf Weed

Experienced growers will tell you that buds obtained from outdoor cannabis are incredibly delicious. Growing a terpene-rich strain outdoors under the warm sun, refreshing rain, and natural breeze can provide you with an unforgettable smoking experience due to its exceptional flavor.

Outdoor Weed Growing 101: The Must-Have Tools and Equipment

The equipment required for growing cannabis outdoors can be divided into two categories: essential gear and optional equipment that can improve your yield. For example, a greenhouse is one of the most expensive optional items commonly used by outdoor growers, and is not necessary to start growing.

Essential equipment for outdoor cannabis cultivation usually includes:

  • Cannabis seeds or clones
  • Pots or other containers
  • Soil and fertilizers
  • Pesticides

Phases of Outdoor Cannabis Cultivation

Phases of Outdoor Cannabis Cultivation

Let’s discuss the different stages involved in growing weed outdoors before we proceed with the article. These stages are described in greater detail later in the text:

  • Germination and seedling stage: Typically, cannabis seeds will start to germinate when exposed to moisture and a constant temperature of around 65° F (about 18.3° C). Experts recommend keeping your crop indoors from germination up to about four weeks of growth before bringing it outside into suitable weather.
  • Vegetative stage: Once the young plant is strong enough, it’s time to plant it outdoors when the weather becomes warm, usually around May in most areas. While your cannabis is adapting to the outdoors, pay particular attention to protecting it from pests and elements. The vegetative stage is also the time to train your cannabis.
  • Flowering stage: Autoflower strains will begin flowering on their own, but photoperiod plants will switch to this stage after receiving less than 12 hours of light a day. At this point, you should stop any LST or HST techniques, while the plant mostly stops growing and puts most of its energy into forming buds. If you’re growing weed from regular seeds, the beginning of the flowering stage is also when you sex your plants and cut down the males.
  • Harvest: When the larger fan leaves start to wilt and turn yellow and the trichomes turn from milky to amber, it’s time to harvest your cannabis. It’s crucial to select a cannabis strain that suits your climate; otherwise, you won’t be able to harvest before it gets too cold outside. For your convenience, Herbies always states each seed’s harvest time on its respective page.

Growing Timeframe for Outdoor Weed: What to Expect

The duration of outdoor cannabis growth is mainly determined by the strain. The fastest-growing types, such as autoflowers, can reach maturity in as little as two months, while photoperiod strains typically take longer to grow and produce larger yields.

On average, photoperiod marijuana requires approximately 3-4 months or even longer, depending on the strain. The earlier you start the plant outdoors, the more time it will spend in the vegetative stage before moving into the flowering stage. Although harvest times may vary due to environmental conditions and the strain’s characteristics, most cannabis strains are typically ready for outdoor harvesting between late September and early October.

Best Strain for Your Outdoor Cannabis Cultivation

Experienced cultivators can grow any cannabis variety outdoors under the appropriate conditions. However, different strains yield different results, as each strain is better suited to specific environmental conditions, such as climate, humidity, and season length. If you’re a first-time outdoor grower, it’s advisable to choose a feminized or autoflowering cannabis strain to increase your chances of successfully growing a healthy plant and achieving a bountiful harvest.

Choosing Between Seeds and Clones for Outdoor Cannabis Growing

When it comes to growing outdoor marijuana, you have two options for source material: seeds or clones. Clones have the advantage of producing identical plants to the mother plant, ensuring consistent characteristics and eliminating the need to sex the plants. However, taking care of the mother plant and clones requires experience, as the mother must be kept in the vegetative stage and clones need to go through a hardening phase before being introduced to the outdoors. Clones are also less hardy and more susceptible to damage from wind and drought.

Related Post: The Best Cannabis Seeds

READ HOW

On the other hand, seeds produce plants with more variation, but they are generally taller and more resilient than clones. They also tend to produce larger harvests. Using feminized genetics from reliable seedbanks can ensure stable and uniform results. Ultimately, the choice between seeds and clones depends on your experience and growing goals.

Top Outdoor Marijuana Strains for Beginners

Here are some of the best strains for novice outdoor growers, as they are well-suited to most environments. But this is just a taste – browse our full collection of Outdoor Cannabis Seeds for a wider selection.

Blue Gelato 41 (Barney’s Farm)

Barney’s Farm’s Blue Gelato 41 is a remarkable combination of three mouth-watering weed strains with an Indica-dominant profile. This cannabis hybrid has gained a massive following worldwide for its resin-coated buds bursting with earthy and citrusy terpenes. However, its potent effects with a THC level of up to 25% make it more suitable for seasoned users. The cerebral and energetic high can be intense, so it’s advisable to consume it in moderation.

Eleven Roses Early Version (Delicious Seeds)

Eleven Roses Early Version by Delicious Seeds is an exceptional choice for growers looking for a lightning-fast harvest in just 45 days of flowering. This feminized cannabis strain produces a bountiful yield of up to 600g/m2 (2oz/ft2) of buds indoors and a staggering 2000g (70.5oz) per plant outdoors. Its flavorful buds are a delightful combination of ripe fruit and wet earth, with a THC content of 25%. Beware, as this potent strain can knock you off your feet and straight into bed!

Godzilla Cookies Auto (Herbies Seeds)

The name of Godzilla Cookies Auto is not just for show. This strain is a real beast with potent effects, thanks to its massive buds that contain up to 27% THC. It’s a well-balanced hybrid of Indica and Sativa that’s great for commercial growers and stoners alike. With its bold and heavy-hitting qualities, this strain is sure to leave a lasting impression and keep you coming back for more.

Outdoor Cannabis Growing: Choosing the Right Soil

It is important to note that most soils consist of three primary components: clay, silt, and sand. For optimal growth, your cannabis plants require slightly acidic soil that is rich in organic matter and has good drainage. As a result, it is essential to conduct extensive research on the various types of soil before planting, especially if planting directly into the ground, to ensure healthy plants with maximum yield potential.

Here are some of the most common soil types for outdoor cannabis cultivation:

Clay soil – This heavy soil has poor drainage and does not hold oxygen well. Sandy soil – This type of soil drains well and heats up quickly. However, it does not retain nutrients well and can be problematic in wet climates. Silt soil – Silt particles are small enough to hold more nutrients than sand and drain better than clay.

To overcome the limitations of your backyard soil, consider using pots filled with cannabis-specific soil mixes or even supersoil. Additionally, choosing the right nutrients and organic options such as manure, compost, or compost tea can help you get the most out of the soil you have. For more information on the best soils for cannabis, check out our comprehensive article on the subject.

Best Nutrients For Growing Marijuana Outdoors

Best Nutrients For Growing Marijuana Outdoors

Cannabis plants demand a nutrient-rich environment to grow optimally, with a balanced blend of phosphorus, potassium, and nitrogen being essential throughout their life cycle. How you provide these nutrients to your plants depends entirely on your soil composition and the methods utilized.

Home gardeners can opt for commercial fertilizers tailored to suit their plants’ specific requirements. Long-release granular fertilizers may not be the best option for first-time cannabis cultivators, as they require a sound understanding of how they function and what your plants need.

USE PROMOCODE GET 5% - WEEDKB5

GET 5%

On the other hand, liquid fertilizers are a more accessible option that provides nutrients to your plants in a readily available form. For beginners, we recommend using cannabis-specific fertilizers that supply your plants with the necessary nutrients to thrive and minimize the risks of nutrient toxicity, lockout, and overfeeding.

Organic options such as compost or supersoil are also an excellent choice to provide your cannabis plants with the required nutrients. They are rich in beneficial microorganisms that constantly produce micro and macronutrients, making them self-regulatory and unlikely to cause nutrient-related issues. So, choose the best nutrient option that suits your plants and ensures a healthy and bountiful harvest.

Outdoor Marijuana Growing: Which Pot Size is Best?

If you lack access to a suitable garden space, growing cannabis plants in pots or other containers can be an excellent alternative. This method provides the flexibility to place your plants in various locations, such as patios, decks, or rooftops, and move them throughout the day to maximize sunlight exposure or protect them from harsh weather conditions.

However, container-grown plants are typically smaller in size than those grown in the ground due to restricted root growth. The size of your container will play a significant role in determining the overall size of your plant, but it’s still possible to grow tall plants using specific growth techniques.

Five-gallon containers are ideal for small to medium-sized outdoor plants, while ten-gallon containers are better suited for growing more abundant crops. Regardless of the container’s size, it’s crucial to monitor root temperatures during warmer weather to avoid overheating, which can severely limit your plant’s growth potential.

How to Water Your Cannabis Plants?

Proper watering is essential for your cannabis plants to thrive. Outdoor cultivation offers the benefit of rainwater exposure, but in areas with warm climates and little rainfall, manual watering is necessary. Overwatering can be harmful to your plants, so it’s essential to find a balance. If you live in a hot, arid climate, consider adding clay-rich soil or rocks below your grow site to help slow drainage. Some growers believe that polymer crystals added to the soil can also improve water retention. Remember to monitor the moisture levels of your plants regularly and adjust your watering schedule accordingly.

Growing Cannabis Outdoors: FAQ

We have prepared answers to frequently asked questions for you, we hope that this will help you!

Ladybugs – Friends or Foes?

One common question when growing weed plants outdoors is whether ladybugs can harm them. The answer is no. Ladybugs are natural predators and can help rid your plantation of pests such as root aphids.

Can a Helicopter Spot Outdoor Cannabis Plants?

It is possible for a helicopter to spot outdoor cannabis plants because the plant has a distinctive shade of green visible from the sky. However, hobby growers rarely get caught this way.

Smell of Growing Weed Outdoors

Weed is a naturally fragrant plant, and even though the outdoors does diffuse the smell, it is still noticeable. If the smell is an issue, it is recommended to choose low-odor strains.

Can You Just Throw Seeds Outside and Expect Them to Grow?

The chance of a seed germinating and growing into a plant is high when it encounters suitable germination conditions, like warm weather and moist soil. However, growing cannabis requires proper care, and even if the plant germinates, it does not guarantee a successful growth until harvest.

Should You Trim Big Fan Leaves When Growing Cannabis Outdoors?

Trimming can increase yields when growing cannabis outdoors. Proper trimming techniques can help the plant focus its energy on bud development. It is recommended to learn how to trim and what strains can benefit from it.

Does Cannabis Need Direct Sunlight During Flowering When Grown Outdoors?

Yes, cannabis needs direct sunlight in both the vegetative and flowering stages. Direct sunlight on buds can increase density and overall quality.

How to Speed Up Cannabis Growth Outdoors?

Choosing quicker strains, pruning, and providing proper nourishment can help your cannabis plants grow faster outdoors. Well-nourished and cared-for plants usually finish on time without taking too long.

Where to Buy the Best Marijuana Seeds?

Price: from $5

Pack: from 1 seed

Shipping worldwide

Price: from $15

Pack: from 1 seed

Fast ship US only - 1 day

Price: from $80

Pack: from 5 seeds

Shipping US only

Price: from $50

Pack: from 5 seeds

Shipping worldwide

Top Strains for Growing in Massachusetts

Adult residents in Massachusetts can now legally grow marijuana for personal use, both indoors and outdoors. It’s a good time to learn about the legal limits and what strains are best suited for the climate. Read on for the best strains to grow in Massachusetts.

What does the law allow?

If you are 21 or older, you can grow up to 6 marijuana plants in your garden, regardless of their maturity. If two or more adults live in the same residence and want to grow marijuana, the maximum number of plants is 12. The law does not differentiate between indoor and outdoor grows, so you can grow cannabis plants in your backyard as long as they’re fenced in and locked and can’t be seen from the outside without binoculars or aircraft. You can keep up to 10 oz of bud, but it must be inaccessible to children and pets.

USE PROMOCODE GET 5% - WEEDKB5

GET 5%

Climate in Massachusetts

Climate in Massachusetts Cannabis is a versatile plant that can thrive in many climates, including the Massachusetts climate. Massachusetts offers long warm summers, which is great for vegging plants, and you can put your seedlings outside as early as May or even April. The early fall when buds start to fill out is also warm and sunny and reasonably dry. However, you’ll also experience a lot of humid and muggy days during the peak of the summer, which can invite mold and bud rot. Keep this in mind when planning the cycle for your automatic strains. Make sure to protect your plants against hurricanes and tropical storms with chicken wire, stakes, or trellises.

Best Strains to Grow Outdoors in Massachusetts

Best Strains to Grow Outdoors in Massachusetts. Autos, Early and Fast Versions Most strains that finish in September can be grown successfully in the Massachusetts climate. If you choose a strain that finishes in the first half of October, make sure it is mold-resistant. Avoid late-flowering genetics with extra dense buds. Loose and airy flower structures are safer in humid conditions or when the nights are cold. The best choice for your first grow would be an autoflowering variety or a special kind of photoperiod cannabis called ‘early’ or ‘fast versions’. Here are the top five examples from each category:

Purple Punch Auto (Barney’s Farm)

Growing Purple Punch Auto in your Massachusetts garden is a uniquely exotic experience. Time your grow to expose buds to a few cold nights in late September for the richest, darkest colors and sweet fruity aroma. This potent Indica strain is ideal for medical patients, providing a deeply relaxing and soothing effect.

Eleven Roses Early Version (Delicious Seeds)

Eleven Roses Early Version is a prime example of modern hybrids that combine shorter flowering periods with impressive yields and high-quality buds. This strain can produce several pounds of sticky, rock-hard buds with close to 25% THC and a delightful aroma of ripe fruit and damp soil. This narcotic Indica can mature fully not just in New England, but also in colder climates.

Gelato Auto (Herbies Seeds)

For those who need an energy boost to stay productive or active, Gelato Auto is a perfect choice. This quick-flowering autoflower strain is easy to grow, beginner-friendly, and among the best strains to cultivate in Massachusetts, producing high-grade buds with 24-26% THC. With just a few tokes, Gelato Auto can provide an uplifting and energizing effect, boosting creativity and motivation.

Blueberry Cheese (Barney’s Farm)

Barney’s Farm’s Indica-dominant strain is a top pick for growing weed in Massachusetts, with a September harvest and high yields of potent buds. Blueberry Cheese has a complex effect, starting with a happy, euphoric high that slowly transitions to relaxation and hunger. Its skunky taste quickly turns into a sweet and cheesy flavor.

Sweet Skunk F1 Fast Version (Sweet Seeds)

Who doesn’t adore a quality Skunk? In Massachusetts, you can now cultivate this iconic cannabis seed thanks to the quick version from Sweet Seeds. Anticipate the same potent fragrance that suggests a wealth of terpenes in the bud, and up to 23% THC for a genuinely long-lasting high. The impact is potent, joyful, and profoundly calming.

Growing cannabis in Massachusetts has many advantages, including lenient laws that allow outdoor cultivation and a mild climate suitable for a variety of strains. With the opportunity to harvest fully mature buds before the end of the warm season, Massachusetts growers are in luck. Share your success stories and favorite strains in the comments below.


Maximizing Autoflower Cannabis Yields: 10 Tips and Tricks

Autoflower cannabis strains are popular among growers due to their fast growth and shorter flowering time. However, some growers may be concerned about their lower yields compared to photoperiod strains. Fortunately, there are several tips and tricks that can help increase the yield of autoflowers. Here are ten tips to get bigger yields from autoflowers:

1. Choose the Right Strain

The first step in achieving bigger yields is to choose the right autoflower strain. Some string naturally produce high yields than others, so research the different trains available and choose one that is known for its high yield. Consider factors such as the plant genetics, growth habits, and the environmental conditions required for optimal growth. We have prepared the top of the most productive autoflowering cannabis seeds, which we will tell you about later.

2. Start with Quality Seeds

Starting with high-quality seeds is important for achieving a successful grow. Look for seeds from reputable breeders and ensure they are fresh and viable. Check the seed’s color and texture to ensure they are healthy, and avoid seeds that are green, white, or cracked.

3. Provide Adequate Light


Providing adequate light is crucial for the growth and development of your autoflower cannabis plants, as it directly affects their yield. In general, autoflowering strains prefer a minimum of 18 hours of light per day, with 20 hours being optimal. You can achieve this by using high-quality LED grow lights, which provide the necessary spectrum of light for cannabis plants while using less energy than other types of grow lights.

Related Post: The Best Cannabis Seeds

READ HOW

When setting up your grow lights, it’s important to position them at the right distance from your plants to ensure they receive the right amount of light without burning. Generally, you should aim to keep your lights about 12-18 inches (30-45 cm) above your plants during the vegetative stage and 8-12 inches (20-30 cm) during the flowering stage.

Additionally, it’s important to maintain a consistent light schedule throughout the entire growing process. Avoid changing the light cycle abruptly or frequently, as this can cause stress to your plants and affect their overall yield. By providing adequate and consistent light, you can help ensure that your autoflower cannabis plants produce healthy and abundant yields.

4. Provide Proper Nutrients

Providing your plants with the proper nutrients, including nitrogen, phosphorus, and potassium, is essential for healthy growth and maximum yield. Be sure to follow a balanced nutrient regimen and avoid overfeeding, which can harm your plants. Look for fertilizers that are specifically designed for autoflower cannabis plants, as they contain the right balance of nutrients and trace elements.

5. Use High-Quality Soil

Using high-quality soil is important for healthy plant growth and maximum yield. Look for soil that is rich in nutrients and has good drainage. Avoid using soil that is too heavy, as this can prevent proper root growth and nutrient absorption.

Consider using soil mixes that contain coco coir, perlite, or vermiculite, as these materials help to improve drainage and increase oxygen flow to the roots.

6. Use Training Techniques

Using training techniques can be an effective way to increase yields in autoflower cannabis plants. One popular technique is low-stress training (LST), which involves gently bending and tying down the stems and branches of your plants to create an even canopy and encourage the growth of multiple bud sites. This can help increase overall yield while also improving the quality of your buds.

Another training technique to consider is topping, which involves cutting off the top of your plant to encourage lateral growth and the development of multiple colas. This can be particularly effective in autoflower strains that tend to have a single main cola.

USE PROMOCODE GET 5% - WEEDKB5

GET 5%

It’s important to note that training techniques should be used with caution and only during the vegetative stage of growth. Avoid training your plants during the flowering stage, as this can cause stress and negatively affect your yield.

Overall, using training techniques in combination with other best practices like providing adequate light and nutrients can help you achieve larger yields from your autoflower cannabis plants.

7. Defoliate Your Plants

Removing some of the lower leaves and branches of your plants can help to increase yield by improving light penetration and airflow. Be sure not to overdo it and only remove what is necessary.

By removing the lower leaves and branches, you can redirect the plant’s energy to the top of the plant, where the buds are located. This helps to promote bigger buds and a higher yield.

8. Maintain Proper Temperature and Humidity

Temperature and Humidity Cannabis Seeds

Maintaining proper temperature and humidity levels is critical for achieving bigger yields in autoflower cannabis plants. Temperature and humidity can affect the growth, development, and overall health of your plants, so it’s important to keep these factors in mind throughout the growing process.

The ideal temperature range for autoflower plants is between 18-26°C (65-80°F) during the day and 15-20°C (60-68°F) at night. Temperatures that are too high or too low can cause stress and slow down growth, which can ultimately lead to smaller yields. It’s important to keep in mind that temperature fluctuations can also be detrimental to your plants, so try to maintain a consistent temperature throughout the day and night.

Humidity levels should also be carefully monitored and controlled. During the vegetative stage, humidity levels should be kept between 40-70%. During the flowering stage, humidity levels should be gradually reduced to 40-50% to prevent mold and mildew growth on your buds.

To maintain proper temperature and humidity levels, consider investing in a quality thermometer and hygrometer to monitor conditions in your growing environment. You may also want to consider using a dehumidifier or humidifier to regulate humidity levels as needed.

Overall, by maintaining optimal temperature and humidity levels, you can ensure that your autoflower cannabis plants grow healthy and strong, leading to bigger yields at harvest time.

9. Harvest at the Right Time

Harvesting your plants at the right time is crucial for achieving maximum yield and potency. Harvest too early, and the buds may not have fully developed, resulting in lower yield and potency. Harvest too late, and the buds may have started to degrade, resulting in lower potency and quality.

To determine the right time to harvest, look for the pistils on the buds to turn from white to a darker color. Additionally, use a magnifying glass to check the trichomes on the buds. When they are mostly cloudy or amber in color, it’s time to harvest.

10. Proper Drying and Curing

After harvesting your plants, it’s important to dry and cure them properly to maintain their potency, flavor, and aroma. Hang your plants upside down in a cool, dark, and well-ventilated area to dry for 7-10 days. Once dry, trim off the excess leaves and place the buds in an airtight container to cure for at least two weeks.

During the curing process, open the container daily to release any excess moisture and check for mold or mildew. After two weeks, your buds should be fully cured and ready for consumption.

In conclusion, increasing the yield of your autoflower cannabis plants is possible with the right techniques and methods. By choosing the right strain, starting with quality seeds, providing adequate light and nutrients, using proper soil and training techniques, maintaining proper temperature and humidity levels, harvesting at the right time, and properly drying and curing your buds, you can achieve bigger yields and a higher quality harvest.

Top Highest Yielding Autoflower Strains

Gorilla Glue Auto (Barney’s Farm)

This plant provides a plentiful yield, which will allow you to enjoy it for an extended period. When grown in regulated indoor conditions, it produces a bountiful 600g/m² (1.97oz/ft2). Even with outdoor cultivation, you can expect to see numerous sizable buds. However, be cautious of mold and chilly weather, as they may impact your yield, which can reach up to approximately 800g (28oz)/plant.

Godzilla Cookies Auto (Herbies Seeds)

Both novice and professional cultivators value Godzilla Cookies Auto because of its ease of growth and ability to yield up to 600 g/m² (2 oz/ft²) indoors. One might assume that cultivating huge harvests would require a significant amount of time, but this is not the case for Godzilla Cookies Auto. This strain completes its blossom period in just 70-75 days.

Forbidden Runtz Auto (FastBuds)

Ideal for growers who are in a hurry, Forbidden Runtz Auto is an autoflowering strain that can be harvested after only 9 weeks of growth. This makes it a perfect choice for year-round indoor cultivation or outdoor cultivation in regions with shorter summers. Although it has a short structure, this cannabis strain is capable of producing moderate quantities of high-quality buds. Indoor cultivation can yield up to 550g/m2 (1.8oz/ft2), while outdoor yields can reach 150g (5oz) per plant.


The Best Cannabis Srore

Price: from $5

Pack: from 1 seed

Shipping worldwide

Price: from $15

Pack: from 1 seed

Fast ship US only - 1 day

Price: from $80

Pack: from 5 seeds

Shipping US only

Price: from $50

Pack: from 5 seeds

Shipping worldwide

Top 5 Cannabis Seeds to Buy in 2023: Best in the USA

WEEDKB is proud to announce our top 5 cannabis seeds for the month of 2023 in the US. These strains have been carefully selected based on their popularity, potency, and overall quality. As the cannabis industry continues to grow, it can be challenging to navigate the vast array of strains available on the market. That’s why we’ve done the research for you and compiled a list of the top 5 cannabis seeds for 2023. Whether you’re a seasoned cannabis enthusiast or a newcomer to the scene, these strains are sure to impress. From the potent Bruce Banner Auto to the flavorful Mimosa x Orange Punch, these strains offer a unique and enjoyable experience for every user.

So without further ado, let’s dive into our top 5 cannabis seeds for 2023:

#1 Bruce Banner Auto

Bruce Banner Auto

Bruce Banner Auto from Herbies Seeds USA is an autoflowering hybrid strain that was created by crossing OG Kush and Strawberry Diesel. It boasts a high THC level that can reach up to 25%, making it one of the strongest autoflowering strains on the market. Its effects can be strong and euphoric, with a subtle balance between physical and psychological action. The flavor profile of Bruce Banner Auto combines notes of citrus, berries, and diesel fuel, creating a unique and enjoyable experience.

#2 Grandaddy Purple Fast Version

Grandaddy Purple Fast Version

Grandaddy Purple Fast Version is a feminized, fast-flowering version of the legendary Grandaddy Purple strain. This indica-dominant hybrid boasts a high THC content of up to 23%, delivering powerful and long-lasting effects that can be both physically relaxing and mentally uplifting. It has a sweet and fruity flavor profile, with hints of grape and berry, and a floral aroma that complements its relaxing effects. Grandaddy Purple Fast Version is a popular choice for medical cannabis patients seeking relief from pain, stress, and insomnia. Its fast-flowering nature also makes it a great choice for growers who want to harvest their crops quickly.

Herbies USA Express is an online store exclusively for residents of the United States. They offer fast and reliable one-day delivery throughout the country. If you’re looking for high-quality cannabis strains and accessories, Herbies USA Express is the place to go. They have a wide selection of strains from top breeders, and you can be sure you’re getting the best quality products. And here’s the best part: if you use our promocode – WEEDKBUS5, you can get a 5% discount on your purchase. Just enter the code at checkout to get your discount. Overall, we highly recommend Herbies USA Express for anyone looking for fast, reliable delivery of high-quality cannabis products in the United States.

Price: from $15

Pack: from 1 seed

Fast ship US only - 1 day

#3 Girl Scout Cookies Fast Version

Girl Scout Cookies Fast Version

Girl Scout Cookies Fast Version is a fast-flowering version of the popular Girl Scout Cookies strain. This hybrid strain has a high THC content of up to 22%, providing powerful and long-lasting effects that can be both physically and mentally relaxing. Its sweet and earthy flavor profile features hints of mint and chocolate, making it a popular choice among cannabis enthusiasts. Girl Scout Cookies Fast Version is a great choice for medical cannabis patients seeking relief from chronic pain, anxiety, and depression. Its fast-flowering nature also makes it a popular choice among growers who want to harvest their crops quickly.

#4 Grandmommy Purple

Grandmommy Purple (Herbies Seeds)

Grandmommy Purple is a hybrid strain known for its potent indica effects, which can provide full-body sedation and mental relaxation. This strain is perfect for those looking to unwind after a long day or those in need of a good night’s sleep. With impressive yields and a flavorful aroma, Grandmommy Purple is a popular choice among growers and cannabis enthusiasts alike in the United States.

#5 Mimosa x Orange Punch

Mimosa x Orange Punch (Barney’s Farm)

Mimosa x Orange Punch is a fruity hybrid strain that boasts a high THC content and delicious citrus aroma. This strain is a cross between Mimosa and Orange Punch, two well-known and popular strains. Its effects are uplifting and energizing, making it a great choice for social situations or creative pursuits. With its vibrant orange hairs and frosty trichomes, Mimosa x Orange Punch is also a visually striking strain that is sure to impress.

Herbies is a trusted and reputable online store that offers a wide selection of high-quality cannabis strains and accessories. They ship to most countries worldwide and offer fast and reliable delivery. If you’re looking for top-notch strains, Herbies is definitely worth checking out. They offer a variety of strains, including some hard-to-find varieties, and they source their products from some of the best breeders in the world. In addition to their great selection of strains. Herbies also offers a variety of other cannabis-related products, including edibles, concentrates, and accessories. Whether you’re a seasoned cannabis connoisseur or a first-time buyer, you’re sure to find something that suits your needs at Herbies.

And here’s the best part: if you use our promocode – WEEDKB5, you can get a 5% discount on your purchase. Just enter the code at checkout to get your discount.

Price: from $5

Pack: from 1 seed

Shipping worldwide

Overall, we highly recommend Herbies for anyone looking for fast, reliable delivery of high-quality cannabis products worldwide. With their great selection, excellent customer service, and fast shipping, Herbies is definitely one of the best online cannabis stores in the industry.

Whether you’re a medical patient seeking relief or a recreational user looking for a good time, these strains are sure to please. Order your seeds today and experience the best that the cannabis industry has to offer.

In conclusion, WEEDKB is committed to providing the highest quality cannabis seeds to our customers. Our top 5 cannabis seeds for 2023 in the US offer a wide range of experiences for every user, and we’re confident that you’ll find something you love. Don’t hesitate to reach out to us if you have any questions or need help selecting the perfect strain for your needs.

Cannabis Light Burn: Prevention and Treatment

Today we will talk about what cannabis light burn is, how it can affect the development and growth of a plant, and how it can be prevented.

A light burn, which is also commonly called a slight discoloration, is a rather serious problem for the plant. The scale of the concern is especially serious when you have numerous cannabis plants growing in your room. Light is one of the main energy sources that allow each plant to develop and grow properly. However, an excess of light can negatively influence further growth.

Cannabis plants use light as food and for additional growth energy, but an excess of it can be negatively affected. Excessive amounts of light and its close placement can lead to discoloration. It is important to know how to prevent and treat cannabis burns if you notice certain changes in cannabis growth.

Light cannabis burns: definition rules

The symptoms of a mild cannabis burn are fairly easy to identify, so anyone can handle this task. This disease can be identified by the appearance of the plant. Cannabis with this diagnosis has the following indications:

  • the plant turns yellow;
  • leaves begin to turn white;
  • flowers turn white.

Next, we will look at why cannabis plants can get a slight burn and how to determine that the plant has received an injury from an overabundance of light.

Bud discoloration

Discoloration of the buds is one of the most common and common signs that makes it clear that the plant has received an excess of solar energy and has received a slight burn. Most often, these symptoms can be observed precisely on the upper buds. This happens because the top buds are closest to the light source, so they are the most vulnerable.

Top 5 Cannabis Seeds to Buy in 2023

READ NOW

Externally, cannabis buds look beautiful when lightened, but if we consider the properties of the plant after receiving a slight burn, we can see that they change significantly. Clarified cones undergo the following changes:

  • the original taste is lost.
  • terpenes and cannabinoids are destroyed.
  • plant properties are reduced or completely lose their original performance.

All this leads to the fact that cannabis buds taste like hay. Excess light can cause not only a slight burn but degradation of some important elements of the plant can also be observed.

Yellow leaves

Light burn weed can also be manifested by yellowing the leaves of the plant. However, this symptom can also indicate other diseases – for example, insufficient nutrient amounts and substances. However, it is still possible to distinguish a burn from a nutritional deficiency.

If the plant has suffered from a light burn, then the desire begins at the top of the leaf. A burn from nutrients and their excess will be accompanied by the appearance of yellowness from the bottom of the sheet.

Light placement

You can grow plants based on the use of two types of additional lighting:

  • sodium lamps.
  • LED lamp.

It is always necessary to follow the recommendations given by the manufacturers. The absence of reflective walls and additional lighting leads to the fact that the plant does not receive the necessary intensity of light energy. Such conditions can adversely affect the level of yield.

Reflective walls

Reflective walls will help improve the light intensity for plants. The essence of their work is that they reflect light and direct it back to the plant. This functionality of the walls allows you to place additional light sources at a higher distance from the cannabis, thereby saving the plant from getting a slight burn.

Overlay lights

It is better to hang the fixtures at a higher distance if reflective walls are used in the room. This will allow the cannabis to receive how much light is too much for cannabis rays from different directions, thereby providing increased intensity. Such manipulations allow the plant to receive an increased flow of light, which helps to increase the level of yield.

Not everyone can afford such conditions for growing plants. These are costly conditions, so commercial growers are most likely to grow plants in such conditions. However, among home growers, there are also special tents that are equipped with all the necessary conditions to ensure that cannabis receives the right amount of energy and other important elements that contribute to increased yields.

Light burn: what is it?

A mild burn is a mild form of lightening of a plant. Cannabis growers may notice this condition by the change in color. Leaves become paler. Growing the plant in an open area under sunlight is safer. Cannabis cannot get burned by the sun because it is very far away from the plant.

Cannabis is more vulnerable to burns when grown indoors. An excessively high heat index is determined by:

  • excessively close arrangement of lamps.
  • bud discoloration.
  • the appearance of a yellow tint in the leaves.

Perhaps outwardly the light bleached buds of the plant look very beautiful. However, cannabis is not grown for ornamental purposes. And the properties of the buds are lost when receiving a light burn. Therefore, it is so important to ensure that the plant receives a sufficient amount of light, but at the same time does not get burned due to an overabundance.

Light cannabis burns: the main methods for determining stress

The early stages of a mild burn are very easy to confuse with other illnesses and stress. So the symptoms of a mild burn are very similar to:

Therefore, it is so influential to make a correct diagnosis before taking any measures to treat the plant and eliminate these symptoms. Incorrectly taken measures and methods of treatment can aggravate the situation and make it much worse.

Evidence of a light plant burn will be the following symptoms:

  • The leaves are directed upwards.
  • Parts of the buds and leaves that are closest to the light source become white or yellow.
  • The leaf turns yellow when the veins remain green.

All of the above cannabis light stress symptoms indicate that the plant has received a slight burn.

Effective ways to prevent minor burns

Experts point out that it is necessary to carry out regular preventive work. It is much easier, better, and more effective for the plant than treating the consequences that were obtained as a result of a slight burn.

KPL

Light burn on cannabis largely depends on the type of lighting used. KPL is considered the safest. Such lamps, even at a distance of 10 inches, cannot harm the plant. Also classified as a safe types are fluorescent lamps and T5 lamps. They do not have much power, so they are considered as safe as possible to provide additional light when growing plants indoors.

LED

Some types of xenon and LED lamps are characterized by high power ratings. Poem To the placement of these types of lamps, even at a distance of 25 centimeters, can adversely affect the condition of the plant, and in some cases even kill it.

The following table allows you to find out the optimal placement of the lamp from the plant, depending on its power.

HPS Distance
150 W 20 centimeters
250 W 30 centimeters
400 W 40 centimeters
600 W 50 centimeters
1000 W 60 centimeters

LED light burn cannabis but are optimal for creating additional lighting indoors with plants. However, it is necessary to take into account the power of the lamp, and, depending on this indicator, you can determine the optimal distance between the plant and the light source to avoid light burns.

Related Post: Top Cannabis Stores in Your Country

READ HOW

Xenon lamps are characterized by high power ratings. In some cases, they can cause great harm to the plant up to its death. But too much distance between the light source and the plant will also not allow the latter to receive the necessary energy flow for normal growth and development.

The following table will show you the optimum distance between the plant and HPS and metal HALDE light sources.

LED Optimum distance between source and plant
200-400W 13 centimeters
400-600W 58 centimeters
600-800W 83 centimeters
800-1000W 90 centimeters
+1000 W 100 centimeters

Manufacturers also provide buyers with similar information. Therefore, you can find out the optimal distance between the plant and the lamp from the manufacturer.

For a safety net, you can plant a plant in a vegetative state a few centimeters further. Next, you need to observe the plant – this will allow you to understand how comfortable cannabis is in such an environment, and then take appropriate measures if necessary. Signs of a struggle will indicate an overabundance of light. In this case, it is necessary to move the plant as far as possible from the light source, or alternatively remove a few lights. As a rule, 100 watts of light energy per square meter will be enough for cannabis.

Use a light meter

A light meter is a special device that allows you to measure the amount of light that plants receive. Such an indicator as lux is used to find out how much light one square meter of a room receives. In different stages, the plant has its own norm.

  • The vegetative stage is from 35,000 to 70,000 lux.
  • The flowering stage is from 55,000 to 85,000 lux.

It is necessary to measure the amount of light in the room with a luxmeter to determine whether the plant is getting a light burn, or if signs of illness are due to other causes.

What about autoflowers?

Autoflowers need a lot of light. The following table allows you to find out about the norms.

Recommended Lux for Autoflowers
Seedling stage 5 000 — 7 000 lux
Vegetative stage 15 000 — 50 000 lux
Flowering stage 45 000 — 75 000 lux

Autos should never exceed 75,000 lux. Most autos will show signs of light burn when exposed to light levels of 75,000 lux and above.

Low-Stress Training

Cannabis light stress training is a special method in which a special bending of the stem is carried out so that the main streams of light fall exactly on the crown of the plant. Special cable tires and wires are used to carry out such a procedure.

Binding method

LST is a method that allows you to control the height and model the structure of cannabis. Thus, positive conditions for growing a plant are created based on the room characteristics. The binding method is cheaper and more commonly used. The plant branches are tied at the sides to simulate the necessary structure and ensure the optimal distance between the lighting and the cannabis.

SCROG

Green curtain is another LST technique. This method helps to control the yield level of the plant. The branches of the plant are bent according to this method. The procedure provides improved crown spreading. In this case, light fluxes fall on all parts of the plant.

Recovery of cannabis after a light burn

Getting cannabis lightly burned does not mean that the plant is unfit for consumption. However, the effectiveness and properties of the plant are significantly reduced. Cannabis buds, after a slight burn, are suitable for consumption, however, the aroma and taste are somewhat lost.

At a higher stage of the burn, the leaves of the plant turn white – this indicates that significant damage has been done. It is too late to save such a plant. Therefore, it is so important to constantly monitor the plant and monitor its condition. This will prevent the symptoms of a slight burn from appearing and avoid the loss of the original properties of cannabis.

Related Post: The Best Cannabis Seeds

READ HOW

When the first symptoms of a slight burn appear, you can remove excess light from the room and additionally water the plant. Additionally, you can install cooling fans – which will reduce the amount of light in the room.

If light bleaching leaves appear on the plant, they must be removed. Otherwise, damaged leaves can harm the rest of the plant and aggravate the burn situation. Cutting off the tops of the plant to treat a slight burn can be done by cutting the tops. This manipulation can be done if the plant is in the vegetative stage.

What can cause a light burn?

The appearance of a slight burn may indicate that the room temperature is high and there is insufficient humidity.

Low humidity

Different stage of the plant requires a certain level of humidity. So, the humidity level should be 70% at the vegetative stage. During flowering, it must be reduced to 60%. Before the start of the growing season, humidity should be reduced to 50%. Improper plant moisture levels can also cause a light burn. To control humidity, you need to purchase a thermohygrometer.

Solution

Growing cannabis outdoors does not cause light burns. Perhaps the humidity level will not be at the right stage, but you will not notice the negative consequences. Growing plants indoors requires extra care and greater control.

Heat

You need to grow cannabis at a certain temperature. The most optimal temperature for this plant is 10-25 degrees Celsius. The appearance of signs of a slight burn may indicate an inappropriate temperature. Plants will quickly let you know that they are not in comfortable conditions.

Solution

Solving the elevated temperature in the room is quite simple – you need to provide additional air circulation. The second way to fix the problem is to increase the frequency of watering, but at the same time reduce the amount of water.

Conclusion

Cannabis light bleaching is not a disease. A similar phenomenon is often common when growing a plant in artificial conditions – indoors. Providing extra attention and supervision, regulating the temperature and humidity levels as needed, and positioning lighting at the ideal distance from marijuana can prevent any challenges that may arise.

Price: from $5

Pack: from 1 seed

Shipping worldwide

Price: from $15

Pack: from 1 seed

Fast ship US only - 1 day

Price: from $80

Pack: from 5 seeds

Shipping US only

Price: from $50

Pack: from 5 seeds

Shipping worldwide

Gorilla Glue #4 Grow Journal and Week-by-Week Guide

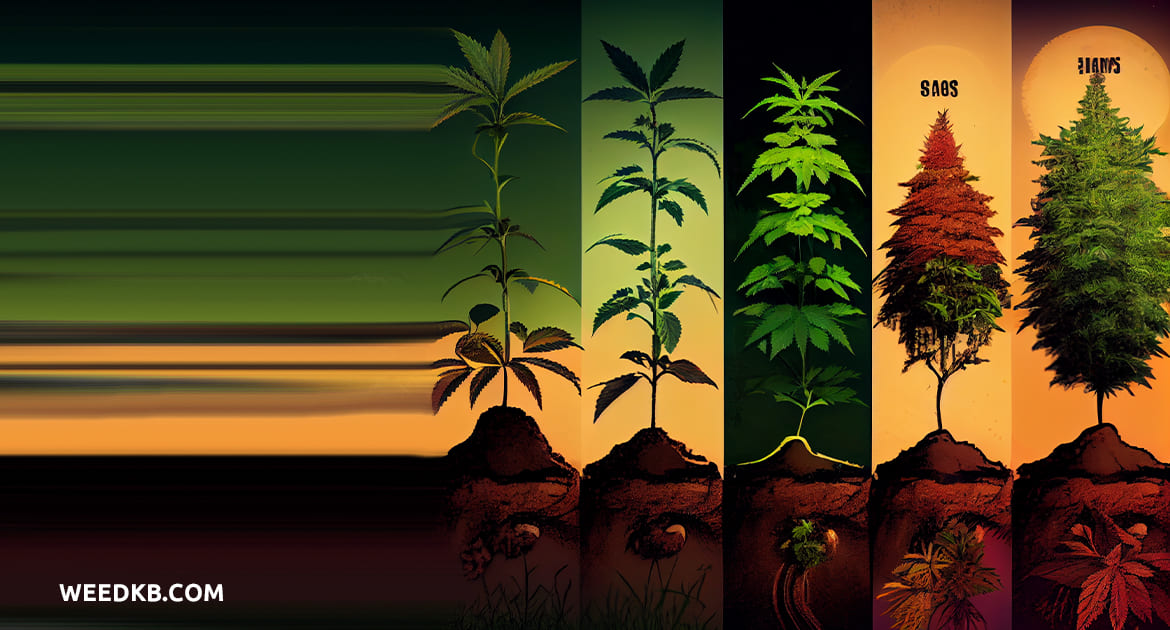
This is a complete guide to growing Gorilla Glue week by week indoors. In it, we go into details of this strain’s cultivation from seed to harvest, using one real-life Gorilla Glue #4 grow journal as an example and occasionally drawing on data from other grow reports.

Canadian (Master, 159 likes, 27 diaries)

“This girl has been a complete pleasure to grow he is very easy very resiting to nutrients and a very hight-quality flower”

We describe a grow cycle that took 14 weeks from seed (10 weeks of flowering) and yielded 159 grams (5.62 ounces) of premium bud. Along the way, we discuss what’s needed to successfully grow Gorilla Glue #4 indoors, how to maintain perfect conditions, and what nutrients and cultivation methods to use.

You’ll see for yourself that Gorilla Glue 4 isn’t hard to grow. She’s resilient to stress and responds well to topping, LST, and super cropping but may stretch too much in flower and needs smart canopy management. And she doesn’t require fancy nutrient schedules to deliver above-average yields.

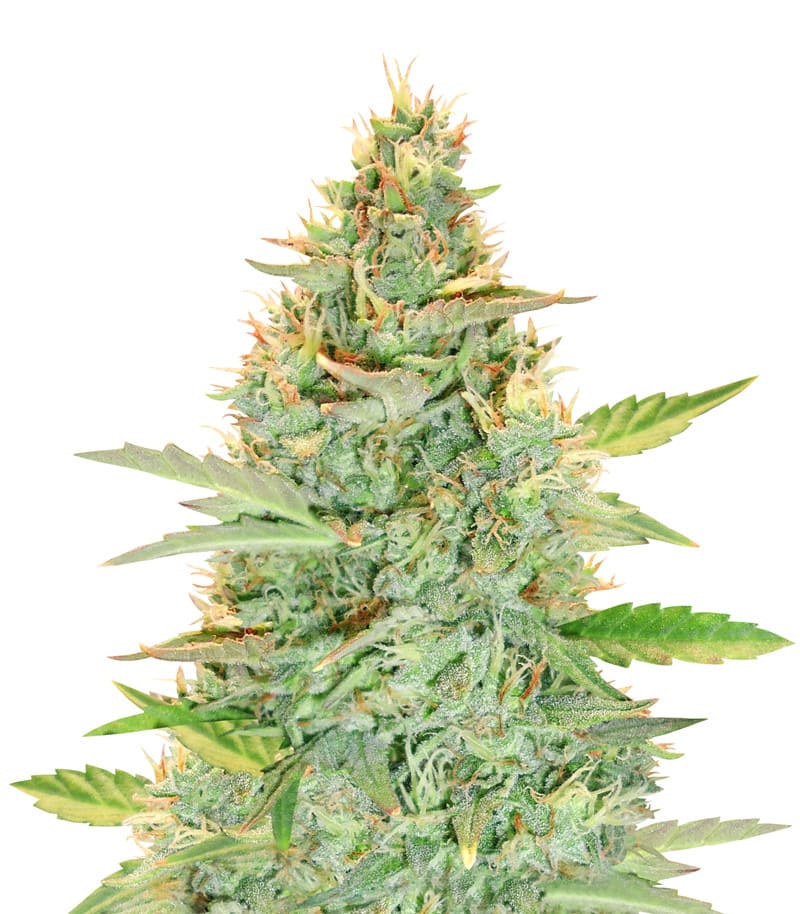
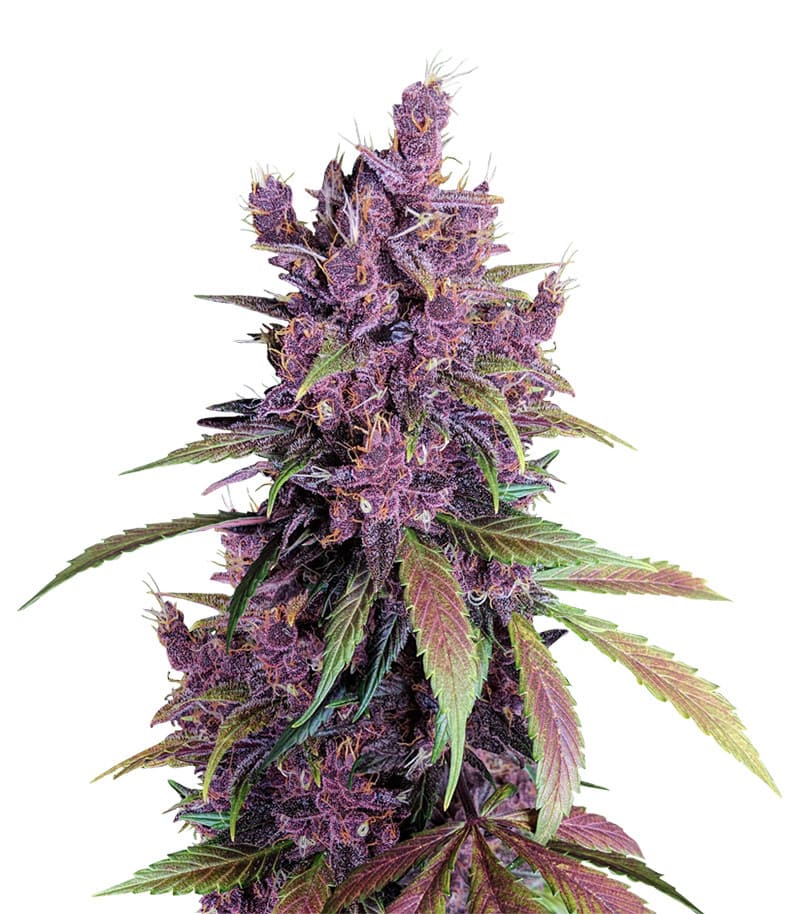
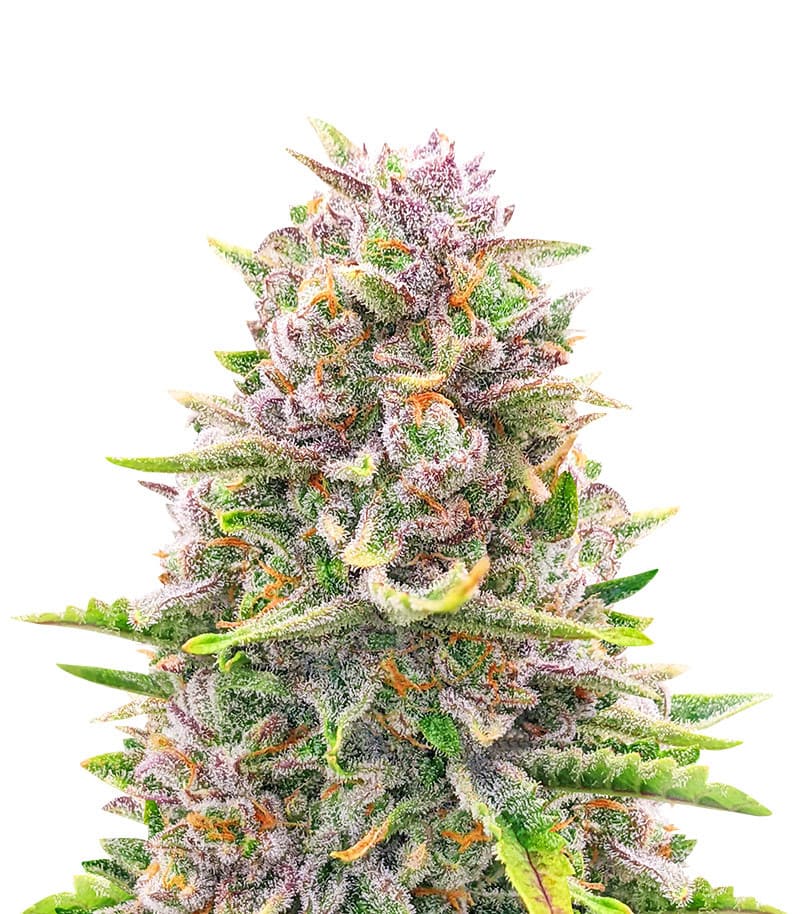
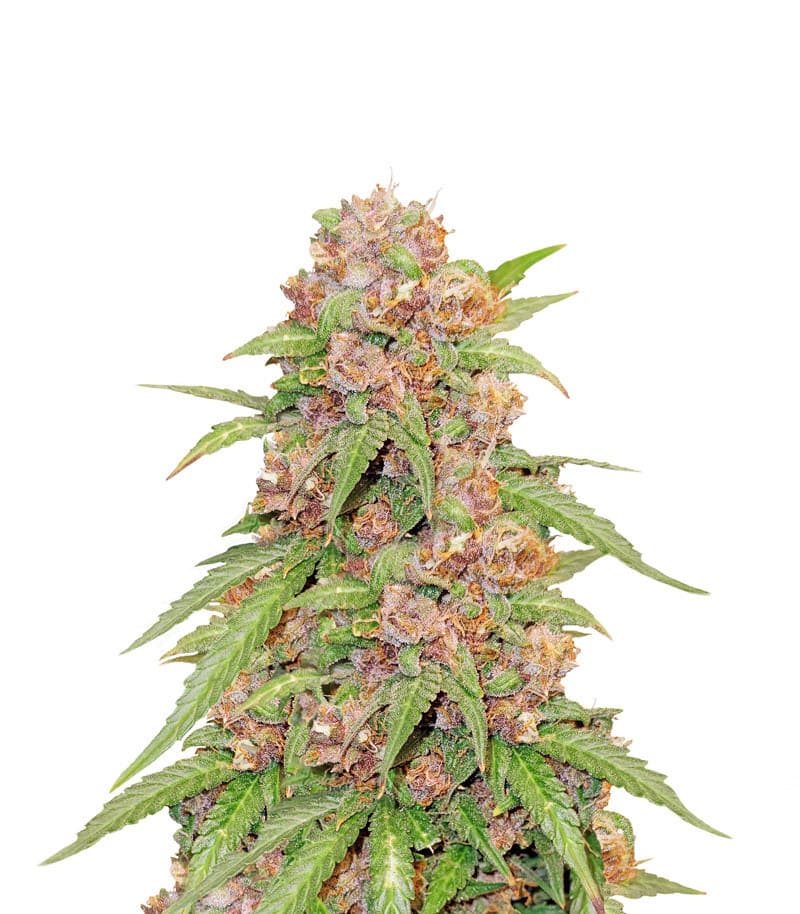
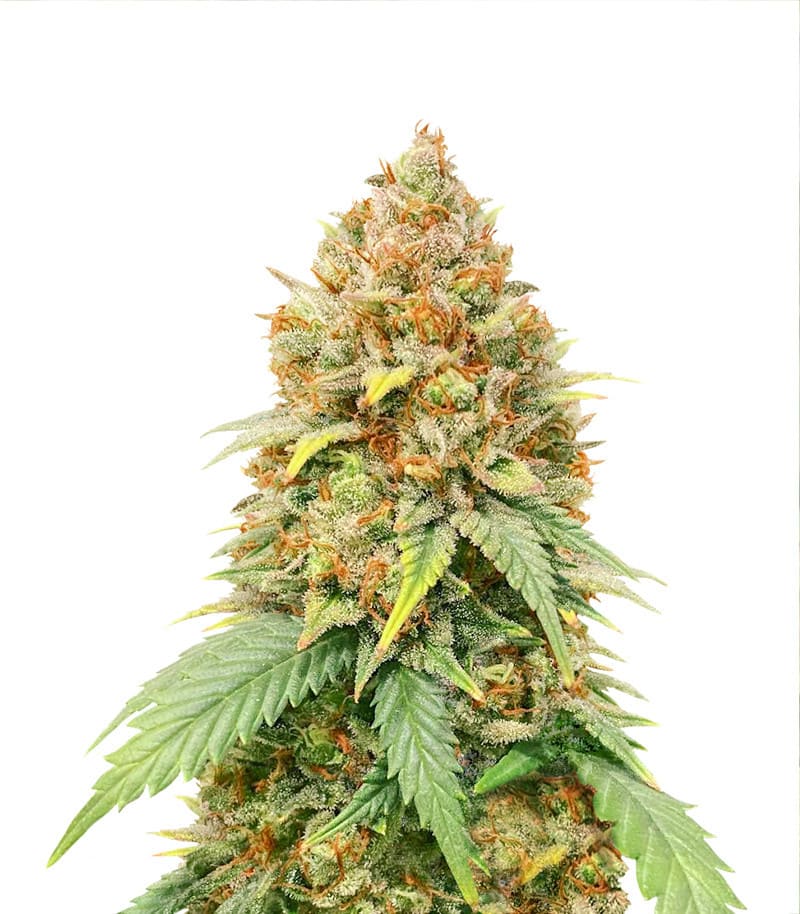
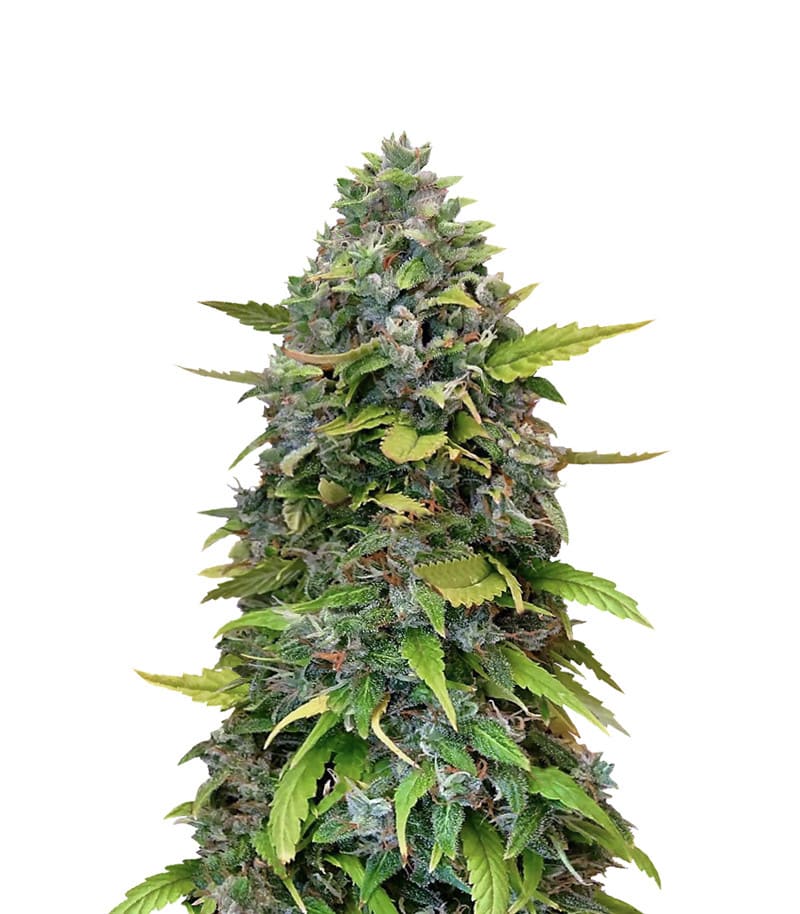
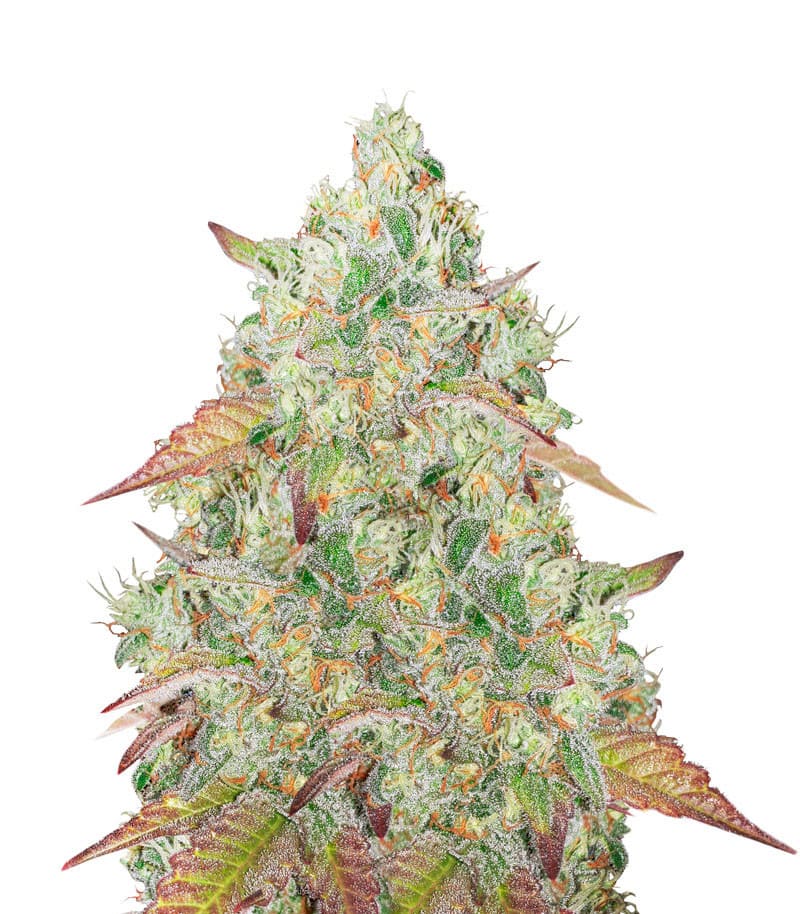
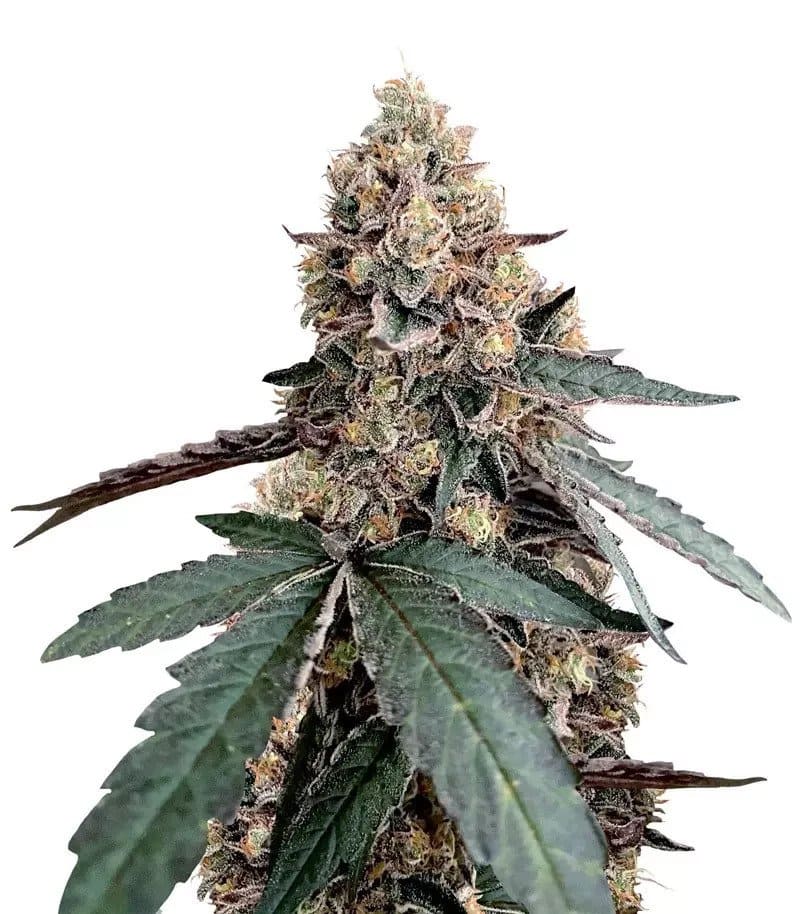
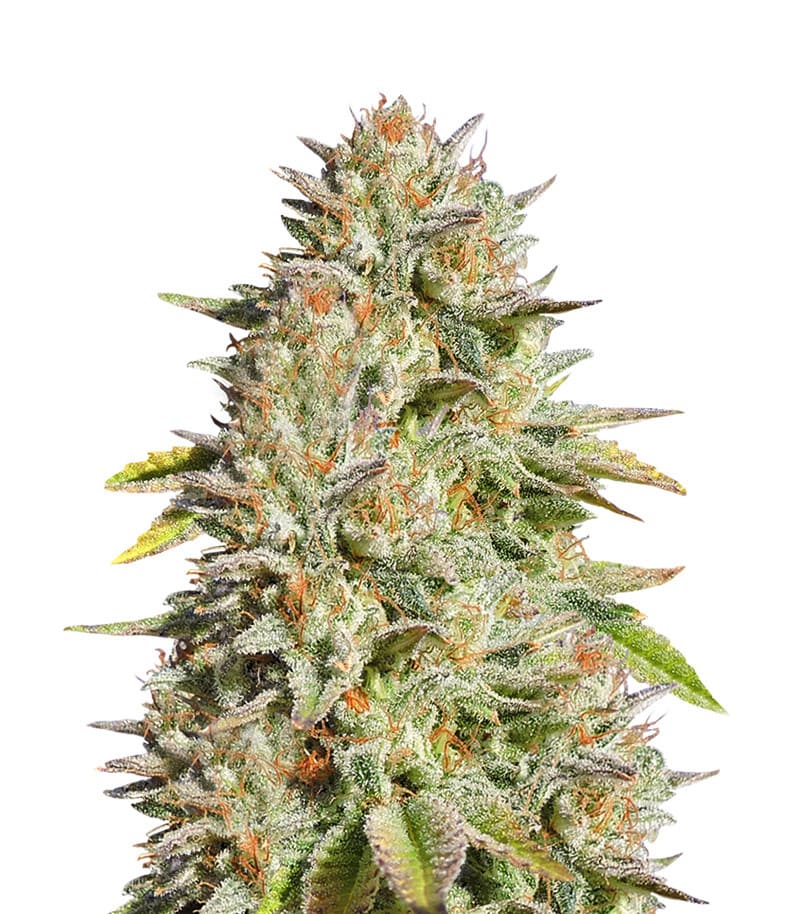
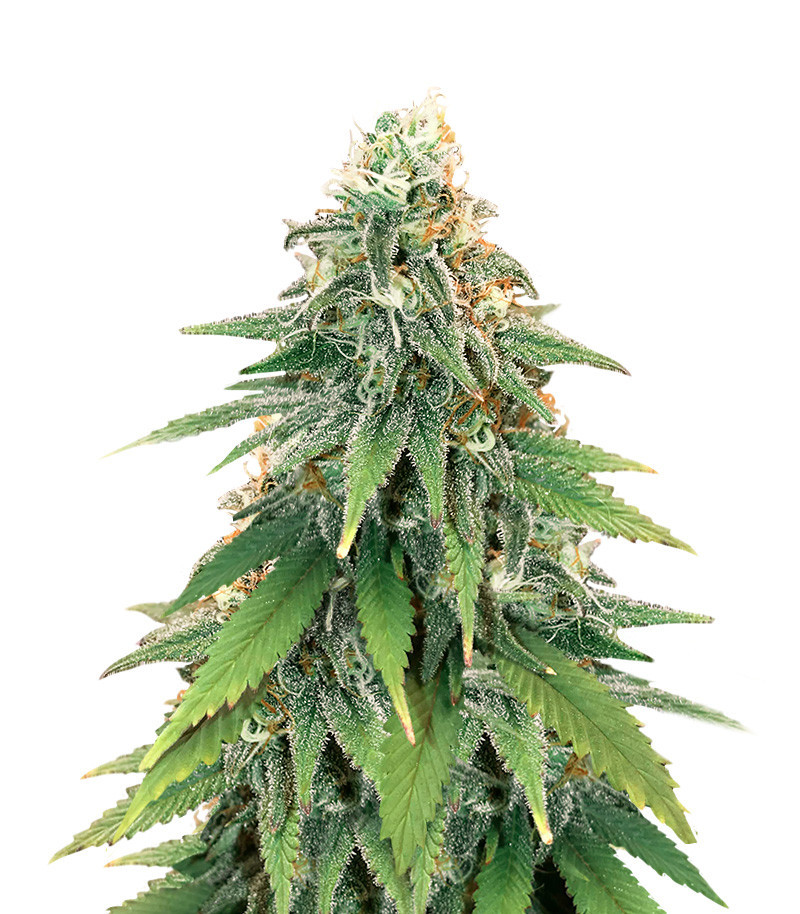
Gorilla Glue #4 (Original Sensible Seeds)

The GG#4 cannabis seeds are continuously astonishing us with their impressive results! It’s remarkable that indoor growers can yield up to 800g/m2 (2.2oz/ft2) with this strain, and outdoor cultivators can obtain up to a kilogram (2.2lb) per plant. The Gorilla Glue #4 only requires 56 to 63 days to complete flowering after switching to a 12/12 light cycle.

Setup Highlights

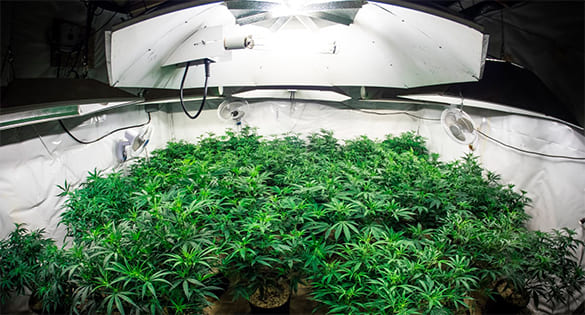
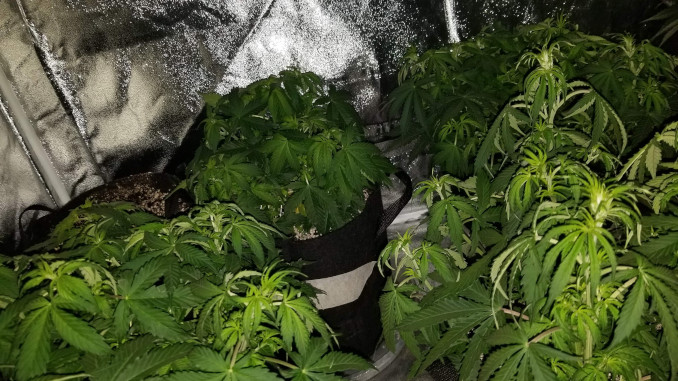
For our review, we’ve chosen a Gorilla Glue #4 grow journal by Canadian. The guy uses a 3’x3’ tent equipped with a 400W HPS. It’s a pretty much standard setup, an old tried warhorse of millions of weed growers worldwide.

Even if you don’t smoke much, we recommend starting with a similar-size grow tent because in smaller spaces, it’s more difficult to control temperature and you can’t fit it with a powerful light. And weaker lights produce insubstantial yields of smaller and airier buds. Bigger tents are also more convenient in terms of watering and canopy management.

Surface Area Light
9.8 ft2 (0.91 m2) 400W
No. of Plants Overall Yield
3 15.63 oz (443 g)
Yield per Plant Yield per Watt
5.22 oz (148 g) 1.1 g

Gorilla Glue Veg Time

We’ll start our Gorilla Glue #4 grow journal by describing the plant’s progress through the vegetative phase.

Gorilla Glue #4 is a classic photoperiod variety which means that it’s up to you to decide on its veg time. This particular grower was vegging his plant for 4 weeks and then switched his timer to 12/12 to induce flowering.

In grow reports available online, people veg GG4 for anywhere from 3 to 8 weeks. And even 15 weeks in one case.

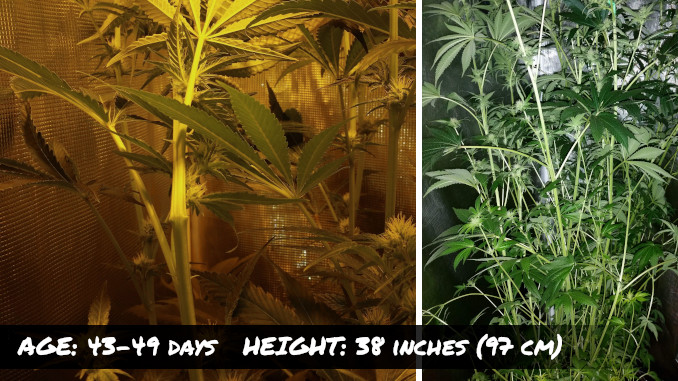
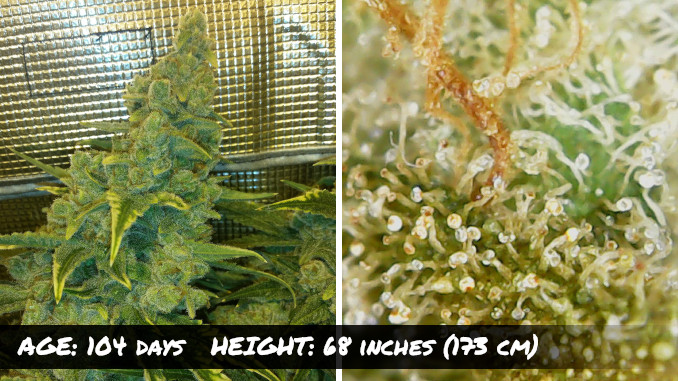
As with any other strain, the duration of the veg for GG4 depends on a lot of factors, for example, the number of transplants or the volume of the final pot. But the most important factor is the height of the plant at harvest which is limited by your available vertical space. Please note that Gorilla Glue #4 is a rather leggy plant and stretches A LOT in flower. In this instance, she went from 16 to 68 inches (41 to 173 cm), more than quadrupling in size.

But let’s not get ahead of ourselves and start with germination.

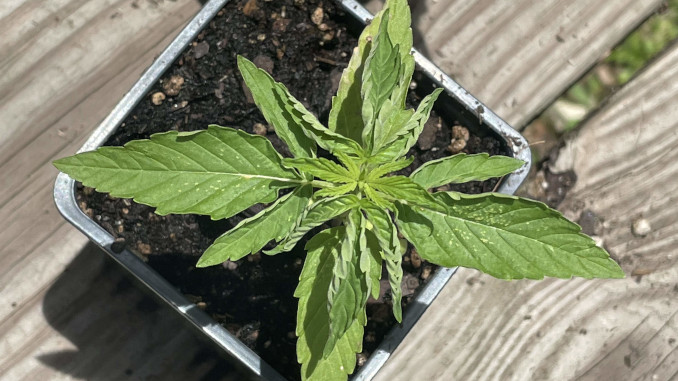
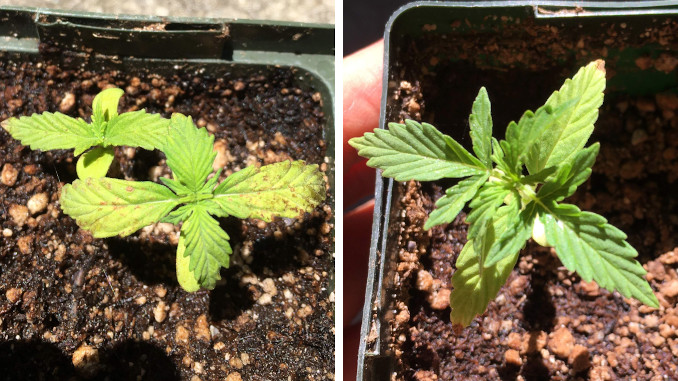
Week 1: What Are the Best Conditions for a GG4 Seedling?

A 3-day-old Gorilla Glue seedling growing in a coco/perlite mix

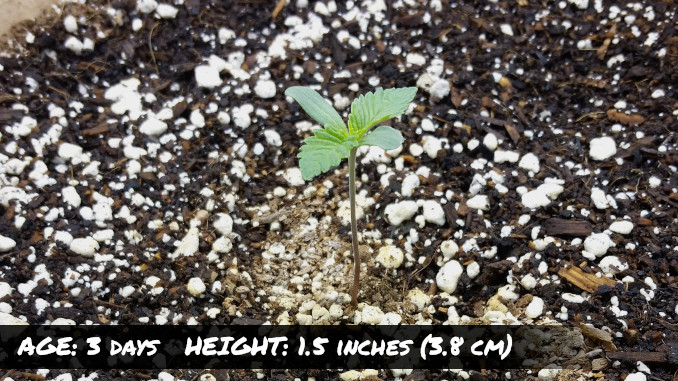
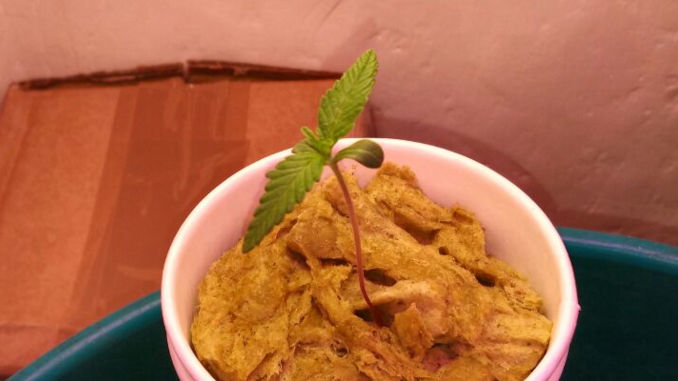
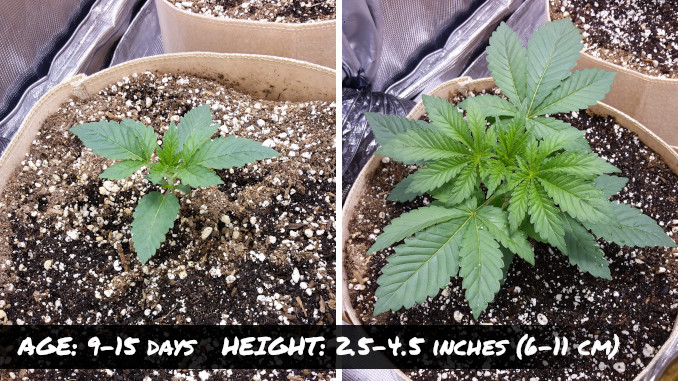
Three days out of the soil, and our Gorilla Glue grow report begins. © Growdiaries © Canadian

There are a lot of ways to germinate cannabis seeds, and even the crudest, intentionally low-tech methods give you good results if you follow three simple rules: moisture, warmth, and darkness.

You may simply germinate your Gorilla Glue bean by placing it into moistened soil about half an inch (1 cm) deep. It will usually take about 3 days to see the sprout. Aim for 23-26 °C (73-79 °F) for best results.

We understand that it’s too much anxiety for a newbie gardener to wait that long without any feedback. That’s why most people prefer to first germinate a bean between wet paper towels and monitor it as often as they want. Good viable seeds can show the taproot in just 12 hours, and then you can put the sprout in the soil.

After your Gorilla seedling has popped above the surface try to make sure that she sheds the helmet head as soon as possible. Otherwise, it will delay growth. Make the outer shell wet and soft, and you will remove it easily with your fingers.

Keep the environment warm and humid, and use a humidity dome if necessary. The perfect relative humidity for cannabis is the same as recommended for people to be comfortable indoors—between 40 and 60 percent. You can go higher than that for the seedling stage (up to 80%), but the more mature your plant gets, the lower the RH should be.

Cannabis Seedling Care: Tips and Optimal Conditions

READ NOW

And when the flowering stages begin for your Gorilla Glue, it’s all the more important to keep the air on the dry side. Beginner growers may find it hard to believe, but marijuana buds can get as moldy as a strawberry or a plum that you left in the fridge for too long. Only with buds, it can happen practically overnight.

In the chart below, you can compare the actual RH in our Gorilla Glue #4 grow journal and the optimal levels that you should aim for:

Gorilla Glue #4 Grow Journal and Week-by-Week Guide: Realative humidity chart

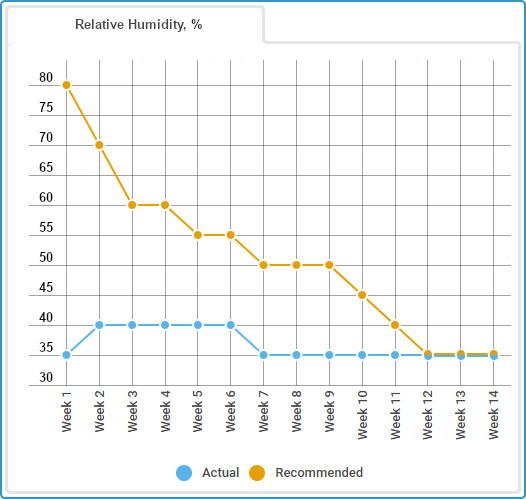
Actual and recommended RH levels for Gorilla Glue week by week.

In the first week from seed, your Gorilla Glue won’t drink much. So spray the surface or water something like half a cup around the base of the stem every couple of days. Of course, if you have pre-moistened the whole volume of your medium in advance.

If you grow your GG4 in soil, she will now find enough nutrients to flourish. In the grow report that we review here, the gardener used a coco/perlite mix (Fox Farm Ko Ko Bop) with a classical ratio of 70/30 percent.

Coco coir is best at retaining water, while perlite creates air pockets in the medium so that roots have oxygen to breathe. Together they make the winning combo. For the same reason, perlite is also beneficial in soil grows.

Some ready-made coco mixes (like this one) are amended with calcium and magnesium and pre-loaded with other essential nutrients. Others are sterile and so require using nutrients (very small doses at first) from practically day one. Starting from the second week, most growers—no matter what medium they use—start giving their cannabis extra nutrients when watering.

A very important consideration in the seedling stage is the distance from the light. Make sure it’s far enough that the little baby is reaching toward the light but doesn’t get too stretchy to topple over.

Let’s have a look at how the light distance was changing for this Gorilla Glue week by week. (Note that she was growing under a 400W HPS; for other lights, you’ll have to find the optimal distance experimentally.)

Gorilla Glue #4 Grow Journal and Week-by-Week Guide: Light distance chart

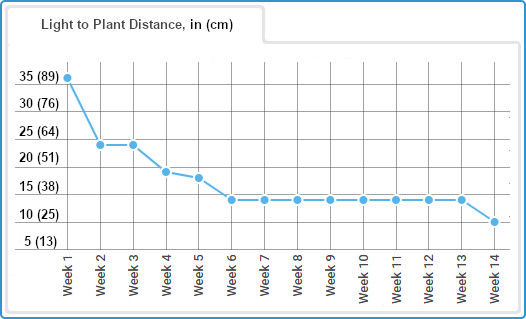
Light distance for the whole of Gorilla Glue 4 grow report.

Week 2: GG4 Grows Huge Fan Leaves

A young Gorilla Glue 4 plant at the age of 9 and 15 days growing in a smart pot filled with coco medium

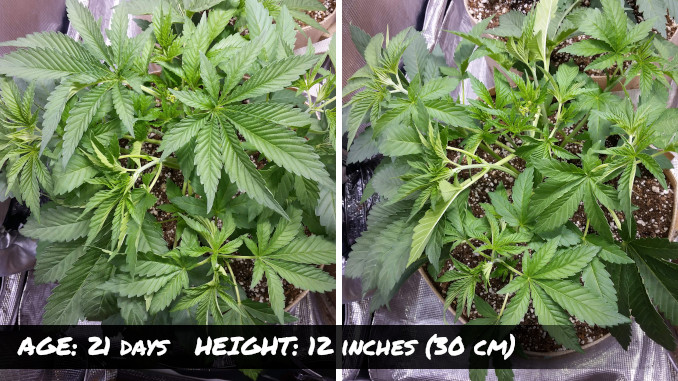
A vigorous progress in week 2 © Growdiaries © Canadian

In the second week from seed, most of the development is still happening underground as roots spread through the medium in search of water and nutrients. The leaves are growing only imperceptibly. Look at their size on day 10: if the first and the second pair span about the same, you’re on schedule.

The more the surface area of fan leaves, the faster they grow. Until something clicks and they explode, which for this Gorilla Glue #4 happened at the beginning of the third week.

The grower noted how quickly his 7 liters of Fox Farm Ko Ko Bop medium was drying. On the one hand, it means more work for you because you’ll have to water more often. On the other, frequently going through wet/dry cycles gives roots the opportunity to both drink and breathe all the time. Cannabis just loves that and grows like crazy. Install an automatic drip system, and you’ll get the maximum benefit from growing in coco.

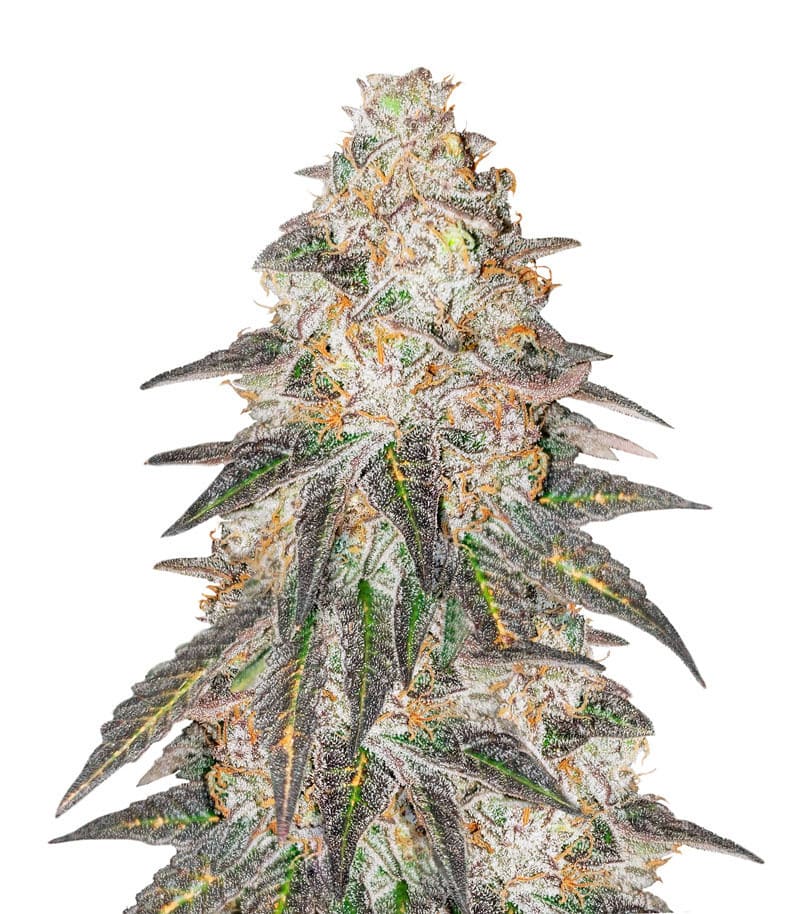
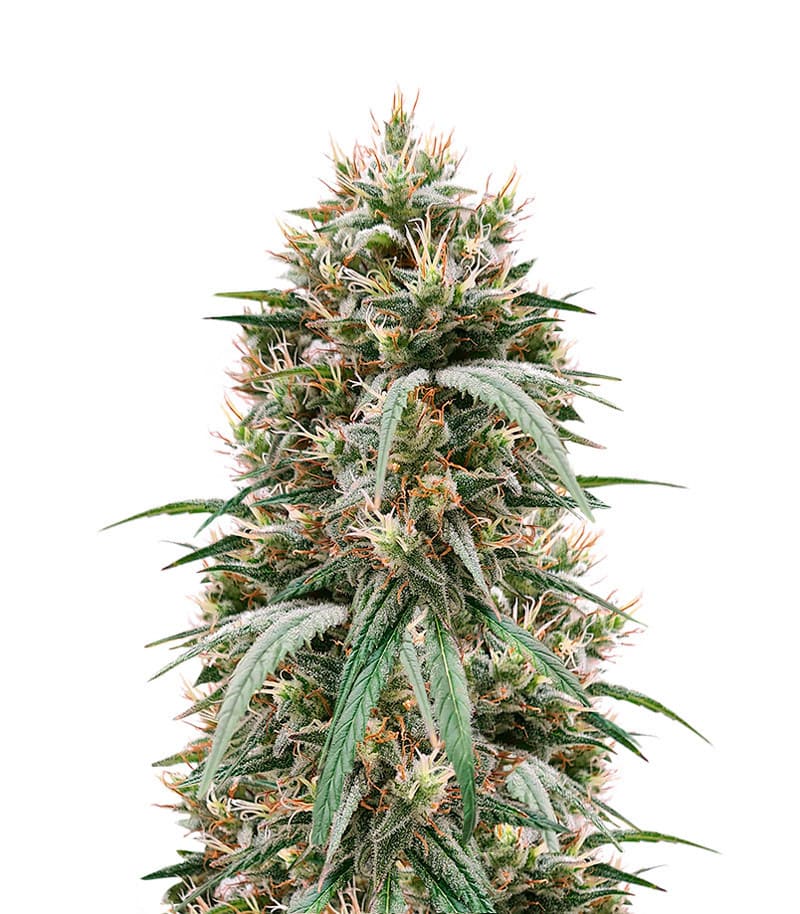
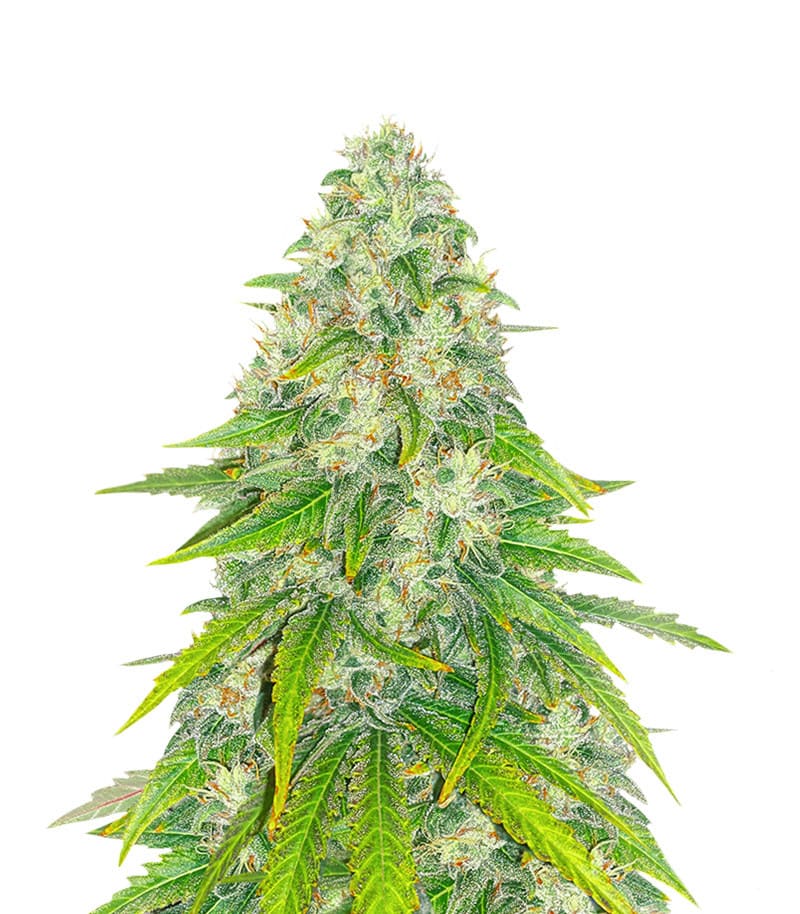
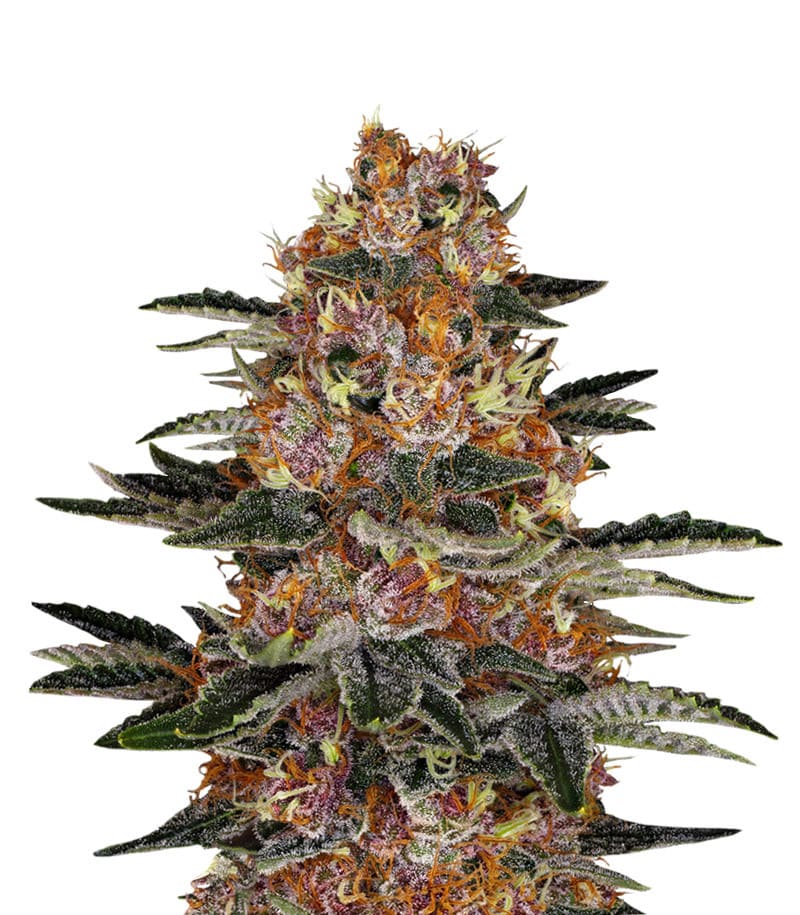
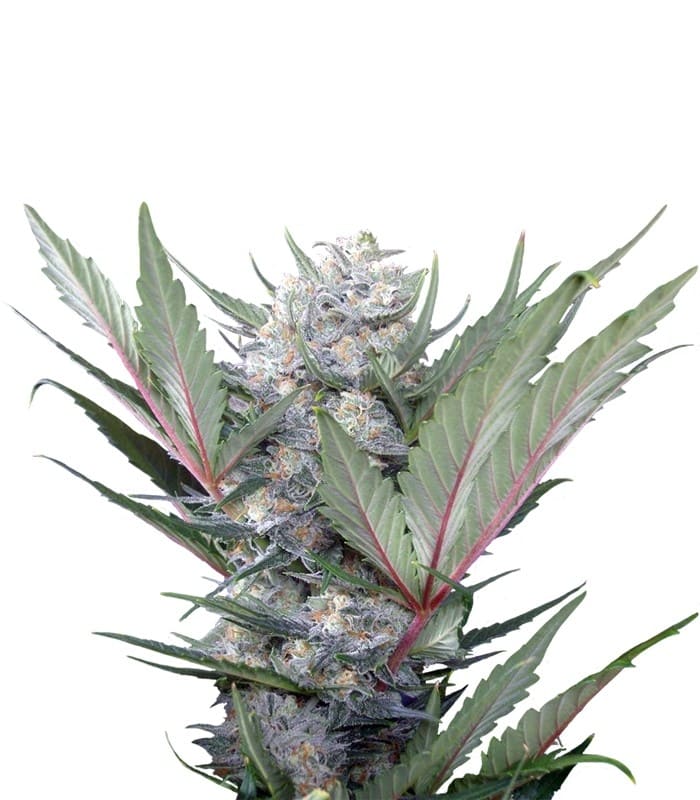
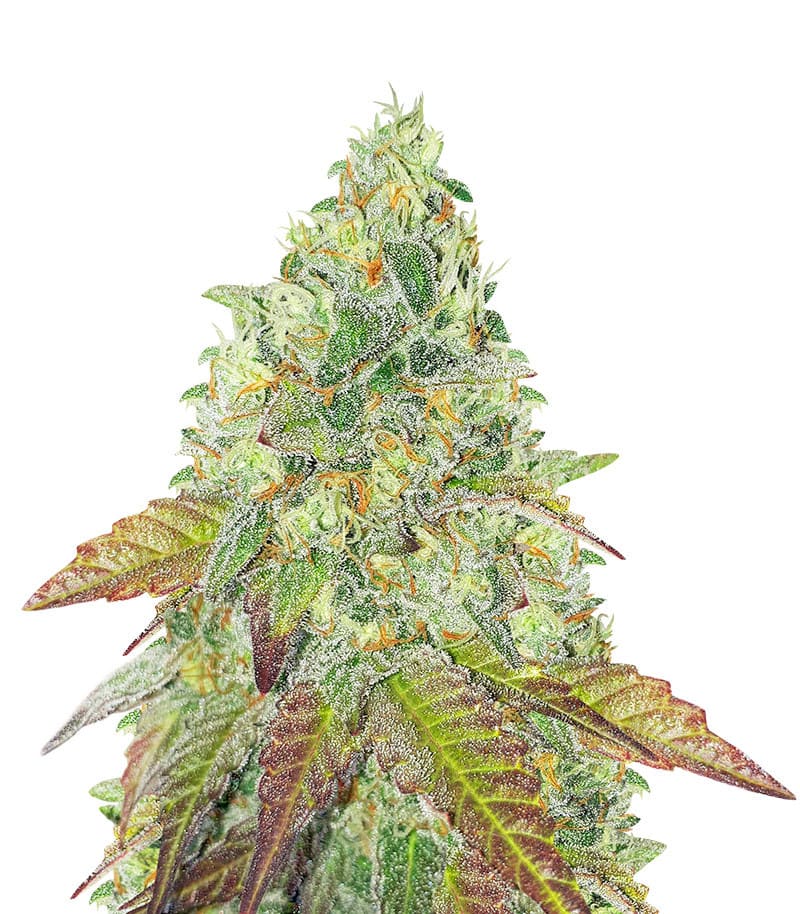
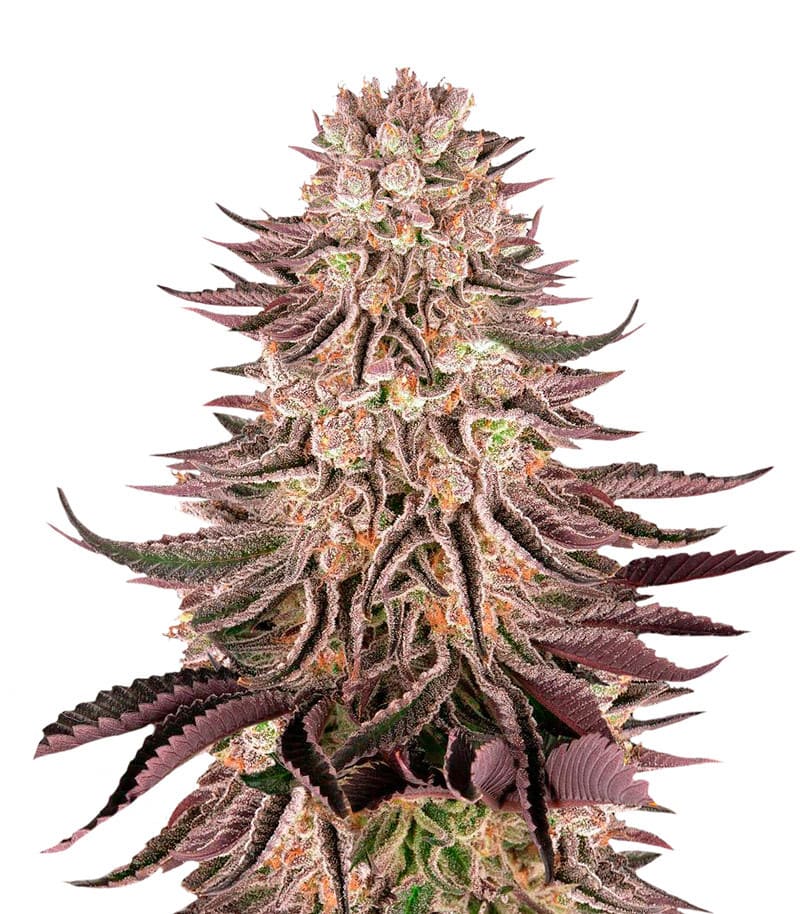
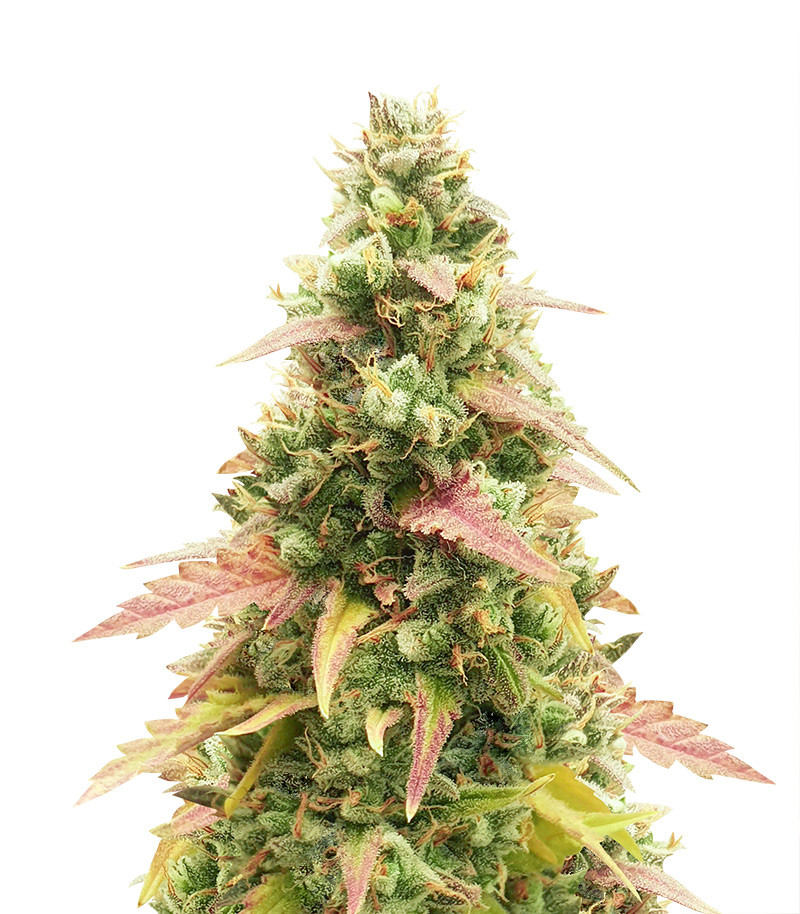
Godzilla Glue (Herbies Seeds)

THC – 29%
Feminized
50% Sativa/50% Indica

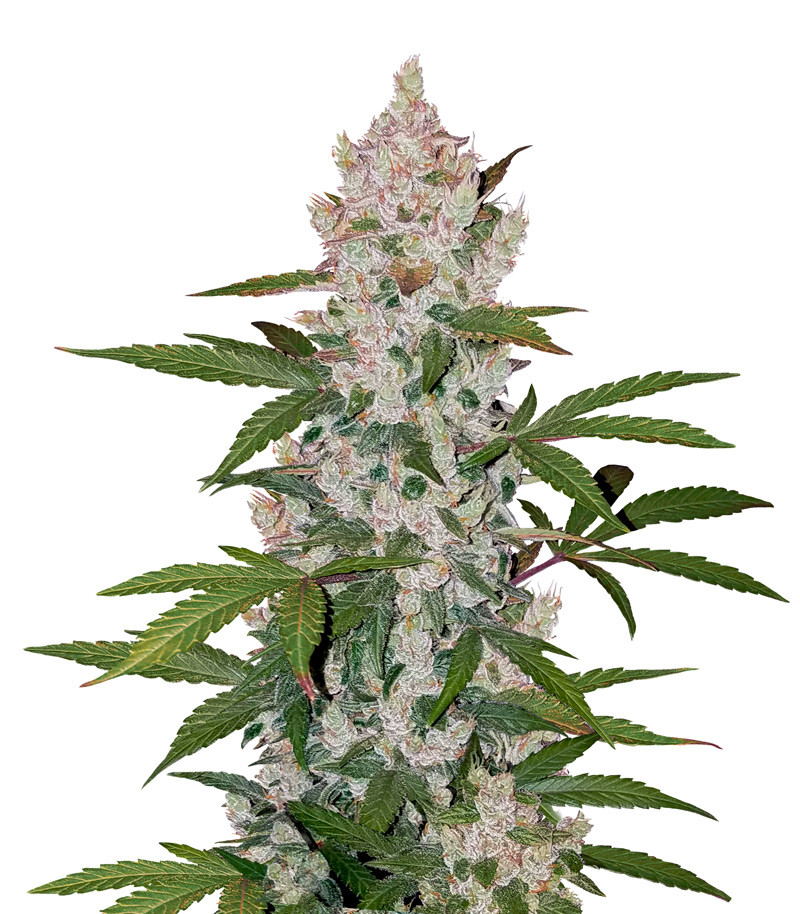
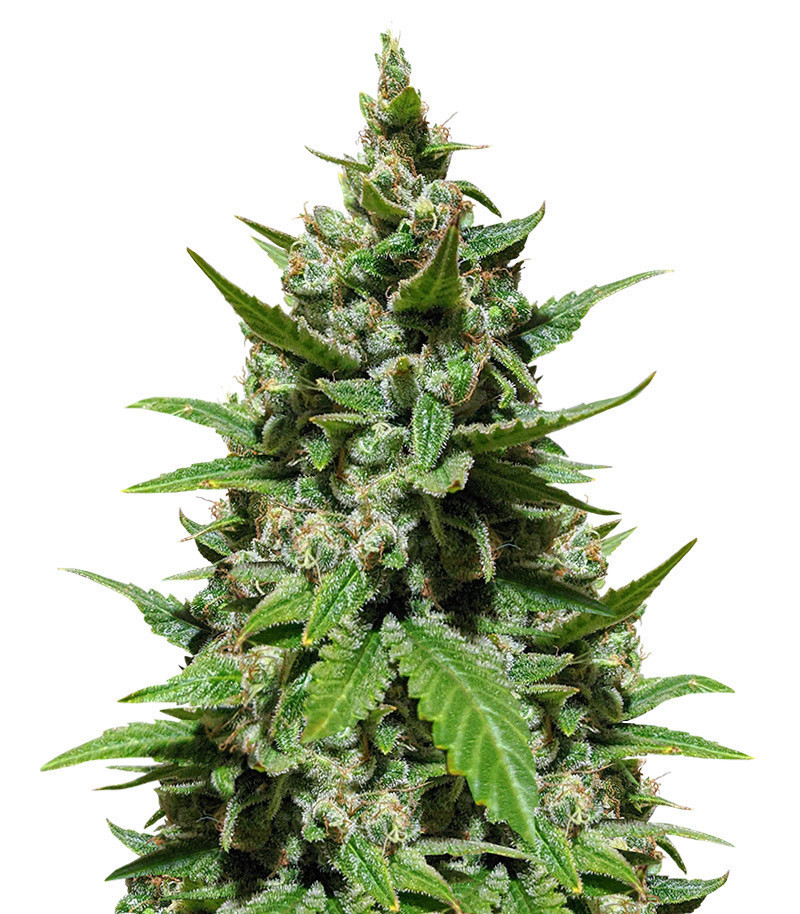
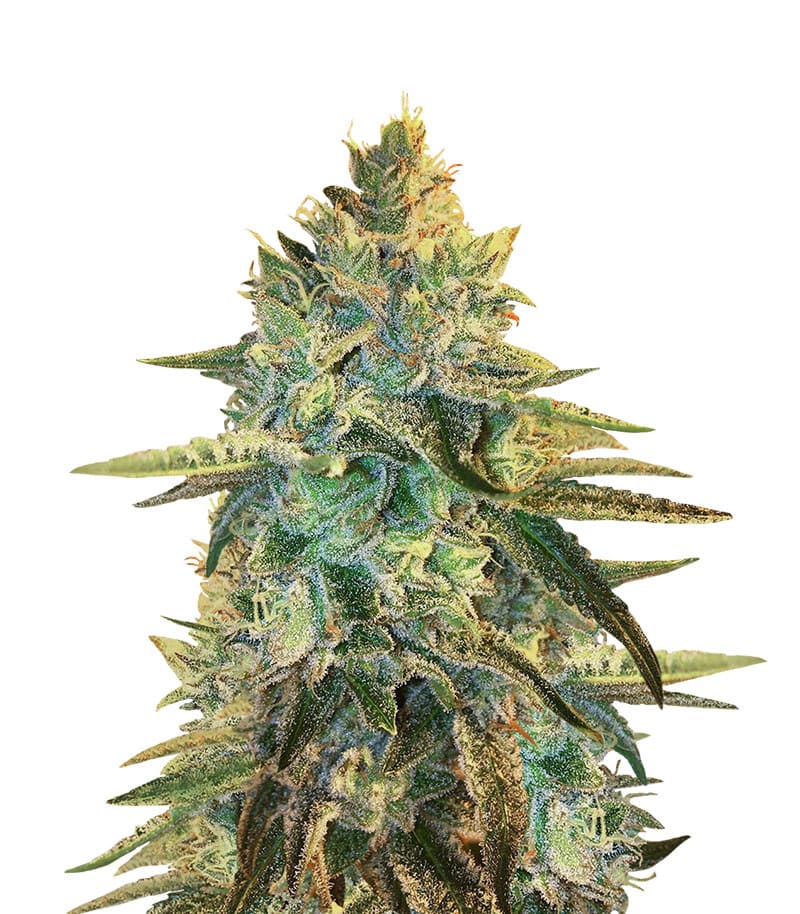
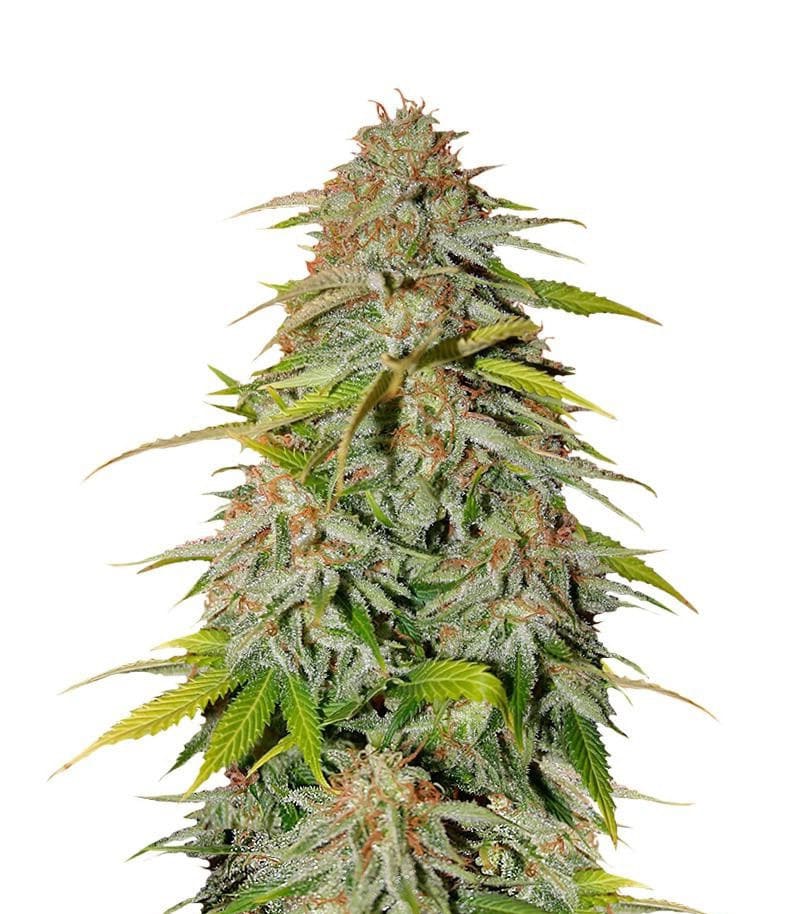
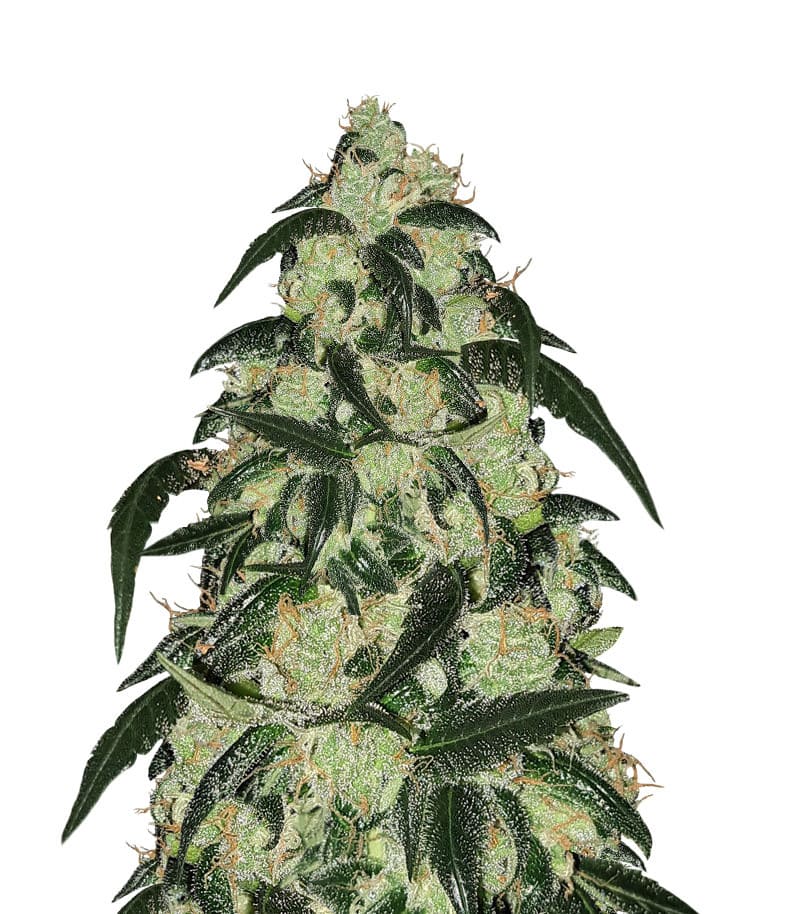
Gorilla Glue Auto (FastBuds)

THC – 24%
Autoflowering
65% Sativa/35% Indica

However, in this Gorilla Glue 4 grow, all watering was done by hand and starting from week 2, the gardener began feeding his girl nutrients. You should keep in mind that weed plants need more nitrogen than phosphorus and potassium in veg. And if you grow in coco, be sure to add lots of calcium and magnesium throughout the life cycle.

It’s safer to start with lower doses of nutrients than their manufacturer recommends. This way you’ll avoid burning young and sensitive roots. Later, if all is well, you’ll get to the recommended values.

Week 3: Topping GG4 And Then Defoliating

A 21-day-old Gorilla Glue #4 trained and overgrowing her fabric pot

Gorilla Glue #4 at the end of week 3 (before and after defoliation) © Growdiaries © Canadian

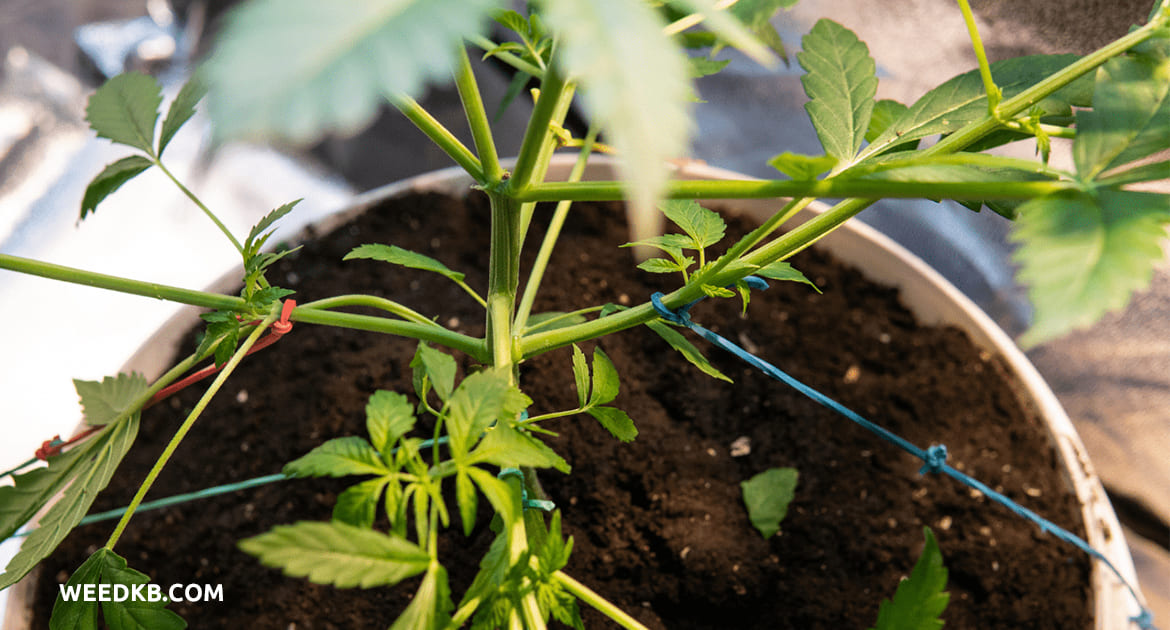
In the third week from seed, Gorilla Glue 4 looked so well-developed that the grower began to high-stress train her without second thoughts. The purpose of training—both low- and high-stress—is to stimulate side growth, making a bushier and more low-profile plant. It’s of utmost importance indoors where you better keep all the tops at exactly the same distance from the light. This way, you get many buds of the same size and quality.

He started with FIMming. The legend says that this curious procedure was discovered by chance—when a grower “botched” his attempt at regular topping and exclaimed “Fuck, I missed!”, or FIM for short.

When topping cannabis in a usual way, you cut the tip clean, leaving intact two tiny shoots below the cut. These will grow into two full-fledged new apexes (tops) instead of just one.

With fimming, you make the cut either a bit higher or a bit lower, cutting through the side shoots as well. At first, they grow all fucked up and mangled but then recover and—together with the two shoots just below—form four (!) apexes instead of one. And while this process is underway, the lower side shoots also get a major boost.

In the pic below, we have shown in red where the cut for a regular topping could have been made.

GG4 on day 17, befotre and after topping, with cuts and future tops marked

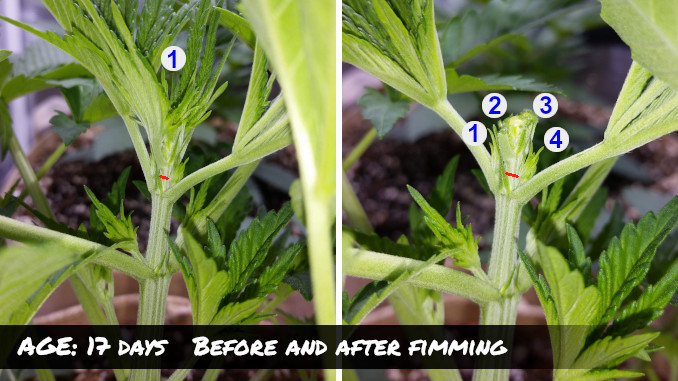
The number of apexes (tops) goes from 1 to 4 when you FIM your cannabis © Growdiaries © Canadian

Several days after the topping, the guy also defoliated his GG4, and rather heavily. The purpose of defoliation is to expose those growing points that are shaded by fan leaves. It’s a perfectly reasonable consideration, but we think many growers get carried away playing Edward Scissorhands.

When plants are stripped down next to nothing, they may LOOK all gorgeous and curvy in flower, suggesting enormous production, but in our experience, extreme defoliation rarely leads to better yields. With that said, the jury’s still out.

USE PROMOCODE GET 5% - WEEDKB5

GET 5%

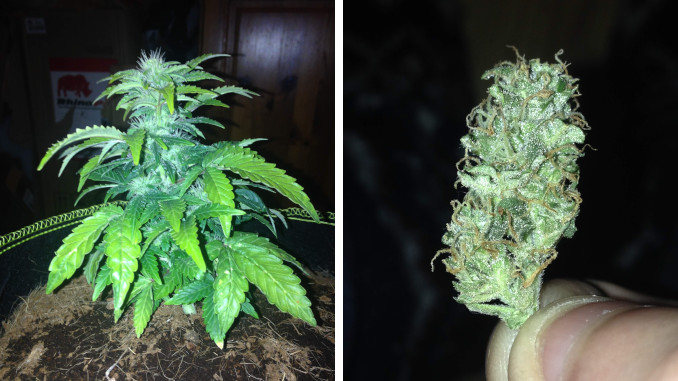
Week 4: Gorilla Glue #4 Veg Time is Coming to an End

A top view and a side view of a 3-week-old Gorilla Glue, heavily defoliated and tied down

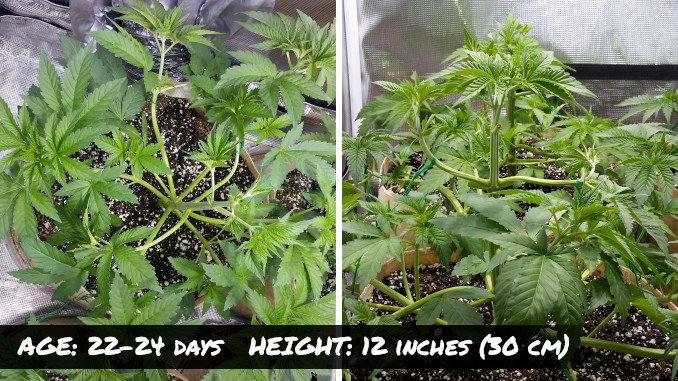
GG4 is topped, defoliated, tied-down, and ready for 12/12 © Growdiaries © Canadian

The grower would switch to 12/12 (for flowering initiation) by the end of the first month from seed. Four weeks is not terribly long veg, but in this case, it was the right move to end it so early because even at this point the plant was stretchy.

The guy had to work now all the time, adjusting the ties and trying to keep his Gorilla Glue stretch from getting out of hand. (Btw, using an HPS with all those reds in the spectrum contributes to stretching.) He was also taking pains not to stress his girl too much by LST because he was afraid she could hermie on him.

He also made a change to the diet by adding GHE FloraNectar Fruit-n-Fusion. This supplement contains different carbohydrates from things like cane sugar and molasses, is rich in potassium, magnesium, and sulfur, and is a good way to prepare for the needs of the flowering stage.

Besides, all those sugars are a great source of energy for a plant that is being constantly defoliated. Remember that leaves produce energy in the form of sugars and starches. If you pluck them all the time, be sure to substitute the loss with something else.

And here is the feeding schedule for the whole of the vegetative phase and the first week of 12/12.

Nutrients, ml/gal Week 2 Week 3 Week 4 Week 5
CALiMAGic 4 4 5 5
FloraMicro 2.5 2.5 3 3
FloraGro 2 2 2.5 3
FloraBloom 1 1 2.5 3
FloraNectar Fruit-n-Fusion 3.79 3.79

The nutrient schedule for the veg part of GG4 grow diary.

Gorilla Glue Flowering Stages

To induce flowering in Gorilla Glue #4 (or any other photoperiod strain) you need to reprogram your timer to 12 hrs of light and 12 hrs of darkness (12/12). Some growers start counting flowering time from the day they flip the switch but bear in mind that the budding doesn’t start right away.

Depending on the genetics, it may take anywhere from one to two weeks before you even see the first signs of flowering—the so-called pistils, or female hairs. This process may be even slower if there’s only been short veg and the plant hasn’t had a chance to mature.

Gorilla Glue is a quite fast variety. The flowering stage is about 8–10 weeks long. At least, that’s how many weeks of 12/12 you’ll need. The first one or two weeks are a transition period, and then Gorilla Glue starts to bud for real.

Week 5: Gorilla Glue Stretch Continues

Gorilla Glue 4 at day 29, before and after another heavy defoliation

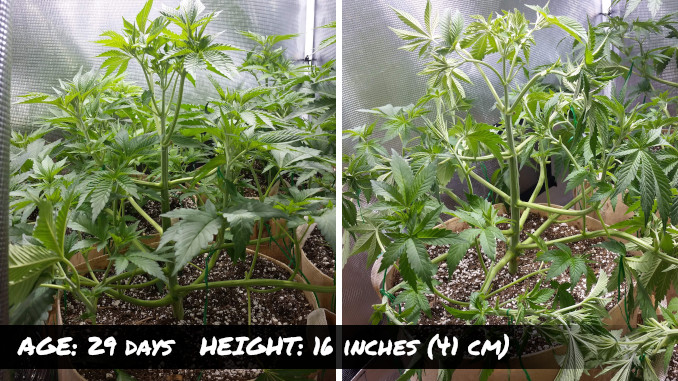
Gorilla Glue 4 before and after defoliation © Growdiaries © Canadian

At this point in the timeline, Gorilla Glue was the tallest among 4 different strains. Her height and legginess were the reason the gardener had ended the veg so early. He was simply afraid she would otherwise use up all available vertical space and also spread sideways.

He continued with heavy defoliation. When plucking the leaves, he noted their very dank smell. This is by the way how professional breeders choose the most promising phenotypes early on—by rubbing and smelling their leaves.

On day 30, the guy undid all the ties. From now on, the girl would continue to grow untrained. Besides being tall and stretchy, GG4 was also the thirstiest plant in the garden. She was still in her initial 7-liter (1.85-gal) smart pot.

Week 6: After Many Haircuts, GG4 is Still Very Bushy

A very dense-looking Gorilla Glue on days 35 and 43 from seed; no sign of flowers yet

After two weeks of 12/12, the flowering stretch is in, but there’s still no budding © Growdiaries © Canadian

The photos above give you an idea of how quickly a healthy weed plant bounces back after even extreme defoliation. And how quickly everything reverts back to the “jungle” state. Which raises the question of whether removing the fan leaves is worth it in the first place.

Maybe all you really need is to prune the excess branches: those that are too far down the stem and those that grow inside the canopy.

Related Post: Top Cannabis Stores in Your Country

READ HOW

It’s very easy to spot the branches that won’t amount to anything. They’re much thinner; they stretch like crazy and form very long internodes but still have no chance of making the canopy. Their destiny is to remain in the shadows. So why keep them?

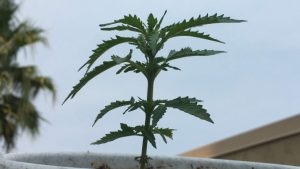
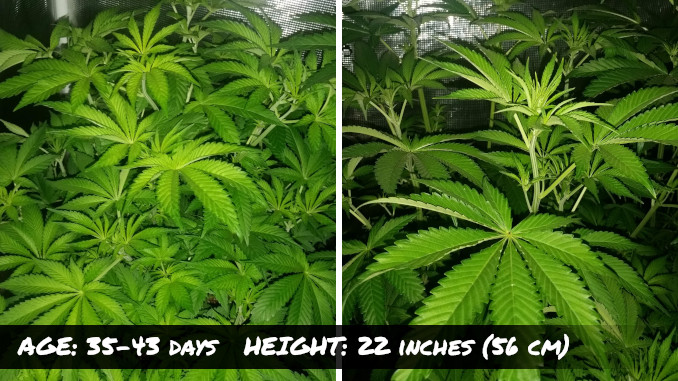
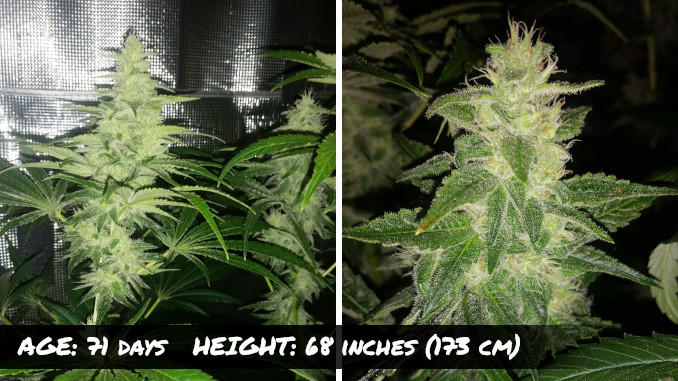
Week 7: Gorilla Glue Still Stretches Like Crazy

First female hairs on Gorilla Glue #4 after three weeks of 12/12

Gorilla Glue #4 progress in the third week of 12/12 © Growdiaries © Canadian

Three weeks into 12/12, Gorilla Glue was still focusing on the stretch rather than on producing the first flowers. (Although, those started to appear too—see the right pic above.) The gardener’s job was to raise the light a bit each morning. This was quite an issue because the other strains in the tent were nowhere near as tall.

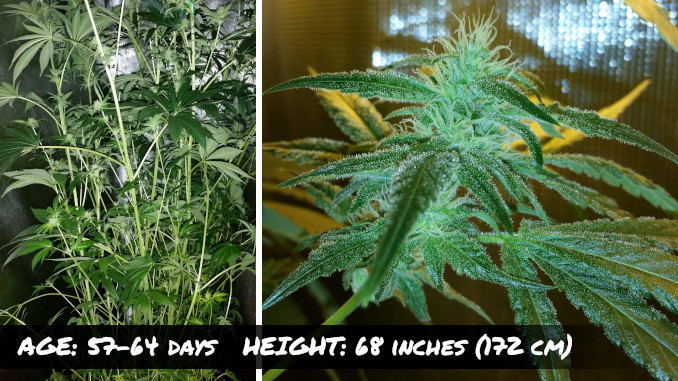
And, unbelievably, the Gorilla Glue stretch continued for another two weeks until she reached a final height of 68 inches (1,73 m). Let’s have a look at the height chart of this GG4 from seed to harvest:

Gorilla Glue #4 Grow Journal and Week-by-Week Guide: Height chart

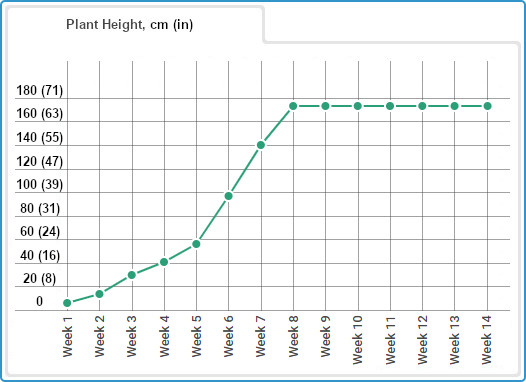
Height of Gorilla Glue week by week.

Week 8: Running Out of Headroom

A side view of a super cropped stretchy branch and a very stetchy indoor cannabis plant 4 weeks into flowering

Super cropping as the last line of defense against GG4 stretch © Growdiaries © Canadian

Four weeks into flowering, the stretch got so out of hand that several tops were growing straight into the light and getting burned in the process. The grower had to bend the tallest tops, using the super cropping technique.

To super crop means to crush a branch between your thumb and forefinger so that the branch can be bent in any direction, including downwards. This is a high-stress training (HST) method and is mostly used in veg for canopy management.

The gardener also suspected that he was feeding his Gorilla Glue too much nitrogen and micronutrients (which contributed to the stretch). So he stopped using both, and now the girl was receiving only those formulas that are needed in flower. Plus CALiMAGic.

Nutrients, ml/gal 6 7 8 9 10 11 12 13 14
CALiMAGic 4 4 4 4 4 4 4 4 4
FloraMicro 1.5 1.5 1.5 1
FloraGro 0.25 0.25 0.25
FloraBloom 3 3 3 3 3 3 3 3 3
FloraNectar Fruit-n-Fusion 2 3 3 3 3 3 3 3 3
Liquid KoolBloom 1.5 1.5 1.5 1.5 1.5 1.5 1.5 1.5 1.5

The feeding schedule for Gorilla Glue flowering stages.

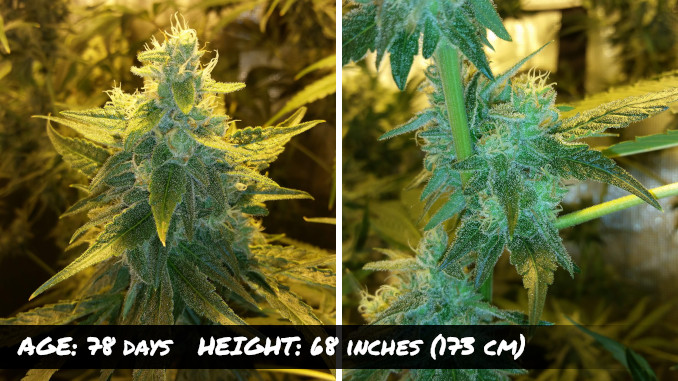
Week 9: The Flowering Stretch is Over

A very stretchy weed plant with extremely long internodes and a closeup of an immature but frosty bud

Gorilla Glue stretch stopped in week 5 of 12/12 © Growdiaries © Canadian

As a high-stress technique, super cropping could have stressed Gorilla Glue and made her hermie, but that didn’t happen. She finally stopped stretching but reached a height of 68 inches (1.72 m) which is a nuisance for an indoor grow.

Even if your tent is tall enough, having a stretchy plant like this leads to lower yields. Here’s why:

  1. The lower bud sites are outside the effective range of the light.
  2. They are in the shadow of the above growth.
  3. The plant has diverted too many resources from budding to stretching.
  4. It spends too much energy on the transport of water and nutrients through too long branches.

For all these reasons, it’s in your best interests to minimize the stretch indoors if you can.

Besides lower yields, the quality of buds is also inconsistent in stretchy cannabis. While the top flowers get enough light to become fat and dense, the lowers are tiny and fluffy. They’re often referred to as “popcorn” buds.

Many gardeners remedy this by lollipopping (removing bud sites and leaves in the lower third of the bush). This redirects the available resources to tops making them even bigger and heavier.

This grower however preferred not to go down this road. He explained that he liked to push the levels of nutrients to the limit, and whenever he went overboard with feeding, the lower bud sites were the first to show signs of trouble. So he left them as an “overfeeding fuse”.

Having said this, we don’t think he ever got carried away with nutrients in this grow cycle (see the chart below). Some people up the doses to 1000 or even 1200 ppm sometimes and get away with it.

Gorilla Glue #4 Grow Journal and Week-by-Week Guide: TDS readings chart

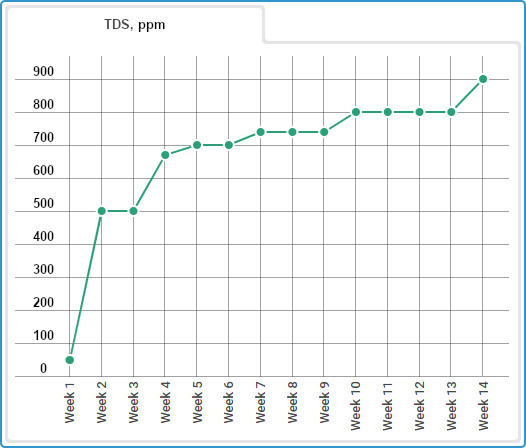
TDS measurements for the whole Gorilla Glue diary.

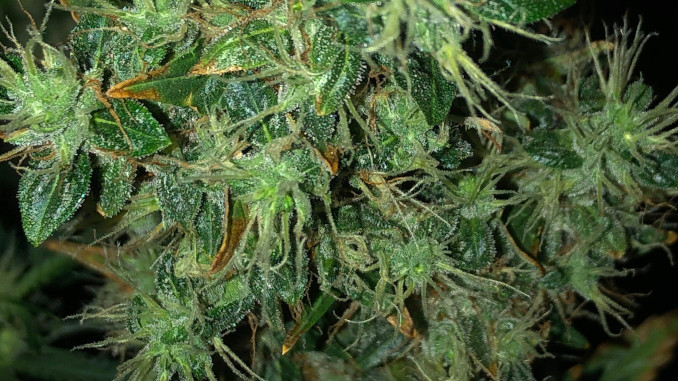
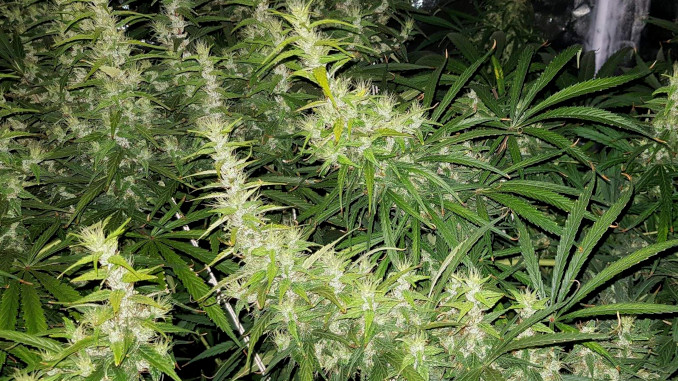
Week 10: Getting Resinous and Smelly

Closeups of well-stacked and resinous marijuana buds 6 weeks into flowering

Even the base of fan leaves gets covered in trichomes © Growdiaries © Canadian

After the flowering stretch has finished, cannabis focuses on stacking up the buds and producing trichomes.

Trichomes (people often call them crystals) are tiny mushroom-like glands that cover the calyces as well as little leaves sticking out the flower clusters. Note that the most resinous of strains, such as Gorilla Glue #4, can have trichomes even on those large fan leaves that are NOT in contact with flowers (see the left pic above).

Trichs are choke-full of THC and other cannabinoids as well as terpenoids and flavonoids. The latter are responsible for the plant’s smell and taste. Naturally, when the plant starts to get covered in resin, it begins to smell too. In this grow, GG4 wasn’t the smelliest of the bunch, though.

Btw, the smell of buds depends on the temperature during flowering. When it’s too hot, flowers evaporate their terpenes at a higher rate which will result in a bland-smelling smoke. And it’s one of the reasons why you should lower day temps to something like 23–25 °C (73–77 °F). In this grow cycle, the temps were not quite ideal but at least consistent.

Gorilla Glue #4 Grow Journal and Week-by-Week Guide: Day and night temperature chart

Day and night temps for the whole Gorilla Glue timeline.

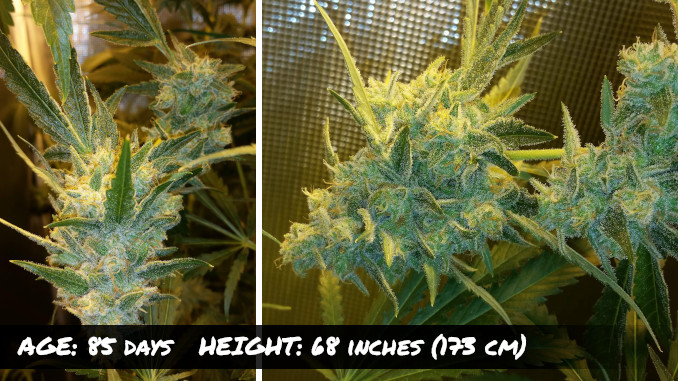
Week 11: Lower Buds Removed After All

Closueps of ganja flowers with lots of trichomes and most of the hairs still white

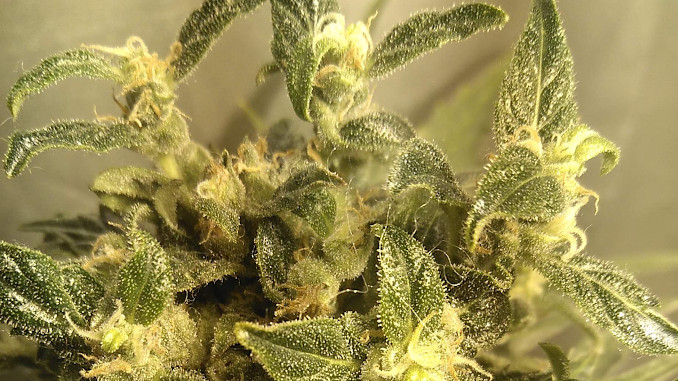
Gorilla Glue trichomes coverage is impressive © Growdiaries © Canadian

This point in the timeline marks a lull in your activities. You have dealt with the stretch, changed the diet to one suitable for flowering, dialed in all conditions. On the other hand, it is yet too early to start watching the trichomes for signs of approaching harvest. Fertigation remains your only chore.

The only other thing that the grower did for his Gorilla Glue at this stage was lollipopping. He decided that she’d be better off without lower bud sites after all.

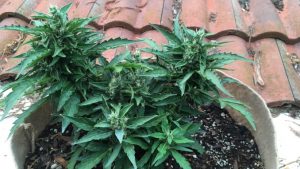
Week 12: Sideways and Upside Down

Heavy maturing marijuana buds drooping under their own weight

Gorilla Glue flowering stages coming to an end © Growdiaries © Canadian

By this point in the timeline, you’ll probably start to anticipate your Gorilla Glue #4 harvest time. At least, the specs of the strain that you’ve seen on the product page tell you that harvest is near.

You can start by looking at the state of pistils. These “female hairs” sticking out of buds are white when they first emerge. But by harvest time, they change their color, most often to orange, but more exotic hues are also possible. Anyway, mature pistils also look twisted and dry which signals that your GG4 harvest is fast approaching.

A word of caution: Under an HPS light, pistils tend to look more immature. So inspect your plant under natural light too: the difference may surprise you.

When you see that the pistils are far along enough, you can start inspecting your Gorilla Glue trichomes under a hand microscope. But in this run, it was yet too early.

However, the buds were extremely resinous and so heavy that the branches were bending under the weight. It’s another reason not to let the stretch spin out of control. And when the damage is already done, at least provide some kind of support in the form of stakes, trellises, yo-yos, ScrOG net, etc.

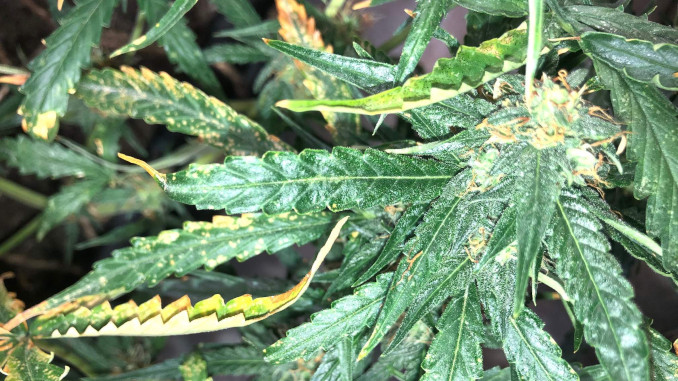
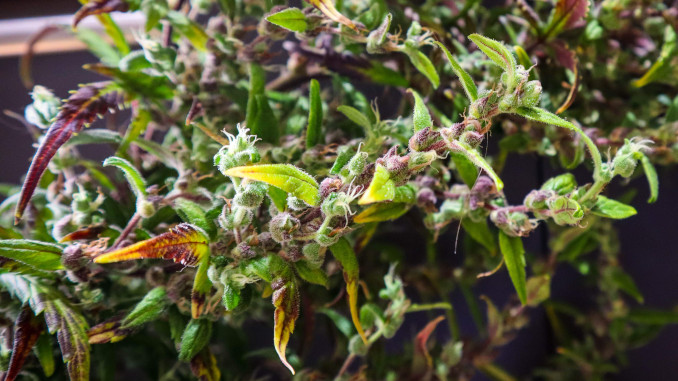
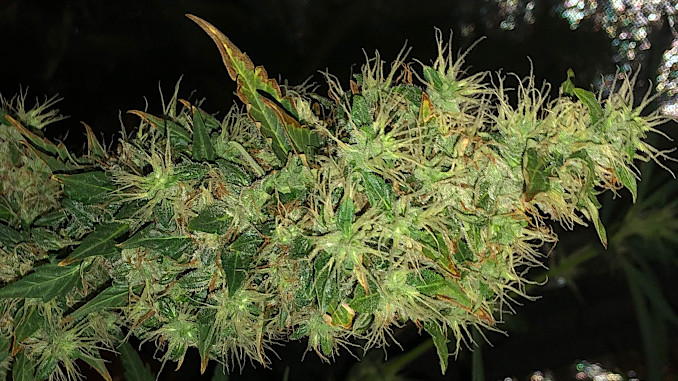
Week 13: Got Milk? What About Amber?

A long conical cannabis cola almost ready for harvest with yellowing edges on fan leaves and a macro shot of trichomes

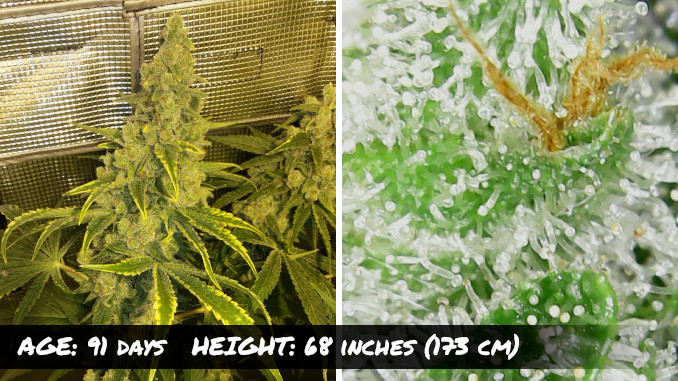
Gorilla Glue trichomes look almost ready but not quite © Growdiaries © Canadian

Now, when the pistils are all orange, twisted, and dry, it’s time to watch the state of the trichomes in earnest. Because it is them that will tell you if your Gorilla Glue is ready to pick.

You should harvest your Gorilla Glue at the peak of her potency which is easy to determine by the color of trichomes. When they are clear, it’s too early because they can produce yet more THC as well as other cannabinoids and terpenes. The presence of all these substances makes trichomes appear milky/cloudy. And this marks the perfect moment to harvest your buds.

Please bear in mind that the color of trichomes determines not only the potency but also the character of the high. After most or all of the trichs have become cloudy, a few of them will start to turn amber. Look closely at the macro shots above and below to see what we mean.

No amber means that your Gorilla Glue will produce a more heady effect. And the longer you wait and the more ambers you see, the more your Gorilla Glue will make you relaxed and sleepy. It’s because, in amber trichomes, THC starts to degrade to cannabinol which doesn’t so much warp your mind as sedates you.

Mostly clear trichomes will produce a high that is felt mostly in the head and without much body buzz, but it can make you paranoid and can be weaker compared to more mature buds.

The state of the trichomes will also tell you when to flush Gorilla Glue. It all depends on the medium you grow in because, in hydroponics and soilless mixes, such as coco, it only takes one week to flush. In soil, you may need as much as two weeks. So we suggest starting the flush in soil when the first cloudy trichomes appear. In coco and similar mediums, you may start flushing when most of them are cloudy or even when you see the first ambers.

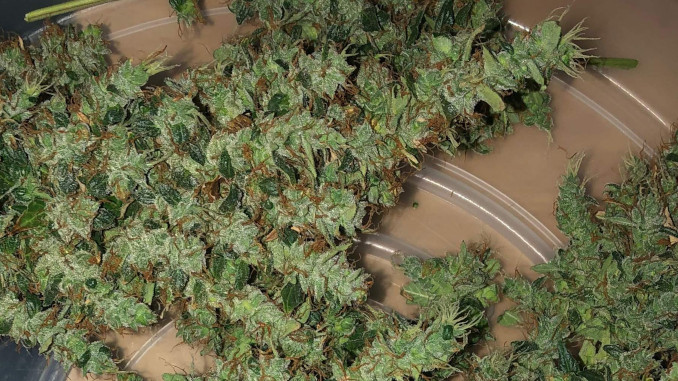
Week 14: Gorilla Glue Harvest

A perfectly mature green marijuana cola and a macro shot of Gorilla Glue trichomes, most of them cloudy and a few amber

After 10 weeks of 12/12, it’s Gorilla Glue #4 harvest time © Growdiaries © Canadian

As we said earlier, in the last week or two before your Gorilla Glue harvest, you should give her nothing but pH’d water. This will give her a chance to uptake the remaining chemicals from the medium and use up those that were already in her system. After a proper flush like this, the smoke will be pure, tasty, and smooth, the joint won’t need relighting, and will leave snow-white ash.

If you dry your cannabis in the same tent, you can cut the plant as a whole and hang it upside down. Make sure to control the temperature and relative humidity. They should be the same as during the Gorilla Glue flowering stages. Another important thing is darkness, and you should probably leave the oscillating fan on.

Related Post: The Best Cannabis Seeds

READ HOW

The initial drying usually takes anywhere from 5 to 10 days depending on the conditions. The longer it is, the better (potentially) the quality, but watch out for mold. You can slow down the process by wet-trimming both the fan leaves and the “sugar” leaves because this would drastically reduce the evaporation surface.

When the surface of the buds is dry to the touch, try to bend the branch. If it snaps, it’s time to cut the nuggets from the branches and put them into glass jars for curing.

Curing serves not only to slowly evaporate the remaining water from flowers. It also gives them time to degrade chlorophyll, sugars, starches, and other organic compounds. You don’t want all those in your smoke because they make it smell like hay, taste terrible, and cause coughing.

Gorilla Glue takes at least 3 weeks to cure properly. This may include the week or so of drying and another two in the jars. However, chemical reactions don’t stop after 3 weeks, and you may find the buds taste better and better the longer you cure them. Curing also makes Gorilla Glue more potent.
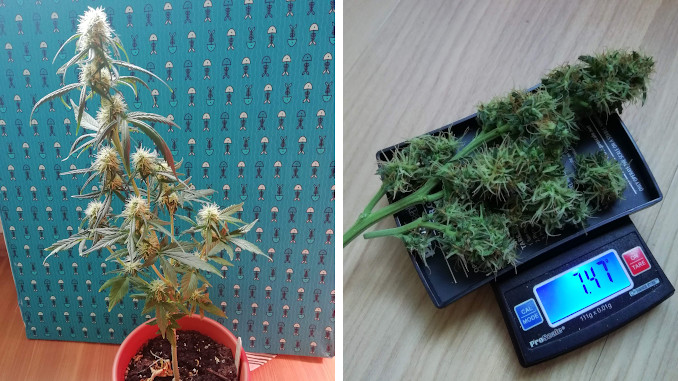
The End Result

A weed branch with round compact nugs, yet untrimmed and very frosty, lying next to a pair of garden shears

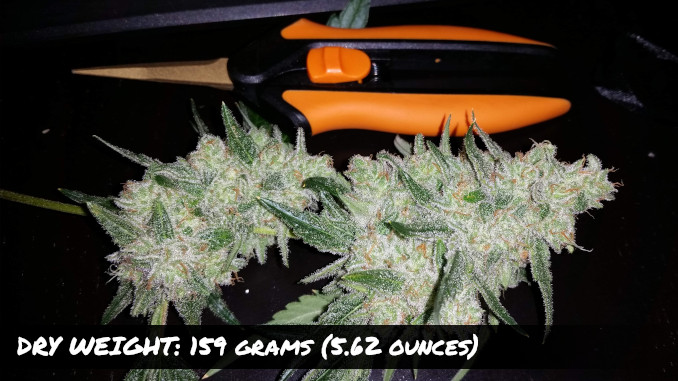
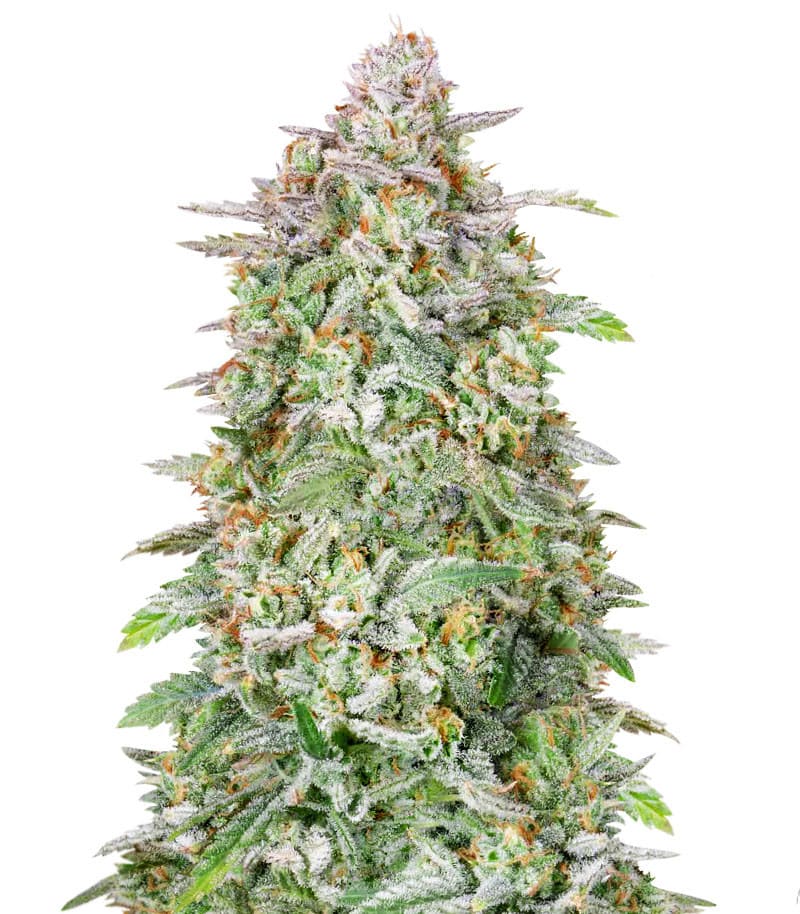
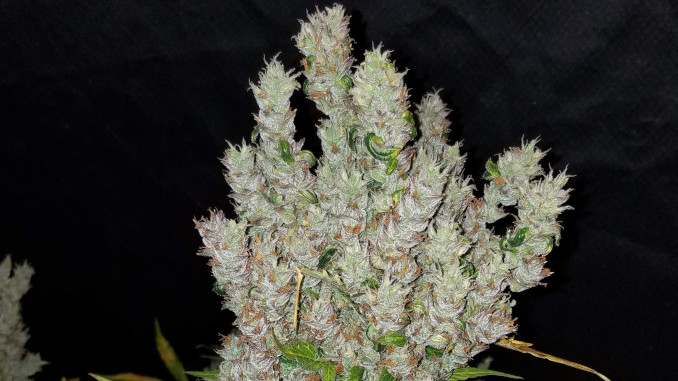
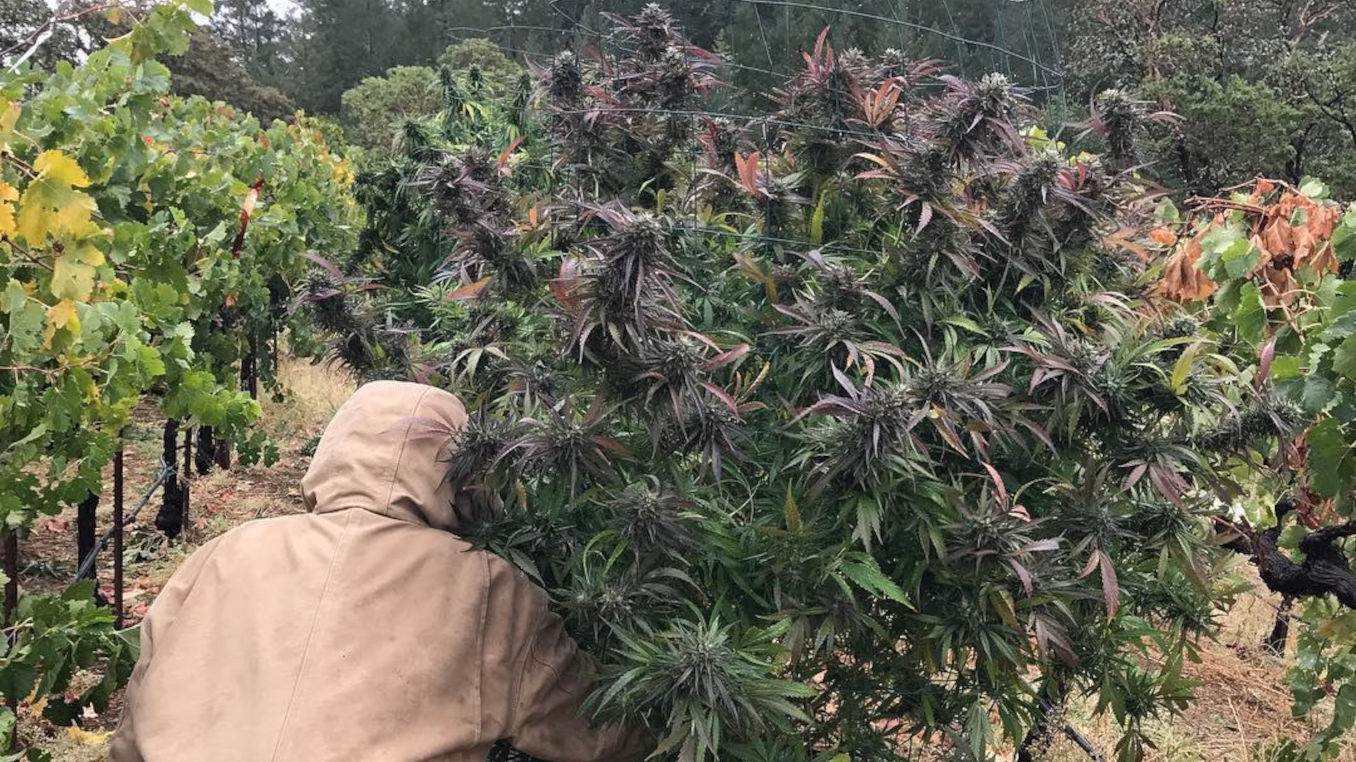
Gorilla Glue #4 yield per plant is quite impressive at 159g © Growdiaries © Canadian

For this Gorilla Glue #4, harvest time was a happy time because buds were big, very dense, and thus massive. The grower harvested 159 g (5.62 oz) from just one of 3 plants grown under a 400W HPS. The overall yields per watt for GG4 and other plants in the tent were through the roof.

The grower noted an extremely potent high once the buds were cured, and the earthy and flowery smell produced a combination that was hard to describe but very pleasant.

We have analyzed GG4 yields in other grows too and compiled them in a table:

Yield per Plant Weeks, Total Weeks in Flower Type of Light Wattage
53g (1.87oz) 16 10 LED 450
92g (3.25oz) 24 9 LED 400
45g (1.57oz) 12 7 HPS 400
38g (1.34oz) 14 9 LED 400
100g (3.53oz) 14 7 HPS 400
31g (1.1oz) 13 8 LED 340
129g (4.55oz) 18 9 LED 300
76g (2.68oz) 13 7 LED 280
164g (5.78oz) 19 9 LED 340

As you can see, on average, Gorilla Glue #4 yields 81g (2.85oz) per plant after 8.3 weeks of flowering. Gorilla Glue #4 veg time depends on the setup and growing methods, and in our sample, the whole life cycle takes from 12 to 24 weeks, with about 16 weeks on average.

Main Takeaways From Gorilla Glue #4 Grow Journal

Gorilla Glue genetics is strong, vigorous, and easy to grow. This strain doesn’t take long to flower, but you might come across a stretchier (and longer) GG4 phenotype. In this case, we recommend shorter veg.

You can get away with feeding your Gorilla Glue 4 higher doses of nutes, but the nutrient schedule doesn’t need to be very sophisticated to get good results (as we’ve seen in this GG4 grow diary). She’s also a very thirsty variety.

The smell isn’t overwhelming, but you’ll still need a good carbon filter during flowering stages. Gorilla Glue #4 responds well to any high-stress training methods and yields way above average.

As for the quality, the buds have a very complex and nuanced flavor that is not so easy to describe, and the smoke is insanely potent. But it’s what you may expect from one of the most resinous genetics out there. Happy growing!

All images in this post were taken from GrowDiaries, the world’s largest weed-growing community.

Cannabis Heat Stress: How to Spot, Prevent, and Treat It

Most of you know how important it is to control the temperature in your weed garden. You also understand that when it’s too hot for too long, the plants will begin to suffer and show you exactly what’s wrong with them. The trick is knowing where to look. In this post, we’ll talk about how the symptoms of cannabis heat stress look like so that you don’t mix’em up with other issues and take proper action right away.

  • you can notice symptoms of cannabis heat stress on both leaves and buds
  • leaves start to cup (curl up) and later become brown and burned
  • in flower, buds may start to foxtail
  • control the distance from the light and set up proper ventilation
  • maintain the right temperature in the root zone

    top view of a 3 week old weed plant with cupping leaves due to cannabis heat stress
    A young plant suffering from heat stress. © Growdiaries © Sandero

Experienced cannabis growers recognize signs of heat stress right away. Heat stress may affect leaves as well as buds.

Symptoms of Heat Stress on Leaves

It all starts when those sharp points on the leaf edges begin to curl up. Thereby, the plant tells you that it has become too hot.

A side view of a 3 week-old cannabis plant with points on edges curling up
Serrated edges on the leaves start to point up. © Growdiaries © misterb

And if you don’t resolve the heat issue soon, the leaves curl up even more and start to look like tacos.

A small stunted autoflower with heat-stressed cupping leaves
Cupping leaves and stunted growth due to heat. © Growdiaries © misterb

It’s hard to say why it happens. Maybe that’s how the plant tries to reduce the surface that receives light.

In an indoor setup, leaf cupping often happens on the parts of the plant that are closest to the bulb. It’s because they receive too much radiant heat from the light. And farther down the stem, leaves may remain normal.

And sometimes, only SOME of the upper leaves show these symptoms — where the light creates hot spots.

Of course, during a heatwave, your whole grow room can get too hot. Then you may notice signs of heat stress on both upper and lower leaves.

Let the problem persist, and you’ll see the situation get much worse. The leaves may get yellow and then brown. The discoloration starts at the tips and along the edges. Later, the heat burn spreads to the whole leaf, and eventually, the leaf becomes dry and crispy.

A top view of flowering cannabis tops with cupping, yellow, and scorched leaves
Here, the heat-related issues got out of hand. © Growdiaries © sndwich

Don’t Confuse Cannabis Heat Stress and Calcium Deficiency

It’s easy to confuse the signs of cannabis heat burn and the symptoms of calcium deficiency. Calcium-deficient leaves also have brown spots and may become dry and brittle at the tips and along the edges, but they also twist in every direction.

Cannabis leaves getting yellow, brown, and twisted
Brow, dead, distorted leaves are signs of calcium deficiency. © Growdiaries © sndwich

Of course, there are situations when plants have both these issues at the same time. Calcium deficiency makes the plants more vulnerable to heat stress, and heat stress makes the calcium-deficient leaves dry out faster.

Droopy Leaves

Droopy leaves aren’t a sign of heat stress. Rather, they indicate that the plant is thirsty. So, if you see that the leaves on your cannabis hang lifeless, maybe it’s time to water your garden. And don’t forget to water more often when the temperature in your grow room rises.

Several cannabis plants in a big grow tent with drooping leaves after the lights have been turned off
These plants probably get less water than they need for transpiration. © Growdiaries © stumay111

Btw, droopy leaves aren’t a very specific symptom. So, it’s easy for inexperienced growers to confuse underwatered wilting and overwatered “claws”. Besides, leaves may slightly droop every evening (before lights-out), and it’s perfectly normal.

Light Stress

Both light stress and heat burn often stem from the same problem — the light being too close to the plant tops. Though these two may manifest at the same time, they are different issues. With good ventilation, you may have an ideal air temperature in the grow tent (and no heat stress), but your plant tops will still suffer from too much light.

Light stress starts with the yellowing of the leaves. Please note that usually, it’s not the youngest leaves on the very top that start to yellow, but the ones just below them. It’s because they have been exposed to light a day or two longer and so get affected earlier.

Light stress is a very common issue in seedlings. Growers often think it’s potassium deficiency and try to treat it as such, but all they need to do is raise the light.

Cannabis seedlings with the yellowing of cotyledons and the first pair of true leaves due to light and heat stress
The scorching Californian sun isn’t kind to these seedlings. © Growdiaries © misterb

Symptoms of Heat Stress on Flowering Buds

Extreme temperature can damage flowering weed plants in several ways. It can interfere with the production of THC and terpenes, making your smoke less potent, aromatic, and flavorful. It can also lead to lower yields because heat prevents buds from filling out and they remain airy and spongy. In a worst-case scenario, buds start foxtailing, especially if you grow one of the strains with a tendency to foxtail.

Foxtailing and leaf cupping due to extreme heat
This Critical Purple Auto grown on a rooftop in NorCal displays both the foxtailing and the taco-ing of the leaves. © Growdiaries © misterb

If the heat is extreme—even for a short period of time—the pistils may change their color from white to brown prematurely. Pistils are the female hairs on cannabis buds. It’s normal for them to become amber or brown at the end of the life cycle when the buds are already big and dense. But if the flowers have only begun to form, they should have white pistils.

How Much Heat is Too Much?

Just like humans, marijuana plants can tolerate very high temperatures for a short time. The problems begin when the temperatures are consistently above optimal levels. You may ask: what are those optimal levels?

Well, we’ve covered that in another article where we cite available research on the topic. In a nutshell, aim for 77-86°F (25-30°C) during the day and 10°F (8°C) lower at night. When the temp levels creep above the allowed maximum, photosynthesis slows down and you begin to notice stunted growth and heat stress symptoms.

And there’s one more thing we didn’t mention earlier: cannabis pests LOVE hot and humid environments and multiply in great numbers.

Fan leaves of cannabis yellow and dry due to heat, pests, and other problems
A lot of tiny spots on the leaves point to some pest infestation. © Growdiaries © sndwich

How to Take Care of Heat Indoors

First of all, don’t plan any indoor growing for the summer months. Otherwise, your grow tent will turn into an oven when a heatwave comes. Second, try to use lights that generate less heat. This means LED quantum boards instead of HPS bulbs.

A very clever trick is to run your lights during night hours—when it’s generally cooler—and turn them off for the day. The only issue could be light leaks. They don’t matter if you grow autoflowers, but with photoperiod strains, make sure there are no light leaks at the seams. Otherwise, they can disrupt flowering.

You can also try and raise the levels of CO2 to help cannabis deal with heat stress. For example, you can place CO2 bags in your grow tent. Please bear in mind that this method is controversial. Available research in other crops draws a very complicated picture. Sometimes, more CO2 is helpful in dealing with high temps, and sometimes it hurts plants even more.

Clearly, the most important thing is ventilation. Your extractor fan should refresh the air inside your grow space at least once every 3-5 minutes. And if you think problems with heat are possible, make it every minute. The same goes for small grow tents. The smaller your tent is, the easier it is to overheat.

So, calculate the volume of the grow tent in cubic feet, write down this number, and buy a fan with the same CFM (the cubic-feet-per-minute capacity).

Also, install an oscillating fan that will blow just above the canopy level. It will help protect your plant tops from heat burn.

Related Post  Autoflower Temp and Humidity: With Real-Life Examples

The Temperature in the Root Zone

Hydroponic growers know very well the importance of keeping the roots nice and cool. If the temperature of the nutrient solution gets way above the recommended 65°F (18°C), problems begin. The levels of dissolved oxygen go down, and the pathogens thrive.

The temperature in other mediums, such as soil or coco, is just as important, but soil growers often forget about it and learn how important that is the hard way.

So, when growing weed under powerful bulbs indoors, make sure to shade your pots from the light. Especially if the pots are black and thus absorb the radiant heat easily. For the same reason, it’s safer to use terracotta containers with thick massive walls than thin plastic ones. And when watering your plants, be sure to use water that is not too warm.

Important! Even if the temperature of the air is way off the mark but the temperature in the root zone is within the ideal range, the plants will be perfectly healthy and show no signs of cannabis heat stress.

Measures Against Cannabis Heat Stress Outdoors

Outdoors, you can help your weed garden deal with heat in three ways:

  1. Keep the roots cool.
  2. Shade the plants from the sun during the hottest part of the day.
  3. Help them survive a heatwave with regular watering.

If you grow cannabis outdoors in pots (rather than on beds), make sure the containers themselves don’t receive any direct light. And when the plants grow in the ground, use a lot of mulch to cover the ground and thus insulate it from heat.

In a hot and sunny climate, plant your cannabis in a spot where trees or walls shade them for a couple of hours in the afternoon. However, a more efficient way is to plant your garden in an open spot and spread shade cloth over it when necessary. And if you grow weed in pots, you can move them around, chasing either the sun or the shade as needed.

Watering your garden generously each morning will help the plants deal with the heat. And if the water is cool, it will not only provide moisture but also lower the temperature in the root zone.

Can You Revive a Heat-Stressed Plant?

In most cases, all you need to do is adjust the temperature and simply wait for the plant to get better. However, some growers propose more hands-on approaches.

Silica (Silicon Dioxide)

Many nutrient manufacturers offer supplements that contain silica. They claim that silica makes cell walls tougher, and tougher cell walls—among other things—make sure leaves lose less water during extreme heat and drought. There are also other mechanisms of silicon’s effect on heat resistance.

The good news is that research on crops other than cannabis, such as rice and tomatoes, fully supports these claims. Silica really makes higher plants more tolerant of heat.

And this is a list of cannabis growing supplements that contain silica:

  • Advanced Nutrients Rhino Skin,
  • True Plant Science Silica Gold,
  • Botanicare Silica Blast,
  • B.A.C. Silica Power,
  • NPK Industries RAW Silica,
  • Cyco Platinum Series Silica,
  • Advanced Hydroponics of Holland Advanced Silica.

Humic Acid

There is ample evidence that humic acid enhances heat tolerance in plants. Researchers have observed these effects in Arabidopsis, tomatoes, and oats. The first of these studies even suggested the exact mechanisms of how humic acid makes plants more heat tolerant. Namely, it regulates several relevant genes, including Heat-Shock Protein (HSP).

Cannabis growers widely use humic acid which is a part of the following products:

  • Green Buzz Liquids Humic Acid Plus,
  • NPK Industries RAW Humic Acid,
  • Earth Juice Rich Humic,
  • Guanokalong Black,
  • Humboldt Nutrients Hum-Bolt and FlavorFul.

Seaweed Kelp Extract

Seaweed contains plant growth regulators, aka plant hormones. As their name suggests, these molecules can regulate many important aspects of plant growth. So, growers use seaweed to boost germination and rooting and to increase yields. Some say seaweed kelp extracts help cannabis recover from environmental stresses, including heat and drought.

However, in her review of the available scientific literature, Dr. Linda Chalker-Scott notes a huge disproportion between aggressive marketing of this “wonder supplement” and its middling benefits. In other words, you’ll end up overpaying for something that in fact doesn’t do much.

With that said, here are a few seaweed kelp products that weed growers use:

  • Kelpak Seaweed Extract ~ Vegetable Fertiliser,
  • Technaflora Soluble Seaweed Extract,
  • Gaia Green Soluble Seaweed Extract,
  • Platinium Hydroponics Engrais Seaweed Extract,
  • Greenleaf Nutrients Kelp Extract,
  • Maxicrop Liquid Seaweed / Liquid Seaweed Plus Iron,
  • Plant Magic Catalyst.

Well, this wraps it up. Now you know how to diagnose, prevent, and treat heat stress in cannabis. And if you live in a hot climate or your grow setup has permanent temperature problems, try cannabis strains that are resistant to heat.


Foxtailing Strains 2022. With Pictures and Statistics

Article Highlights

  • The tendency to foxtail is most common among tropical sativas
  • Some varieties, like the Trainwreck family, are notorious foxtailers
  • Some of the “purple” or “blue” genetics may tend to foxtail
  • Even if a strain is prone to foxtailing, not every phenotype will foxtail on you
  • Even “normal” strains may foxtail as a response to heat/light stress
  • The 11/13 light cycle increases the expression of foxtailing genes, too
cannabis flowers with calyces looking like a string of pearls
This Devil Cream Auto is an example of extreme foxtailing.

In a separate article, we talked about the reasons your buds may foxtail. The usual suspects are heat and light stress. It means that either your plant tops are too close to the lights or there’s been a heatwave that raised the temperature in your growing space.

In yet another post, we also mentioned that keeping your photoperiod strains under 11/13 in flower may result in foxtailing. It’s because foxtailing is a sativa trait and the 11/13 light cycle leads to the expression of sativa traits.

And sometimes you have absolutely no control over foxtailing because it’s genetic. So, if you hate to see your buds foxtail, avoid the strains in the list below. And if you want to grow foxtailing weed, prepare to be patient. When growing cannabis from seeds, you’ll see several phenotypes in the same strain and not all of them will foxtail.

I have personally seen foxtailing in my grow room on a few occasions, but for this post, I needed a bigger sample. So I did a thorough search through the Growdiaries community to find marijuana strains that foxtail more often than others.

Foxtailing in Sativa Strains

You have bigger odds of seeing foxtailing if you grow strains that are pure sativas or have a very high percentage of sativa genes in them. A good example is any strain with “Haze” in its name.

Mature flowers of Dr Grinspoon looking like strings of pearls
A close up of a Super Lemon Haze bud with a spire on top and bullet-shaped calyces on the sides
A view of a grow tent with huge foxtailing colas and a closeup of a cola with many spires
Thin tapering tops of very frosty buds
Two Acapulco Gold buds: an indoor and outdoor one, both showing mild foxtailing
Mature swollen buds with signs of foxtailing
Closeups of cannabis buds with huge swollen calyces
A gloved hand holding a huge, mildly foxtailing marijuana cola
Very mild foxtailing on fat and dense marijuana buds

Dr. Grinspoon (Barney's Farm) © Growdiaries

Super Lemon Haze (Green House Seeds) © Growdiaries

G13 Haze (Green House Seeds) © Growdiaries

Hawaiian Snow (Green House Seeds) © Growdiaries

Acapulco Gold (Barney's Farm) © Growdiaries

Laughing Buddha (Barney's Farm) © Growdiaries

A.M.S. (Green House Seeds) © Growdiaries

Tangerine Dream (Barney's Farm) © Growdiaries

Neville's Haze (Green House Seeds) © Growdiaries

next arrow
previous arrow

Swipe to see all images in the gallery.

Frankly, it’s not always clear if sativa buds are foxtailing or not. Sativas often have thin, spear-like colas. Or the buds may explode in every direction, become very fat but remain spongy at the same time. So, there were quite a few borderline cases, but I tried to do my best. Here are the results.

Strain, Sativa/Indica
Breeder
Foxtailing
None Mild Strong Extreme
Dr. Grinspoon, 100/0
Barney’s Farm
1 6 9 2
Super Lemon Haze, 70/30
Green House Seeds
16 6 4
G13 Haze, 80/20
Barney’s Farm
8 4 1
Hawaiian Snow, 80/20
Green House Seeds
3 1
Acapulco Gold, 70/30
Barney’s Farm
13 3
Laughing Buddha, 80/20
Barney’s Farm
19 3
Super Silver Haze, 70/30
Green House Seeds
4 2
A.M.S., 40/60
Green House Seeds
1 2
Tangerine Dream, 60/40
Barney’s Farm
20 2
Neville’s Haze, 90/10
Green House Seeds
1
Pineapple Haze, 30/70
Barney’s Farm
2 1
Arjan’s Haze #3, 70/30
Green House Seeds
4 1

The Trainwreck Line

Whenever people start to discuss foxtailing genetics, the name “Trainwreck” pops up every time. Indeed, I managed to find a couple of examples where Trainwreck buds foxtail in a big way.

Extremely long spires on Train Wreck autoflower
Many protruding shoots on K-Train colas
Long spear-like marijuana bud with many white pistils

Train Wreck Auto (King Crop Seeds) © Growdiaries

K-Train (Green House Seeds) © Growdiaries

Dark Ghost Train (Rare Dankness) © Growdiaries

next arrow
previous arrow

Swipe to see all images in the gallery.

Unfortunately, I only found a few grows, so the sample is very small. Anyway, these are the results:

Strain, Sativa/Indica
Breeder
Foxtailing
None Mild Strong Extreme
Train Wreck Auto, 60/30/10
King Crop Seeds
2 1 1
K-Train
Green House Seeds
1 1
Dark Ghost Train
Rare Dankness
1 1
Trainwreck Auto, 55/45
FastBuds
8 1

Purple or Blue Genetics

When I was searching for foxtailing strains on Growdiaries and on different forums, I was surprised to see foxtailing in such varieties as Blue Cheese, Critical Purple Auto, and Devil Cream Auto. All these strains don’t have much sativa in their DNA, but they’re all purple.

Then I asked myself what comes to mind when I think of purple buds. Well, I picture them either bloated and loose, or with huge dense calyces that shoot in every direction and almost resemble bullets. And sometimes purple buds look like a bunch of grapes or even a string of pearls.

Buds looking like a bunch of frosty pearls
A purple weed bud with many fat tapering offshoots
A weed bud untrimmed and displaying very strong foxtailing and the same bud trimmed
Two different foxtailing colas: one with several side spikes, the other with a spear-like top
Big and lumpy purple buds before harvest

Devil Cream Auto (Sweet Seeds) © Growdiaries

Dark Devil Auto (Sweet Seeds) © Growdiaries

Black Cream Auto (Sweet Seeds) © Growdiaries

Blue Cheese (Royal Queen Seeds) © Growdiaries

Purple Punch (Barney's Farm) © Growdiaries

next arrow
previous arrow

Swipe to see all images in the gallery.

Well, it’s just a theory of mine that many purple genetics tend to foxtail. You can check it yourself, and below, you can find a few examples. Please note that Sweet Seeds Devil Cream Auto turned out to be the second most foxtailing strain in our review. And both of its parents—Dark Devil Auto and Black Cream Auto—have this tendency, too.

Strain, Sativa/Indica
Breeder
Foxtailing
None Mild Strong Extreme
Devil Cream Auto, 20/80
Sweet Seeds
10 5 2 3
Dark Devil Auto, 60/40
Sweet Seeds
9 7 1
Black Cream Auto, 5/95
Sweet Seeds
11 5 1
Blue Cheese, 40/60
Royal Queen Seeds
5 4 1
Critical Purple Auto, 0/100
Growers Choice Seeds
14 2
Purple Punch, 10/90
Barney’s Farm
29 4

That’s it for now. Later, I may add other genetics to this list. And if you have encountered foxtailing strains in your grows, please share in the comments.

Foxtailing Buds: Good or Bad? Causes, Fixes, and More

Foxtailing buds have their fair share of fans. It’s evidenced by the fact that some growers look specifically for foxtailing strains when they shop for cannabis seeds. However, this is a niche demand, and most of you prefer their buds to be compact and dense, and not elongated, wispy, and airy. Unfortunately, this is exactly what foxtailing in weed leads to.

Foxtailing buds can be due to either genetics or stress, usually heat and light stress. While you can’t fight genetic foxtailing, you can and should do your best to reduce environmental stresses. It’s not just about the bag appeal of your buds, but about their weight, potency, and aroma as well.

What is Foxtailing in Plants?

We say that buds are foxtailing when they begin to elongate uncontrollably at the tip or grow a lot of tapering side shoots. The cola assumes a strange frilly shape that is not to everyone’s liking.

pointy buds on Green Crack Auto

This huge and high-yielding Green Crack Auto has very pointy buds © Growdiaries © Hawkbo

But let’s start with how cannabis buds normally develop. Flower clusters in cannabis consist of many calyces. A calyx is where the seed develops if the buds catch some male pollen. Calyces usually stack up very close to each other, forming those compact fat colas that we love so much.

However, if you happen to grow some naturally foxtailing Sativa or it’s too hot in your garden, calyces may grow far apart, with noticeable spaces in between. Then the cola may indeed remind you of a fox’s tail. (Interestingly, cola means ‘tail’ in Spanish.)

In the most severe cases, each calyx may grow on its own separate ‘stick’, but mostly a string of calyces just grow on top of each other, forming thin tapering spires.

harvested and trimmed foxtailing buds in a glass bowl

This Zkittlez Auto was flowering during a heatwave, hence the foxtailing. © Growdiaries © Treighfunky

Quite often, you will also see a lot of small, roundish, deep-green, and not very sugary-looking ‘sugar leaves’ growing between the calyces of a foxtailing plant. They look like the plant has second thoughts of reverting back to veg. In short, foxtailing weed is something you can’t miss.

sugar leaves on foxtailing buds

‘Sugar leaves’ on foxtailing buds have a strange shape and color. © Growdiaries © Treighfunky

What Causes Foxtailing Buds?

There are two main foxtailing causes — the plant’s genetic makeup and its specific reaction to environmental conditions. We’d say these two are closely related, and we’ll shortly explain why.

Let’s start with the second one. Why does foxtailing happen if nothing in its genes makes it particularly prone to this issue? Most marijuana growers agree that what causes foxtailing in weed is usually heat stress. Frankly, we couldn’t find any research linking bud foxtailing to heat stress in cannabis, but the issue was studied in other species.

There is the example of heads of cabbage not forming in the tropics. Tropical heat turns a cabbage plant into a tall stick with every leaf on it growing separately. At least, that’s what they told us in school. The same thing happens when people try to grow temperate-zone pines in the tropics. Individual shoots may each become several feet long without any side branching.

In cannabis, this reaction to heat may be a defense mechanism. In the tropics, heat goes hand in hand with high humidity which may spoil the buds if they are too solid. That’s why Sativa buds are generally airier than Indica buds. And foxtailing is one way to achieve that. This would explain why tropical Sativas have more predisposition toward foxtailing.

Is Foxtailing on Weed Bad?

The answer depends on genetics. If your strain of weed has genes that tell it to foxtail, you may not like the looks of the buds, but they may turn out to be outstanding in every other respect. The potency, the character of the high, as well as the aroma and the flavor may be like nothing you’ve ever experienced.

In this case, foxtailing isn’t good or bad per se. It’s just the strain’s feature, and you’ll have to accept it. Or choose another strain for the next time and move on.

The Dr Grinspoon strain is a perfect example of genetic foxtailing

The Dr Grinspoon strain is a perfect example of genetic foxtailing. © Growdiaries © DreamCatcher

But if foxtailing is not genetic, treat it as a sign of trouble and adjust your environment accordingly. People often wonder: “Does foxtailing affect potency?” Foxtailing itself doesn’t, but its UNDERLYING cause—be it heat stress or light stress—certainly does. Excessive heat also leads to the evaporation of terpenes, making your buds less aromatic and flavorful. And yields may also suffer.

So, while foxtailing weed isn’t bad, it’s also not the best bud you can hope to grow. It’s blander, less potent, to say nothing of its reduced bag appeal.

How to Fix Foxtailing Buds?

More often than not, the cause of foxtailing on buds indoors is the wrong distance of lights from the plants. You can tell that this is the case if all of the fox tailing is on the tops closest to the light. So, to stop foxtailing, simply raise the light.

Devil Cream Auto foxtailing in week 9 from seed

Devil Cream Auto foxtailing in a bad way in week 9 from seed. © Growdiaries © scotch_egg

For traditional HPS bulbs, try the back-of-your-hand test. Place your hand under the lights on the level of plant tops, palm down. If you feel a burning sensation on the back of your hand, the light is too close. It means that the buds receive too much heat radiation, and this indeed may be the reason why they foxtail.

LED lights can cause foxtailing on weed, too, but testing the distance with the back of your hand may not work. However, most LED lights worth using in a cannabis garden come with instructions. Follow them and watch how your plants react. If the distance is too short or the light operates at full power, you will see symptoms of light stress and heat stress. If the light is too far off or dimmed too much, you may see an unusual amount of stretch. Try to find the ‘Goldilocks zone’ and stay within it.

The Importance of Ventilation

Sometimes, heat radiating from the light affects not just the top buds but causes the temperature to increase throughout the tent. It happens a lot in summer, especially during a heatwave. In this case, you may see the foxtailing affect not only the tops but the middle and lower bud sites, too. A good extractor fan may help the matter, but using an oscillating fan is also important. By constantly moving the air inside the grow space, it will make sure there are no heat pockets.

stacked calyxes on the Auto Kaya 47 bud

For this Auto Kaya 47, the temperature was quite low in flower. So, the foxtailing is probably genetic. © Growdiaries © Marquise_ao_Sul

How to Stop Foxtailing Outdoors

A heatwave can wreak havoc on your outdoor garden, too. In a greenhouse, you can also use fans to lower the temps inside it, but outside, the only way you can help your weed plants deal with the heat is to shade them from the sun during the hottest hours.

If you live in the desert, your best option might be to plant your garden in a spot where trees or structures shade it from the afternoon sun. Or you may span the semi-transparent shade cloth over your plants.

Related Post: Outdoor Marijuana Temperature Range

READ NOW

Can Foxtailing be Reversed?

If you have caught foxtailing early on in flower, odds are that you can still get normal-looking buds at harvest. The plant simply has enough weeks of flowering to grow a bunch of normal flower clusters on top of those that were initially foxtailing.

But if the problem persists till late in flower, and buds keep foxtailing near harvest, there’s nothing you can do to change their looks for the better. So be proactive and don’t postpone resolving the issue till the end of flower.

When to Harvest Foxtailing Buds?

In contrast to normal flowers, foxtailing buds have this unfortunate feature: they take forever to mature. You just see more and more calyces forming, with more and more white pistils on them. And when you watch the trichomes on this new growth, they are clear, meaning not ready for harvest. This is another reason to not let your buds foxtail.

Zkittlez Auto foxtailing before the harvest

It may not look it, but this foxtailing bud has actually been 8 weeks in flower. © Growdiaries © Treighfunky

Other than that, the general rule applies. Harvest foxtailing buds when the majority of the trichomes or all of them are milky and some are starting to turn amber. And if you don’t have a magnifying glass to inspect the trichs, wait at least until all of the pistils (female hairs) wither and turn brown. In either case, the constant emergence of fresh growth on your foxtailing buds will try your patience.

The Good, the Bad, and the Ugly

The bottom line is that fox tailing weed can be a good thing if it’s a genetic feature of some exotic tropical Sativa. But it’s bad if the foxtailing is due to stress.

Stress can do so much more damage to your cannabis than simply spoiling the appearance of your buds. It can negatively affect yields, flowering time, potency, smell, and taste. So, if you see any sign of stress—whether the foxtailing or anything else—act quickly and try to create for your weed the optimal conditions it deserves.


The Best Cannabis Srore

Price: from $5

Pack: from 1 seed

Shipping worldwide

Price: from $15

Pack: from 1 seed

Fast ship US only - 1 day

Price: from $80

Pack: from 5 seeds

Shipping US only

Price: from $50

Pack: from 5 seeds

Shipping worldwide


Autoflower Clones: Don’t Try to Find Them for Sale. Here’s Why

Cloning cannabis is a very convenient way of plant propagation. And buying clones, where it’s legal, is probably the easiest way to start a grow. The other thing that makes the life of an amateur grower so much easier is using autoflowering genetics. You put two and two together, you want autoflower clones. But does anyone sell them?

While autoflowers CAN be cloned, what you can’t do is keep them from flowering. Autoflower clones may begin to flower even before they have rooted. And, once in flower, you can’t revert them back to veg. As a result, autoflowering clones will stay small and yield very little.

autoflowering clones: a very small autoflower in a pot right before harvest and a dry resinous bud held between fingers
This is what your harvest will look like if you grow your weed from autoflowering clones. © GrowDiaries

So your best bet is to grow autos from seeds. Luckily there are enough online vendors that will deliver them right to your door. Click this link if you want a reliable seed shop that has shipped close to a million orders to practically all the countries in the world, including the U.S. and the UK.

Why Buying Autoflower Clones is Virtually Impossible

The reason is that you want two mutually exclusive things from these autoflowering cuttings:

  • you want them to flower automatically,
  • you DON’T want them to flower automatically, at least not till they’re big enough for your needs.

Autoflowers are a special kind of cannabis. The presence of Ruderalis genes in their DNA makes them ignore the light cycle. It doesn’t matter if you’ve planted them in spring or summer or fall. They simply don’t care for how long the days or the nights are.

a small flowering weed plant in a plastic pot and its trimmed buds on the scales
Another example of a small autoflower with very little yield. © GrowDiaries

And indoors, they don’t care for the light schedule. Whether 12/12 or 18/6 or even 24/0 or anything in between, it doesn’t change their timeline. They come up out of the soil, have short but vigorous veg, and then enter the flowering stage which doesn’t last very long either.

And when you take cuttings and root them as autoflower clones, the transition to flowering doesn’t slow down. Well, maybe for a couple of days compared to the main plant. So your autoflowering clone will be nothing but a rather small branch with a handful of flowers on it. It will never have a chance to develop into a large multi-branch bush.

Compare this with the results of a most unremarkable, run-of-the-mill Gorilla Glue Autoflower grow. You simply don’t want to purchase clones if you can buy seeds like these.

Cloning Early Versions and Fast Versions

When browsing seed shops, you may come across varieties that have ‘fast version’ or ‘early version’ added to their names. These strains are photoperiod-dependent, but they have enough autoflowering genes in them to start and finish flowering (outdoors) a couple of weeks earlier than normal photoperiod strains. A very handy feature for climates with short summers. You CAN clone these genetics and keep them in veg indefinitely. We’d say offering fast/early version clones for sale would make sense.

Taking Autoflowering Cuttings from Superautos

Superautos isn’t an official term or anything. These plants are supposed to be normal autoflowers, but, for some reason, they don’t start to flower automatically. When dealing with a superauto, the grower may need to change the light schedule to 16/8, 14/6, or even 12/12 before the plant transitions to the flowering stage. You can clone such genetics, too.

Well, that wraps it up. Stop looking for autoflowering clones. Nobody sells them. Or if they do, they shouldn’t. Autoflowers are a kind of genetics that are only grown from seeds, not clones.

All images in this post were taken from GrowDiaries, the world’s largest weed-growing community.