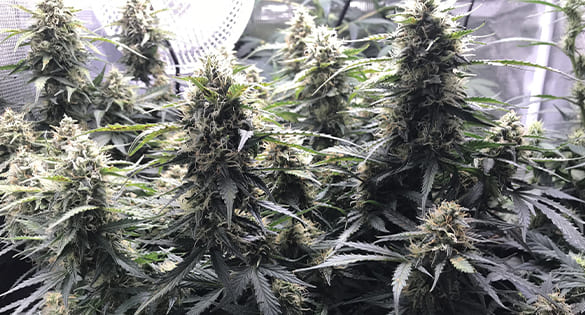
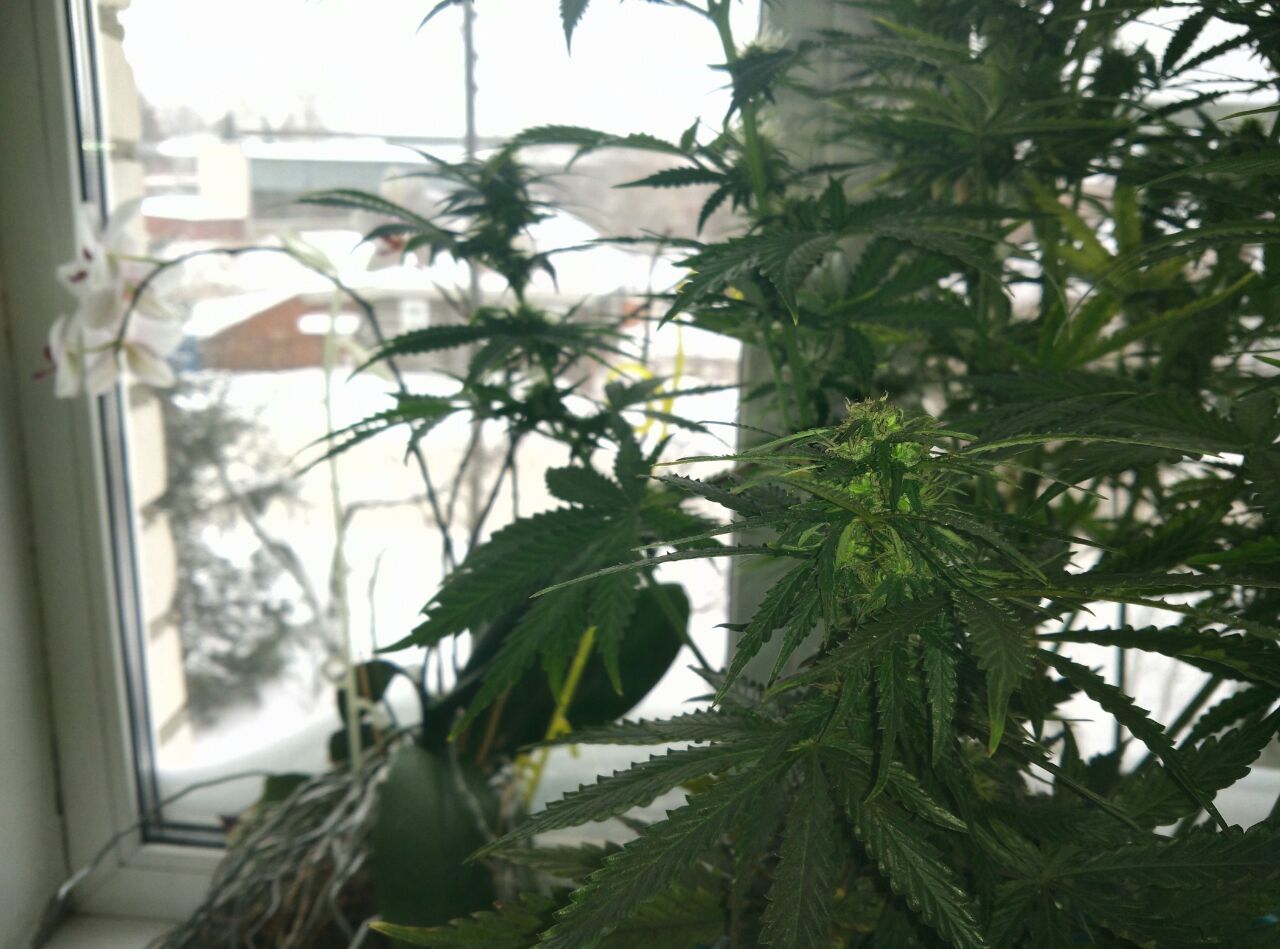
11/13 Flowering Light Cycle: Can it Improve Your Grow?
When growing photoperiod marijuana, it’s a standard practice to give it 18/6 in veg and 12/12 in flower. However, there are growers who use a shorter photoperiod and swear by it. Let’s review the existing studies and anecdotal evidence and see if 11/13 flowering light cycle and similar light schedules really work.
What Does Science Say on Flowering Under 13/11?
It’s notoriously difficult to find any peer-reviewed scientific publications on the subject of cannabis cultivation. The question of using 11/13 for flowering is no exception. There’s one major paper that studied the effects of light (intensity, spectrum etc.) on cannabis production. It only briefly states that shorter photoperiod potentially leads to smaller yields*. Well, it’s expected, and this is the same thing as growers on forums say.
Another study actually focused not on medical marijuana, but on hemp grown for fiber. It also noted that shorter photoperiod causes earlier flowering**. The researchers observed little difference in flowering times if days lasted 13 h 40 min or less. However, if light hours were at 14 h 40 min or more, this significantly delayed the beginning of flowering (and the harvest time).
Well, hardly any real-life grower has ever experimented with a 14/10 cycle, so this doesn’t give us much insight. It’s interesting that both 12/12 and 13/11 fall into the “13 h 40 min or less” category, and the scientists didn’t find the difference statistically significant.
And in case you’re wondering what’s the maximum length of day at which most cannabis plants start to flower indoors, it’s 13.2 hours (and 10.8 h of dark)***. So not only the ‘11 on 13 off flowering’ light schedule, but also the opposite (13 on 11 off) can be used for flowering. At least, for indicas and indica-dominant strains.
And that’s it in terms of reliable scientific data. Let’s hope we get more in the future.
What’s the Consensus in the Growing Community?
It’s very difficult to obtain objective results of whether the 13/11 flowering cycle works for you or not. To get hard evidence, you’ll have to run a side-by-side experiment. Nobody has bothered to do this so far. So we don’t know for sure. Still, there are several points that all 11/13 growers agree upon:
A slightly shorter flowering time. Comes handy if you’re in a hurry, or want to save a day or two worth of electricity.
A slightly lower yield. Here you have a classical tradeoff between speed and reward. You can try to offset this with more powerful lights though.
Saving electricity. Even if the 13 11 light cycle doesn’t make the flowering shorter, you’ll save 1 hour a day worth of energy.
More Controversial Findings on 11/13 Flowering Light Cycle
Perhaps, the list above didn’t inspire you to try less than 12 hours of light during flowering? Well, here are a few extra points that’ll probably change your mind.
At least two celebrity breeders—the legendary DJ Short of the Blueberry fame and Swerve from Cali Connection—recommend to shorten the day during flowering. DJ Short believes that this method is great for breeding. It’s because it increases the expression of sativa genes in a hybrid. This affects the plant structure and the shape and the texture of buds (e.g. foxtailing). More importantly, it also influences the high. Presumably, the standard 12/12 cycle makes the effect more couch-locky. And if you want more of the cerebral sativa energy, you better make light hours shorter and darkness longer. The effect of 11/13 grown buds also tends to be a creeper, according to anecdotal reports.
Some people say that they’ve noticed less stretch on 11/13 during flowering. Which means that you should give your plants a longer veg than normal if you want the same final height.
There’s much controversy about whether the 13/11 flowering time produces more trichomes or less. Some think less light equals less THC. Others say THC gets degraded by light, so more hours of darkness means more potency. Anyway, if you want more resinous buds, the 11/13 method doesn’t seem like a good idea. You may want to try the extended dark period before harvest instead.
Don’t be Afraid to Experiment with 11/13!
For people who love to tweak their growing conditions, changing the photoperiod during flowering presents a lot of opportunities. Just keep in mind that, with days lasting more than 14h 40min, no flowering usually happens. But anything less than that is acceptable and gives you a lot of room for trial and error.
Try and experiment with incremental changes of 15 minutes over several consecutive grows until you hit a sweet spot. For example, you may find that 10h 30 min on / 13 h 30 min off works best for a particular strain. However, you’ll have to find it for yourself—there’s no one-size-fits-all solution. Maybe the tried and true 12/12 schedule would be perfect for you after all? Who knows!
Dark Before Harvest: Does Darkness Lead to Dankness?
The quality of buds depends on the percentage of THC and other cannabinoids, and growers go to great lengths to increase their levels. This also goes for the aromatic substances called terpenes. One of the popular ways to danker buds is the extended dark period before harvest. It can range from 24 hours to 1 week or even more. And don’t think that the usefulness of darkness before harvest is a myth. It’s not like there’s only some weak anecdotal evidence to support it. There are actually some compelling theories explaining why it happens.
Dark Time Before Harvest Theories
One explanation of why dark before harvest improves the quality of weed is that mild stress may increase the production of resin in buds. Another way to stress your plants in a (supposedly) good way is to lower nighttime air temperature. Or even to cool down the root zone by watering your mature plants with ice-cold water. There may be some truth to it, so feel free to experiment, just don’t be sadistic.
Another theory says that such a reaction to extended darkness is an evolutionary mechanism. Here’s the logic: cannabis begins to flower when nights become longer and longer. This signals to the plants that they better hurry if they want to produce seeds before winter. Unpollinated female plants keep increasing the mass of flowers in hopes that at least some of them manage to catch pollen. And if nights are not just long but seemingly endless, the process of making more flowers (and more THC) reaches a frenetic pace. I personally don’t think it a good explanation. Such a response could hardly have evolved because in nature no one turns off the sun for several days in a row.
Yet another theory (which I like) says that at night sugars and starches travel from the above-ground part of a plant to the root zone and are stored there for future use. Now sugars and starches aren’t something that improves the quality of the smoke. On the contrary, they make it harsh and the taste unpleasant. To get rid of these unwanted substances (and the chlorophyll) growers slowly dry and cure their buds for several weeks. However, you can do the same with the long dark phase before harvest. At least, partly.
Finally, there is this explanation that seems to me very good science. It’s common knowledge that the content of THC and other cannabinoids fluctuates. It reaches the peak at the end of the dark period (night), and then cannabinoids get partly degraded by light during the day. It’s because cannabinoids protect marijuana flowers from the harmful effects of UV radiation. Naturally, they are spent in the process, and at night, plants slowly replenish them. So the obvious choice is to harvest your weed before lights-on indoors, or at dawn outdoors. By the same logic, with longer darkness before harvest, THC production may increase even more. And one more thing: some growers use shorter days and longer nights (like 11/13 flowering light cycle). It’s also supposed to make weed more resinous, but we’re not sure it’s true.
Lab Results
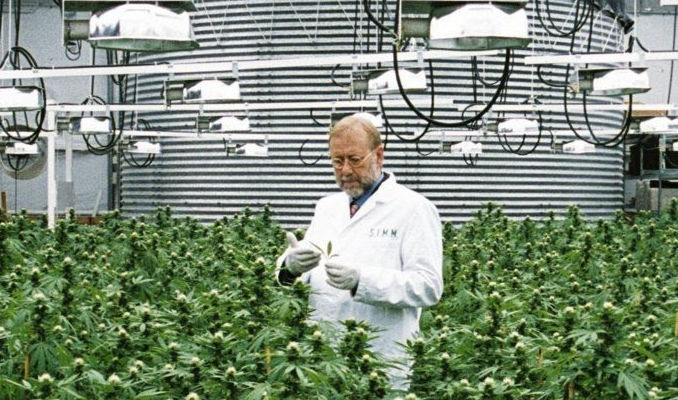
Many websites and forums refer to a study that was supposedly done on the subject by the Stichting Institute of Medical Marijuana (SIMM). We couldn’t find this publication (if there ever was any), but at least SIMM is a very much real organization. Well, used to be. Founded by an American activist James Burton, it was one of two licensed suppliers of medical marijuana in Holland and unfortunately went bankrupt within a year or two*.
The legend says that Burton and colleagues once conducted an interesting experiment. They harvested half of the plants in a regular way, but kept the other half in the dark for 72 hours. When they later analyzed the final dried product, the THC level in some of the strains was up as much as 30% compared to their counterparts harvested in a regular way. The content of CBD and CBN remained the same.
James Burton at his (now long closed) growing facilities in the Netherlands.
Darkness Period Before Harvest and Terpenes Levels
It’s the same as with cannabinoids. The concentration of aromatic substances in buds increases during the dark cycle. During the day, when the air gets warm and sometimes hot, part of the terpenes evaporate. For this reason alone, it’s very important to lower by a few degrees the daytime temps during flowering, and especially closer to harvest. Remember that terpenes and flavonoids don’t just make the smoke smellier and tastier. They also influence the character of the high through the so-called entourage effect.
Naturally, a few dark days before harvest contribute to the higher concentration of terpenes in buds. All growers who have tried keeping their plants in a completely dark room for 24h-48h or more report on how intense the smell becomes.
How Long Should You Keep Weed in Dark Before Harvest?
Suppose you’re not in a hurry and can wait as long as it’s necessary for buds to reach the peak of their quality. How long is enough?
Well, at the very least, harvest your buds at the end of their last night (the last 12 hours of darkness), and then manicure them under dimmed lights and dry and cure them in a dark room. Extending the dark period is even better. A 24 hrs long night will hardly make a difference that you’d notice. 36 or 48 hrs is more like it. As we already mentioned, experiments have confirmed the efficacy of 72 hours, or 3 days.
Some growers have shared stories of how they had to leave their plants in dark for 4-5 days and sometimes 1 week and even more. They generally say the nugs were fire, but very long periods with no light also made the buds less solid.
Beware of Mold and Bud Rot!
When you leave weed in dark before harvest, make sure the soil is dry. It’s a bad idea to water your plant before turning off the lights for good. First, lower humidity means higher THC. Second, by keeping both the medium and the air dry you decrease the risk of mold and bud rot. You won’t have a chance to inspect your plants for several days, so take all precautions if you don’t want to see your harvest completely spoiled.
Drying and Curing in the Dark Does the Trick, Too
When you cut a plant and hang it upside down in a dark closet to dry, it doesn’t mean that the plant is dead. It has no roots, sure, but it’s still alive, and the chemical processes inside it slow down, but carry on. So the idea of using the prolonged darkness to improve the quality of buds works here as well. Which means that when you dry your buds and later cure them, never expose them to direct light. Complete darkness isn’t necessary, but wouldn’t hurt either.
Darkness Before Harvest for Autoflowers
Given the huge popularity of automatic strain, no wonder people keep asking if they can give a dark period before harvest to their autoflowers. Of course, you can. All the principles above apply to any cannabis plant, including autos.
To Conclude
Darkness helps marijuana plants replenish THC and terpenes. During the day, THC partly degrades and terpenes partly evaporate. So the best time for harvest is early morning. And if you extend the night before the harvest to at least 2 days, you can (arguably) get more flavorful and potent buds. We’re sure many of you have already tried this method. Did it work for you? Please share!
The very fact that we compare outdoor vs greenhouse vs indoor weed is the relic of the prohibition era. Because you don’t grow your own papayas and mangos. You import them from countries where they are produced naturally and cheaply. However, odds are that some grower in your area cultivates a Mango strain or a Papaya strain. And more often than not they’re doing it under artificial lights.
50 years from now, we’ll all be smoking Thai weed, and Moroccan hash, and maybe Colombian or Jamaican genetics. In short, landraces that baby boomers used to enjoy back in the day. Of course, we’ll be smoking local weed, too — the way we often eat locally grown tomatoes. But let’s be honest: nobody in their right mind sets up their tomato gardens in warehouses, basements, and garages. Any future cannabis grow-op will be using the power of the sun.
But we have a very different legal landscape at the moment, so let’s see what this means for the quality of the weed that we smoke and grow.
Indoor vs Outdoor Nugs
The main difference between outdoor farming vs indoor farming is that we make use of sunlight in the former case and artificial light — in the latter. The sun produces light of a broader spectrum. This naturally leads to the production of a broader range of cannabinoids and terpenes in the buds and a different kind of high.
Outdoor vs Indoor Weed High
Most smokers know about THC which is the main chemical in marijuana responsible for making you high. Recently, another substance called CBD has been making headlines, thanks to its many health benefits and its huge healing potential. However, weed contains dozens of other cannabinoids and also many aromatic terpenes, and all of them have a potential to influence the high. It’s called the entourage effect. So, with its greater number of cannabinoids and terpenes, outdoor cannabis influences users in a less bland and more nuanced way.
Okay, the experience is richer, but what about the potency?
Outdoor Weed THC Content
The THC level of a particular weed strain depends mostly on the underlying genetics. And it so happens that many of the most potent modern varieties aren’t adapted to outdoor cultivation in all but a handful of climates.
If you live in California, or in a Mediterranean country like Spain and Italy, or possibly in some New England state, you can probably grow a highest-THC variety. Meaning you have a good chance of bringing it to full potential before it gets too cold and rainy. But in most other climates (like Canada or the UK), you’ll have to choose some faster-flowering outdoor varieties, and those are bred for their speed and not necessarily for their high THC percentage. And the harsher your climate, the more the cannabis genetics that you can hope to bring to full maturity will resemble hemp rather than medical marijuana. This is the reason why outdoor THC content is on average significantly lower.
To recap, natural light is good for outdoor marijuana trichomes and THC levels, but often there’s simply not enough sun when it matters most, that is in the final weeks before the harvest.
So what should you do if you’re not blessed with a warm and sunny climate? Well, one option will be using a greenhouse (more of it below), another — to choose outdoor autoflower marijuana seeds. With autos, you don’t need a full-term growing cycle ending in October or November. They can finish in 2-3 months from sprouts and during the period when the sun is at the peak of its activity and thus conducive to the maximum THC percentage a strain is capable of.
Other Aspects of Bud Quality in Outdoor vs Indoor Plants
We have said it once and we shall repeat it just one more time and be done with it. Under subpar conditions in colder climates, it will be difficult to grow high-potency stuff consistently, if at all.
This Green Crack Auto looks like she’ll be ready in a couple of weeks, but the results seem totally unspectacular. Probably, due to bad climate.
So let’s compare only those cases where it’s totally possible to grow the same strain both indoors and out. What can one expect?
Indoors, artificial lights together with the complete control of temperature & humidity and other environmental variables like CO2 levels allow for more consistent results because… well you are in control of everything. Outdoors, very little depends on you and anything can happen. So, you risk not only some variance in bud quality, but also losing your crop altogether. Possible culprits — hail, heavy rain, strong winds, cold spells, early frosts, and heawaves/draughts.
But suppose nothing bad has happened. How will outdoor and indoor nugs compare then? There are still other risks in an outdoor grow operation.
Wat Can be Wrong with Outdoor Buds
Pests. In an indoor grow-op, a pest attack can be devastating. However, a sealed-off environment with lab-grade hygiene routines can prevent an infestation in the first place. Outdoors, the plants are usually too big to actually die because of pests or even suffer too much damage. Nevertheless, some growers don’t put up even with a slightest infestation. So, if you buy outdoor-grown buds, there’s a possibility that there are trace amounts of pesticides in them, as well as eggs, larvae, and grown-up insects. Microscopes sometimes reveal very nasty stuff.
Mold/Spores. This is another thing that you don’t want to see when you admire trichomes under a microscope. Of course, mold, bud rot, and fungi can affect crops in any setup. But outdoors there are humid days, and rains, and cold nights, and all this exacerbates the problem.
Dust/Dirt/Fine Sand. It’s definitely not as bad, but still something to avoid. And indoor buds are cleaner in this respect, too.
In short, if you grow outdoor weed yourself, be aware of these issues and try to prevent them. And if you buy buds from someone else, you better trust their integrity, especially if the farm is an outdoor one.
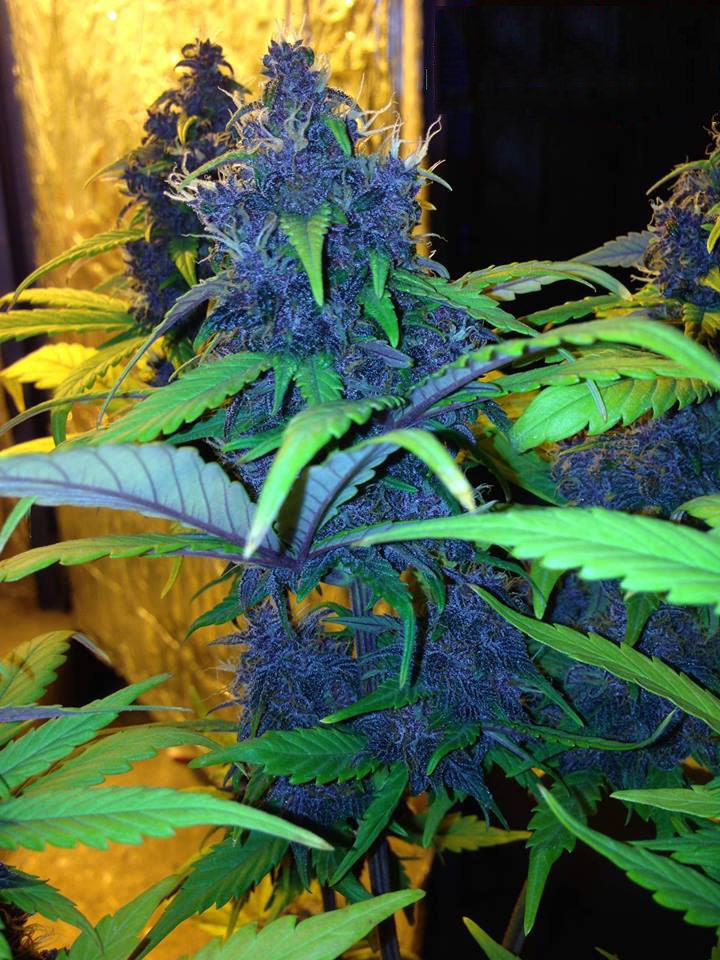
Size and Texture of Buds
Grow lights, especially weaker ones, have a notoriously limited effective range. Here’s the inverse-square law in action: if you double the distance from light, its intensity reduces 4 times! This means that buds in the upper portion of an indoor plant can be huge and solid. At the same time, the lowers that are just a dozen inches down the branch are smaller and spongier, less mature and with fewer trichomes. It’s a good practice to trim away those popcorn buds in the earlier stages of flowering (a technique called lollipopping).
These beautiful purple buds look dense and meaty, but only in the top portion of the cola. Further down where the intensity of the light diminishes, you see longer and longer gaps.
In contrast, you can say that the distance from the sun to upper buds and lower buds is exactly the same. (What’s a couple of feet compared to 93 million miles?) So, outdoor nuggets have a potential to be of the same quality throughout the whole height of the plant. And the intensity of the sunlight makes them really dense and heavy.
Outdoor vs Indoor Yield
Indoor growers usually estimate their yields in grams per square meter. This is the figure that you see when you look at the features of a particular strain in a seed shop. Let’s say they promise 500-550 g/m².
These numbers are what you can hope to achieve under most favorable conditions and using powerful enough lights. Most of the time, this means a 600W HPS per each square meter. However, there’s no universal convention here. So, when you see numbers like 800 g/m², it probably means that you have to use a 1000W HPS per square meter to achieve such results.
When comparing their achievements, growers often use another metrics — gram per watt. With an old-fashioned HPS, 1.0 g/W is probably the highest that you can get. And only you work hard enough and know what you’re doing. Modern LED quantum boards can be much more energy efficient and let you overshoot the 1 g/W mark easily. Nevertheless, there’s only so much watts that you can cram into your grow room without burning your plant tops or making them foxtail. So take the grams-per-square-meter numbers seriously: it’s probably the very best you can hope for.
What are the Yileds Outdoors?
As for outdoor weed plants, their yields are expressed as grams per plant. For some smaller, Indica-dominant varieties, the indoor and outdoor figures are very close, say 550-600 g/m² and 700 g/plant. For other genetics, the difference is huge, and some strains are supposed to bring in as much as 10 pounds from each of the tree-like monsters.
You’ve probably seen photos of those massive outdoor marijuana plants: they are started inside at the end of winter, undergo several toppings, acquire a lot of girth, and become so tall that you need a stepladder to reach their uppermost tops. Big plants like these require chicken-wire cages for support, but let you harvest much more than their indoor counterparts. Though they can easily cover 3 m² of surface area each, their per-square-meter production would still be greater than indoors.
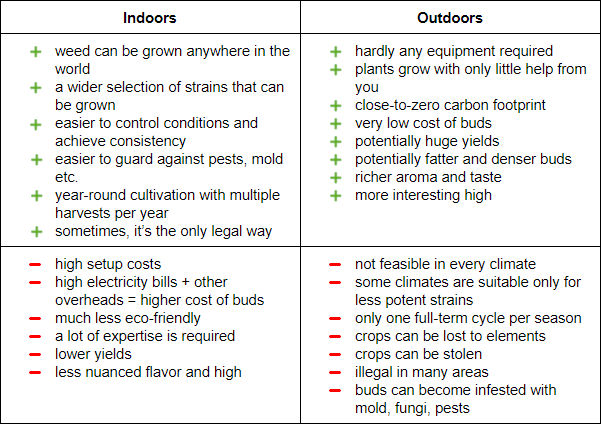
Outdoor vs Indoor Growing: Drawbacks and Benefits of Each
Now let’s quickly recap the advantages and disadvantages of both methods of cultivation and also include those that we haven’t mentioned yet (because they are too obvious):
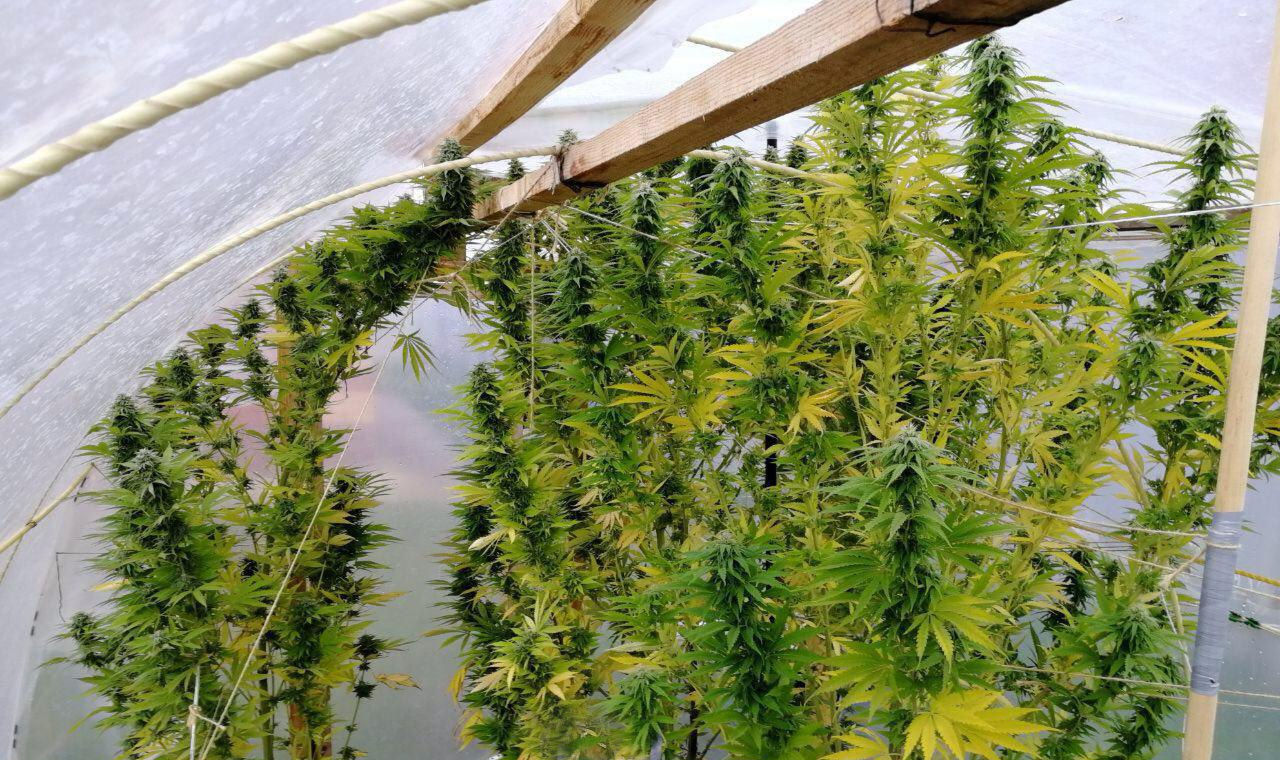
Greenhouse: The Best of Both Worlds
A greenhouse is a perfect option for when you want to combine the free energy of the sun with the ability to control other variables of the growing environment.
It can be as simple as having a transparent roof and walls around your garden because this alone can extend your growing season by a full month in spring and as much in fall. It can also level out too wide swings in temperature and humidity and protect your plants from rain, hail, and wind. It’s basically outdoor growing on steroids.
This makeshift affair seems too small even for these medium-sized plants and must be very inconvenient to use, but i does what it’s supposed to do: provides shelter from bad weather. And it looks like it’s raining outside. Hard.
Or you can use a greenhouse the other way around: create an enclosed and sealed-off space, like a full-fledged indoor grow with all its bells and whistles, but with the sun serving as the source of light (either sole, or primary).
In this case, people usually use the light deprivation technique. It means that you never wait for the fall with its equal duration of days and nights, but use an opaque tarp to cover your greenhouse in the evening and thus create 12 hours of uninterrupted and complete darkness. This way, you can make your weed plants flower at any time of year.
With a light dep greenhouse (which are often fully automated), you can have multiple harvests per year, or even a year-round growing operation, or simply choose the sunniest part of summer to have the flowering period for your buds to make them as huge and meaty as possible.
Cost of Greenhose Weed Compared to Indoor or Outdoor Buds
As for the question of costs, greenhouses fall somewhere in between outdoor and indoor farming, and, the more complicated the setup, the more expensive your buds will be. It’s very hard to find any research with reliable figures, but here are some rough estimates*:
indoor production – $300 per pound
greenhouse production – $150 per pound
outdoor farms – $30 per pound
As you have probably guessed, we personally prefer the production of marijuana in greenhouses. Simply because it seems to be the most responsible way to use Nature’s resources while having enough control over the quality of the final product. But everybody’s circumstances are different, and we hope that now you have enough information to make an informed choice. Please tell us what you think in the comments!
Outdoor Marijuana Temperature Range: Ideal, Okay, Extreme
If your climate is too cold (like mine), or too hot, and you think that the only option for you is indoor cultivation, think again. The acceptable outdoor marijuana temperature range is quite wide, and marijuana plants, at least mature ones, can be surprisingly hardy. As a result, they can take a lot of bad weather and still reward you with enough high-quality buds.
Ideal Outdoor Marijuana Temperature
Well, ideal outdoor marijuana temperature is actually the same for any type of grow. It’s because indoors we simply try to recreate artificially the natural environment that cannabis plants have best adapted to. The only difference is that, in an indoor setup, we have more control in maintaining the perfect conditions. And they are:
77-86°F (25-30°C) during the day, or when the lights are on.
At least these are the figures that are the most conducive to photosynthesis and gas/water exchange processes, according to research1. And, in case you’re wondering, the ideal level of light intensity (PPFD) would be ~1500 μmol/m2/s.
All this may guarantee the fastest rate of growth for cannabis plants. However, our goal is a bit different — we grow for the highest possible production of THC and other cannabinoids, as well as terpenes that make the smoke so aromatic and flavorful. So, with that in mind, growers have gradually come up with the following empirical figures:
Seedling and vegetative stage. Young weed plants prefer a little milder conditions than the flowering ones, with day temperature between 70 and 85°F (20-30°C).
Flowering stage. When plants start to form buds and then all the way to harvest, the temps should be a little lower — 65 to 80°F (18-26°C). The reason is that higher temperatures burn terpenes and cannabinoids making the buds less aromatic and potent.
During any stage of growth, the night temperatures should be 10°F (8°C) lower than during the day. This gives marijuana plants a chance to shift to a lower gear and have a rest. However, too radical a change between day and night temperatures can lead to even more stress, and should be avoided.
That Was Ideal, But What is Acceptable?
Outdoors, we work with what we have. Even in climates that give us the luxury of the perfect outdoor marijuana temperature range there are spells of too cold and too hot weather. So the question is: what is okay for outdoor weed and what is not?
Just like a dashing bachelor in a Jane Austin novel who chooses himself a wife, anything from 15 to 30 would do just fine. (Sorry for this potentially offensive remark, but in my experience they are the most memorable.) These figures are in Celsius btw, and in Fahrenheit it’s 59° to 86°.
At higher temps, no irreparable damage is done, although the photosynthesis slows down. And so does the THC production, while terpenes evaporate from buds at a faster rate, robbing them of flavor. The texture of buds deteriorates as well, and they become less compact and more airy.
So if you live in a really hot climate, like Arizona or Nevada, try to mitigate the effects of heat stress. Make sure that trees, walls or other structures provide some shade for your marijuana during the hottest hours in the afternoon. Or stretch some shade cloth over your garden (60% transparency should be just fine). Anyway, if higher temps may hurt weed plants, they can’t kill them. Drought can though.
The effects of cold temps are much worse. When the daytime temperatures drop below 15°C (59°F), all processes slow down to a crawl or are put on pause. And at 13°C (55°F), more delicate strains may experience a shock. It means that once the temps are back within the acceptable range, the plants will need some time to recover before they resume bud production.
The Effects of Frost and Snow
Below freezing air temperatures don’t kill marijuana overnight, but they can do a lot of damage to leaves, flowers, and even branches. They wilt and get brown and mushy in places, so if there’s a chance of snow or even a couple of frosty nights in a row, it’s best to harvest your buds before that.
These buds might be still salvageable, but the quality will be very subpar, to say the least.
I myself once harvested a couple of bushes after a heavy snowfall. They started to flower extremely late, so I had to push the limits with them. When I was cutting the branches, I had to shake them very hard to free them from snow. Only a minor percentage of buds were spoilt beyond being usable, but the rest turned out okay. I don’t recommend this to anyone, though. It’s safer to use a faster-flowering variety or an auto.
How to Protect Cannabis from Cold
1. Choose Genetics Wisely
Start with choosing a strain that is fast enough to finish flowering before the end of the growing season. The only sure thing are autoflowers because in practically any climate there are a couple of warm months in the middle of summer, and it’s all an auto needs. Besides being very quick to finish, autoflowers are more resilient to cold weather: they have Cannabis ruderalis genetics in them, and ruderalis is a subspecies that originated in places like Siberia and is very tolerant of cold.
This is a natural ruderalis plant. Looks pathetic, doesn’t it? Luckily, modern autoflowers are so much better in every respect.
If you prefer to grow a photoperiod variety, look for strains with words ‘fast’, ‘early’ or ‘quick’ in their names. They are the result of crossing a true photoperiod strain with an autoflowering one. These plants still wait for the days to become short enough before they start flowering, but this happens much earlier.
Important! When shopping for an outdoor photoperiod strain, take with a grain of salt the harvest times that a breeder promises. If, for example, they say late September, they probably mean places like Spain or Southern France, not Scotland or Denmark. The farther up north, the longer the summer days, and the later the flowering begins (and finishes). That’s a ‘perk’ of living at higher latitudes.
2. Find a Good Spot
The second most important thing is finding a spot that receives as much sunlight as possible and is sheltered from wind. It also helps to plant your cannabis near a wall (preferably a stone wall) that shelters it on the north side and is warmed by the sun. And by all means avoid planting your cannabis in a low spot. The thing is that cold air tends to ‘roll down’ from higher places into depressions in the ground, and then stays there. A south-facing slope makes for an ideal spot for your outdoor garden.
3. Using Pots Increases Mobility
Another trick that’ll help you make the best of your cold climate is growing your outdoor marijuana in pots rather than in the ground. In this case, you can move the pots around, always choosing the sunniest and warmest spot and even take the plants inside if their very survival is under threat.
4. Start Seedlings Indoors
Keep in mind that, while mature plants don’t mind some cold weather, young seedlings do. They may be shocked or killed if the temps are outside the acceptable range. So make sure that summer weather has come for good—no ground frosts in the early morning and at least 15°C (59°F) during the day—before taking the seedlings outside. Also, it’s recommended not to sow cannabis seeds directly into the ground. It’s best to grow them for 2 weeks inside, then harden them a bit by taking outside for a couple of hours every day, and finally place them permanently outdoors.
Outdoor Marijuana Temperature: Focus on the Root Zone
One thing that is overlooked by most growers is that the temperature of the air plays a far less important role than that of the medium. The air may be as cold as 5°C (41°F), but marijuana plants will thrive if the temp in the root zone is at a comfortable level2. It’s like when you are neck-deep in a hot spring, you don’t mind that your head is exposed to a chilling breeze, right?
Remember all those numbers we’ve given above? They all apply to the root zone.
This really gives you a lot of freedom. The most obvious choice is to use a really thick layer of mulch to insulate the ground from the air. It works both ways, by the way: by keeping the ground cooler in hot climates, or keeping it warmer in cold ones.
Or you can go high-tech. A pump, a water tank with a heater/cooler and some clever piping laid in the ground or through the containers/grow bags will allow you to circulate water with a set temperature to warm up or cool down the medium. (And mind you we’re not talking about watering here, right? Watering is a different story. This is only about heat exchange.)
Also google ‘geothermal greenhouse’. This is basically an underground (or partially underground) greenhouse with a glass roof that is generally made sloping and facing south. A geothermal greenhouse makes use of the fact that deep below the ground surface the temperature remains stable throughout the year. It’s much cooler in summer, and much warmer in winter compared to above ground. For such a greenhouse to really work its magic the depth must be 10-12’ (~ 3 meters).
Outdoor Winter Grow
Wanna try and grow marijuana in winter? First check if your climate supports this idea. Again, the temperature, especially in the root zone, should be above 15°C (59°F) most of the time. Short periods of colder weather are unwelcome, but acceptable. Opt for cold-resistant strains, like Indica autoflowers. Also, use all the tips and tricks of protecting your plants from cold that we’ve shared above. And again don’t forget about the importance of the root zone).
Also keep in mind one more thing about marijuana winter grows: the days in winter are short, and the nights long. This will make any photoperiod variety start flowering after just a few weeks from sprouts. It’s not unlike the ‘12/12 from seed’ method. This usually results in much smaller plants, so if you want them bigger, think about auxiliary lighting to make the days longer.
If you don’t use auxilliary lights to extend short winter days, any photoperiod strain will go into the flowering mode.
Conversely, if your winter cannabis doesn’t finish before spring, or more specifically before the spring equinox (March 20), days will gradually become long enough to disrupt the flowering. So make sure you plan your winter grow accordingly.
Outdoor Marijuana Temperature Range is Quite Inclusive
Outdoor horticulture of medical marijuana is feasible even in colder climates. Just learn to make the best of the most adverse conditions and choose a strain that is quick to finish and is tolerant of low temperature. And now, after the arrival of autoflowers, almost anybody can grow top-shelf buds outdoors.
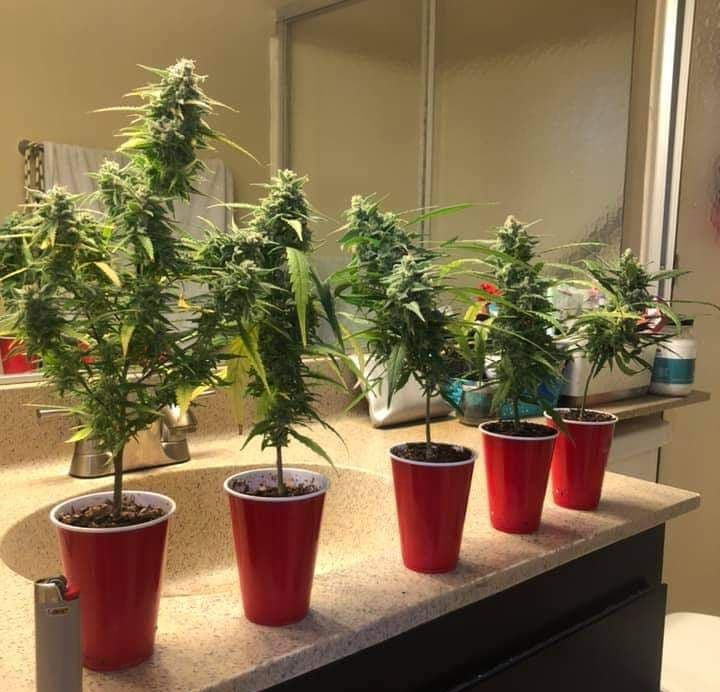
12/12 From Seed to Harvest: When to Choose This Method
The 12/12 from seed to harvest method is a bit outdated, but still has its uses. In this article you can learn everything about yields, pot size and plant size, flowering time — in short, all that you can expect when running 12/12 from seed in your grow.
If you have grown weed before, you probably understand what ‘12/12 cycle from seed’ means. And for the novice growers, the following short paragraph explains all the science.
Cannabis is a short-day plant, meaning that it only starts to flower when days become short enough at the end of summer or the beginning of fall. Indoors, we mimic this by shortening the lighting cycle to 12 hours of light and 12 hours of darkness (12/12) and thus inducing the flowering. Usually, we do this after several weeks of the vegetative growth under 18/6, but sometimes you can reprogram your timer to 12-12 from the day your sprouts emerge. And this is exactly what we mean by 12/12 flowering from seed.
These Black Widows clones were put under 12 and 12 as soon as they rooted. Not exactly a 12-12 from seed scenario, but the idea is the same. Wonderful results btw.
Growing Weed on 12/12 From Seed: Right Reasons and Wrong Ones
Frankly, this is a notoriously low-yielding method, so there must be other reasons to still choose it, right? Of course, there are.
1. Bagseed Growing
Okay, you’ve bought some buds with seeds in them, liked the smoke, and decided to give those bag seeds a try. Not the most brilliant idea ever, but okay. You don’t know how these seeds will turn out until they’re well into flowering, and this can be in like 1.5-2 months from sprouts (if grown in a regular way). Probably, too much time to spend on a dark horse, right? And here the 12/12-from-seed-no-veg method can easily save you 2-4 weeks or more.
2. Using Regular Seeds
It’s the same as with bagseeds. A certain percentage of regular seeds (probably around 50%) will grow into males, and you want to spot them and discard them as soon as possible. Again, 12/12 lighting from seed saves you several weeks of precious time.
3. Perpetual Harvest with no Extra Veg Room
Some people have just one grow space, but prefer to run a perpetual harvest operation. Obviously, your only grow room will be the flowering room, with lights running at 12/12 continuously. So the only way to add new plants after you’ve harvested some of their predecessors is to give the newcomers 12/12 from seed to harvest.
4. You Don’t Care About Yield, But Value Variety
At one time, I was crazy about mix packs that some breeders sell because they gave me the opportunity to grow (and later enjoy) several different genetics in one go. So I used to put 9 different strains in my 2’x2’ grow tent and run them in a 12/12 cycle from seed. The yield per plant was underwhelming, but more than enough for me. The main thing was that every smoke came out different in terms of effect and flavor.
So, these were the good reasons to choose the 12/12 from seed to harvest method, and here are the bad ones:
Microgrow/Limited Height. In small grow spaces with a short distance to lights, you’ll probably be better off raising autoflowers in small containers. The alternative is having fewer plants, but training them in veg (topping, LST, ScrOG) to have a flat canopy. Both of these options will guarantee you better yields.
Weak lights. Some people who use tubular fluorescent lamps (like T5) or something similar (CFLs, LED bulbs) think that lighting systems of this kind call for a SOG grow with many budstick plants in solo cups. It’s probably true, but again autoflowering seeds will give you better results than photoperiod strains grown on 12/12 from seed to harvest. And yet again, simply training those during normal veg would be more effective, too.
Expectation of a faster turnover. Questions like “How long does 12/12 from seed take?” (which people ask all the time) prove that many of them regard this method as the fastest way to harvest. In fact, it doesn’t really make your plants finish much faster, if at all. More of it below.
Cloning/Reveg
There is one more aspect of growing weed 12 12 from seed that we have briefly touched upon when talking about bag seeds and regular seeds. Here it goes.
Some growers try out every bean they lay their hands on in search for a hidden gem. Well, it’s a noble quest, and the 12/12 from seed method allows you to quickly assess the genetics. But suppose you’ve found a phenotype you like. Now what?
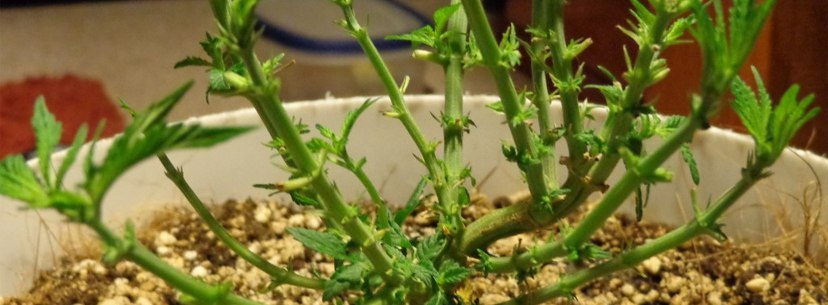
You have two options: one is cloning a plant that is already flowering, the other is reverting it back to veg (a procedure known as ‘reveg’).
Taking a cutting from a flowering plant and then rooting it is a fairly difficult procedure compared to cloning in a regular way (when the plant is still in veg). It takes longer and the success rate is lower. (There is an upside, though: the resulting clone turns out into an insanely branchy little monster; hence the name of this procedure – monster cropping.) Another difficulty is that plants grown 12/12-style are basically a ‘bud on a stick’ and often have no side branches to use as cuttings.
What’s the Alternative to Reveg Then?
If you’re searching for a keeper, try vegging every plant for a few weeks, then take a back-up clone from each, and then flower all donor plants to see if there’s a champion among them. It’s easier this way.
The same goes for reveg. Reverting flowering plants back to veg is hardly a beginner-friendly procedure, and can take months (with no guarantee of success). Do you know that some growers in colder climates use this feature to have the harvest in the middle of summer? They make their plants flower indoors for 4 weeks, and then put them outside. And no reveg happens, even though summer days are much longer than nights. Why? Because reveg is a difficult process and requires so much more than simply reverting to 18/6 or even 24/0.
Revegging a plant after harvest is a painfully slow procedure with uncertain prospects.
12/12 From Seed vs Autoflower Growing
In many ways, the 12/12 from seed method is similar to the cultivation of autos, but autos have a much better potential because they can flower on 18, 20 or even 24 hours of light a day. All this extra energy will be transformed into extra bud weight and raised amounts of THC and terpenes. There was a time when autoflowers weren’t high-yielding or potent enough to compete with their photoperiod counterparts, but it’s long gone now. Today, the 12/12 from seed vs auto choice is a no brainer.
And by the same logic, the worst thing you can do is to grow an autoflower on 12/12 from seed. Sometimes people are forced to do this: for example, when there is some free space in the flowering room, but no extra seeds, except autoflowering ones, to fill it. But autos raised in this manner usually stay small and yield little.
12/12 From Seed Instructions and Tips
So, you have a grow room dedicated to the 12/12 from seed to harvest grow. Start by programming your timer so that the lights turn on for 12 hours of light every 24 hours, and then germinate some seeds using your favourite germination method.
This is what you may expect when growing weed in a 12/12 cycle from seed.
What Size Pot for 12/12 from Seed Works Best?
You don’t need a lot of space for your plants’ roots because the vegetative stage will be very short and then the root system basically stops growing. So use solo cups (party cups) or small plastic containers. The pot size can be anywhere from 16 oz (0.5 L) to a gallon (3.78 L). Keep in mind that the smaller the containers, the more frequently you’ll have to water them. More medium also means better buffering for nutrients and less risk of a nutrient burn.
Also different strains react differently to 12 and 12 from seed. Some will take many weeks before they even start flowering, and they will require bigger containers. Growing in 1 litre pots will do fine for most varieties that are worth growing this way.
When Does Flowering Start?
Even on 12/12 from day one, weed plants don’t start flowering right away. Vegetative growth is an important process and will run its natural course. Expect at least 3-4 weeks before the plants are mature enough to show their sex. Of course, when it happens, they will start to flower immediately. As you can see, this is basically the same timeline as for autoflowers.
How Long till Harvest?
Most 12/12 enthusiasts report that their plants finish in 70+ days from sprouts, although some phenos can take up to 3-4 months. Again, autos can do much better than that, and they’ll yield more, too. The reason is that the yields are proportionate to the hours of light a plant receives, and you can give autos from 18 to 24 hours a day.
The Final Size and Yield
It all depends on a lot of factors — strain, pot size, lights etc. It can be as little as an eighth (3.5g) or less from a sickly runt in a solo cup, or up to a half ounce (14g) in a 16oz (0.5L) cup. In the latter case, the skinny one-cola plants will be upwards of 2 feet (60+cm).
This is how a harvested plant can look like if grown 12/12 from seed. Hardly inspiring. I’d even say vaguely humiliating.
Some 12/12 growers prefer even bigger plants in containers of up to a gallon (3.78L): their height can be 3-4 feet (90-120cm) and more, and the yield per plant of 0.5-1oz (14-28g) is considered very good. And it really is, if you grow many such plants SOG-style. There are even reports of plants yielding as much as 3 ounces (85g) each.
SOG (Sea of Green) is the Only Viable Option
Given that the size of the containers is quite small and the plants are lanky, with almost no side branches, we recommend cramming as many of them as possible into your grow space. This way your yield per square meter can prove to be not so bad after all: let’s say 30 half-ounce plants under a 1000W HPS. Hardly record-breaking for a SOG grow, but still.
Topping/Pinching
Would-be 12/12 growers often wonder whether they can train their plants or not. I think the logic here is the same as with autos: any HST technique, like topping, would just lower the yields and (possibly) delay the harvest time. Besides, any training method, including LST, raises the question of spacing: if the plants stand next to each other in tight rows, you shouldn’t try to make them wider and bushier. The single-cola pattern is probably the best.
The Best Strains For 12/12 From Seed To Harvest… and the Worst
As we have said earlier, this method is best reserved for seeds of unknown origin and potential. But if you insist on growing store-bought seeds this way, choose an indica. Indica strains tend to react quite early to the change in light cycle, and if you give them 12/12 from sprouts, the veg will be very short and the plants will remain nice and compact.
As for sativas (like Haze) and sativa-dominant genetics, they have evolved in regions near the equator where days and nights are close to an equal length the whole year. So, they can remain in veg for many weeks and even months before they even show their sex. It kind of defeats the purpose of 12/12. The plants will be neither fast, nor small, and the yields will be disappointing because of too little light hours received in veg.
12/12 From Seed Feeding Schedule
The first thing you should take care of is the development of roots. We recommend using some rooting stimulator when watering your plants in the first two weeks or so.
As for nitrogen-rich fertilizers, it all depends on the pot size. In bigger containers, the soil will probably have enough nutrients to last for the whole of veg. In smaller pots or cups, the plants will need a nitro boost early on. Continue to feed them with veg nutrients till they reach the final height and stop stretching further. This usually means a couple of weeks into flowering.
Starting in the third week from seeds, introduce the bloom fertilizers (with raised P-K levels). First use them along the veg ferts and then without them. 2 weeks before the harvest is time to start the final flush.
The Bottom Line
There are a few special situations where the 12/12 from seed to harvest method can lead to results that are by no means spectacular, but optimal under given conditions. In most other cases, using it would be a mistake. Always check whether you can achieve the same goal with autoflowers, or other growing methods. And if you don’t agree, please share your opinions in the comments.
Organic Autoflower Grow: Taking Care of Soil, Roots, Nutrients
Organic farming is such a hot topic right now for the simple reason that people have become conscious about what goes into their bodies: be it food, drinks, or smokables. If you have ever tested buds resulting from an organic autoflower grow, you know what we’re talking about. The smoke is clean and full-flavored, never feels harsh on your throat or lungs, and often produces a crisp, well-defined effect, without additional grogginess or disorientation. Or a heavy head in the morning, for that matter.
Organic farming means also so much more: respect for Nature, caring for the preservation of resources, promoting the sustainability of ecosystems and the health of soil, plants, and animals, not just people. For all these reasons, we encourage you to always use organic methods.
Organic Autoflower Grow: What’s Involved?
As you may have already guessed, the organic approach is always a holistic one. It means that we focus not on the plant itself, but on its entire environment. And we manipulate this environment to achieve the results we need.
An organic autoflower grow means that we don’t feed the plant, but the beneficial microbes populating the soil, not the roots, but the mycorrhizae living in a symbiotic relationship with them. And organic nutrients are never absorbed by plants directly, but first need to be processed by microorganisms.
Now let’s talk about each component of a successful organic autoflower grow.
1. Organic Soil Mix
Soil is the single most important factor in the production of top-shelf buds. It is especially true of autoflowering genetics. The thing is that the life cycle of autoflowering vs feminized plants is very short and it’s so important to create a sound basis for success from day one. Give your plant’s enough medium for the development of a healthy root structure and supercharge it with enough raw matter and enough living things to make it digestible, and you can probably use fresh water till harvest and still get amazing results. That’s how important a good organic soil mix is.
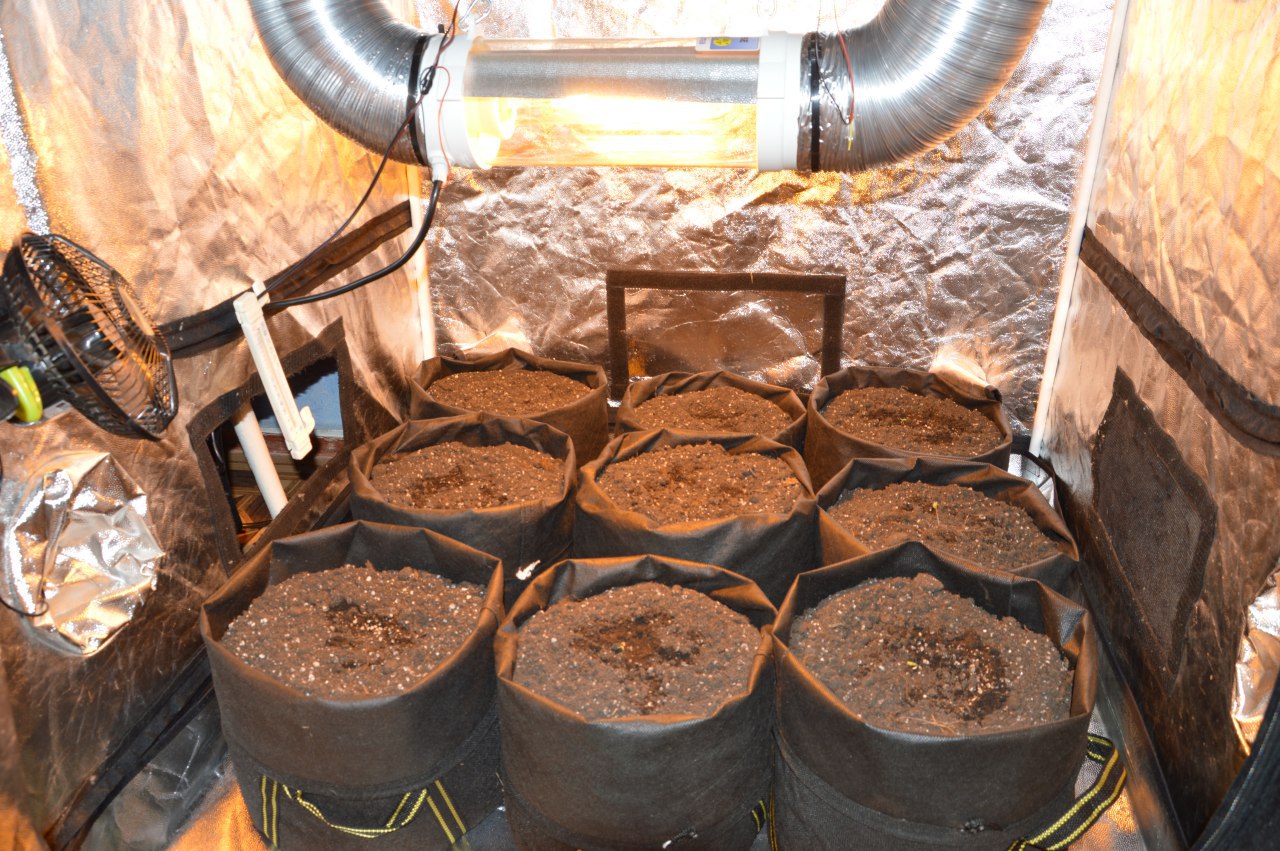
With so much medium (~6 gallons of super soil), these 9 autos won’t probably need any extra feeding till harvest.
An organic soil recipe, often referred to as Super Soil, can include the following basic ingredients (please note that the percentages are just the ballpark values, so feel free to experiment, but avoid making the mixture too ‘hot’):
50% peat- or sphagnum-based soilless mix (provides the bulk of the medium),
10-20% mature compost (some organic nutrients + lots of microbes),
10% earthworm castings, or vermicompost (the same),
10% perlite (helps saturate the medium with O2 which is necessary for roots),
fungi/mycorrhizae/bacteria (turn raw organics into available plant food).
The last item is actually the most important one and is basically what organic growing is all about. The rest is just bed and board for the little creatures. The question is: how can you inoculate your Super Soil with them? Well, microbial life is all around us. So you can simply give your soil mix enough time to be naturally populated with living things. Or you can speed up this process by adding some store-bought probiotic preparation.
Tip: You don’t have to be a DIY enthusiast to use super soil for growing autos. There are a number of ready-made organic soil mixes available online. Some are concentrated, others have just a normal strength. All have a host of microbes with unpronounceable Latin names and enough food for their colony to start multiplying as soon as you add some water.
We know that some of you prefer to come up with their own proprietary formulas or just love to experiment. So here’s a list of additional things a good organic soil can include:
Bat Guano,
Blood Meal,
Bone/Fish Bone Meal,
Alfalfa,
Kelp (Seaweed),
Epsom Salt,
Dolomite Lime,
Humic Acids,
Azomite
With all these additives, a little goes a long way. So make sure that collectively they don’t make up more than 5-10% of the volume. A mixture that is too concentrated can actually hurt the roots of cannabis, and you may need to do a lot of flushing to make the medium comfortable for the root system again. Conversely, if you have made a too weak soil mix and this resulted in a slow growth of your autoflower, adding more plant food during each watering is fairly easy.
2. Mycorrhizae
Mycorrhizal fungi are such an important part of organic soil that they deserve a special mention.
Let’s visualize a root system of a marijuana plant. It consists of a complicated network of strands (some thick, others very thin) that extend into every nook and corner of the medium and are meant to absorb water and nutrients from it.
Well, believe it or not, but some of those thinner strands aren’t actually roots of the cannabis plant itself. In fact, they are separate organisms — a special kind of fungus called mycorrhizae. Yet these fungi look exactly like roots and perform the exact function of roots. Meaning they help to find and absorb the nutrients for the marijuana plant to uptake. So, by pre-mixing a mycorrhizae concentrate into the medium or by watering your plant with a mycorrhizae supplement, you literally provide it with an additional root structure. And bigger roots mean more rapid water and nutrients uptake, fatter buds, and heavier yields.
3. Liquid Organic Nutrients
Now that you’ve read about super soil and mycorrhizae, you understand that feeding your organically grown autoflower can actually be a one-time event. Everything your plant will need from seed to harvest may well be pre-loaded into the medium (if the container is large enough and the mixture is rich enough).
However, most of the time, growers also use bottles with liquid organic nutrients throughout much of the grow. Luckily, today’s market offers an insane amount of different product lines. The truth is that you can grow weed even with non-specific fertilizers, meant for other cultivars. So ANY organic product designed specifically for cannabis will guarantee an enormous success.
As a feeding schedule, you can choose from several options:
let your autoflower take everything she needs from soil during weeks 1-2 and then start adding organic feed, …
let the soil be the sole source of nutrients for the whole veg and only use fertilizers in flower, …
avoid using liquid nutrients till your plant starts to look hungry or shows the signs of deficiencies, presumably in the later stages of flowering, …
mix a super soil and then use only fresh water till the day you chop.
What will work best for you, depends on the following factors:
the size of the container; the more the volume, the longer you can go without using liquid nutrients; a 5-gallon pot will be enough for the whole cycle for most autoflowers,
the type of the medium; a coco/perlite mixture, rockwool, or DWC have no nutrients of their own and so you’ll have to add nutrients with every feeding,
the growing conditions and the growth rate; the more powerful lights you use, the higher the demand for CO2, water, nutrients, and everything else).
Also don’t forget that watering requirements are different for when you choose organic nutrients as opposed to synthetic ones. In the latter case, you want to avoid the salts build-up and should water your pots till 20% of what you pour runs off. In organic grows, you want the opposite: to retain as much precious microbial life and plant food in the medium as possible. So you water slowly until you see first drops coming out of the drainage holes, and then stop.
Organic Autoflower Grow: A Sure Way to Success
An organic autoflower grow lets you harvest buds of superior quality and is a very beginner-friendly method. It can be as easy as preparing a rich soil mix, inoculating it with bacteria and mycorrhizae, and then letting them do their thing all the way till harvest.
Of course, the devil is in the details. But the beauty of organic growing is that you can’t kill a plant even if you get many of those details wrong. So start experimenting! And if you already have some experience with growing autos organically, please share in comments what did and didn’t work for you.