Newbie growers tend to run into cannabis seedling problems with their plants from day one. That’s why our diagnosis tool can come handy to you. Start by finding your cannabis seedling issues in the list below (we tried to group them for more convenient navigation), and then use page jumps (or scroll down) for possible causes and solutions.
It may be a serious disease, or just a temporary issue that is easy to fix, or even a perfectly normal thing that you mistook for a sign of trouble. In the latter case, we recommend you to read our article on the anatomy, development and look of a healthy seedling. And, of course, it’s better to ensure that no cannabis seedling problems arise in the first place, so we encourage you to read another article with tips on creating perfect conditions for your sprouts and caring for them the right way.
Removing the ‘Helmet Head’ by Hand
Too often, when a weed seedling is sprouting from the medium, the cotyledons are still stuck in the shell and it won’t come off on its own.

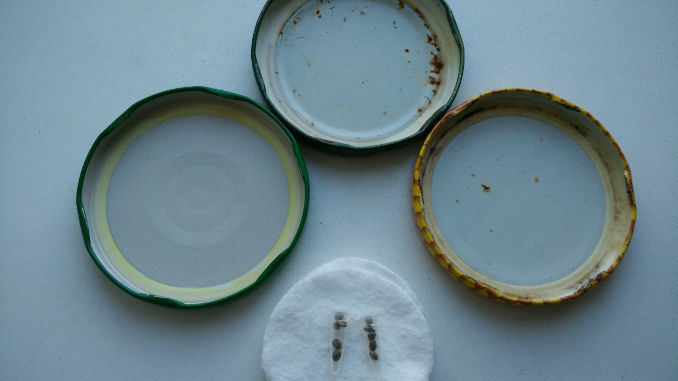
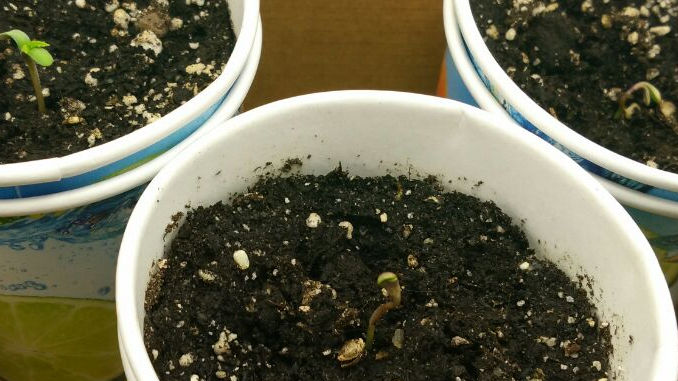
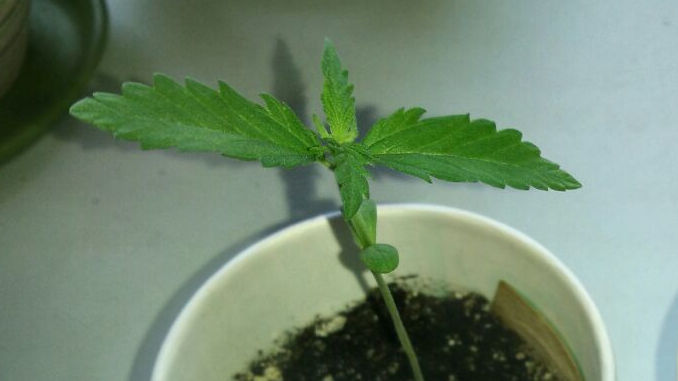
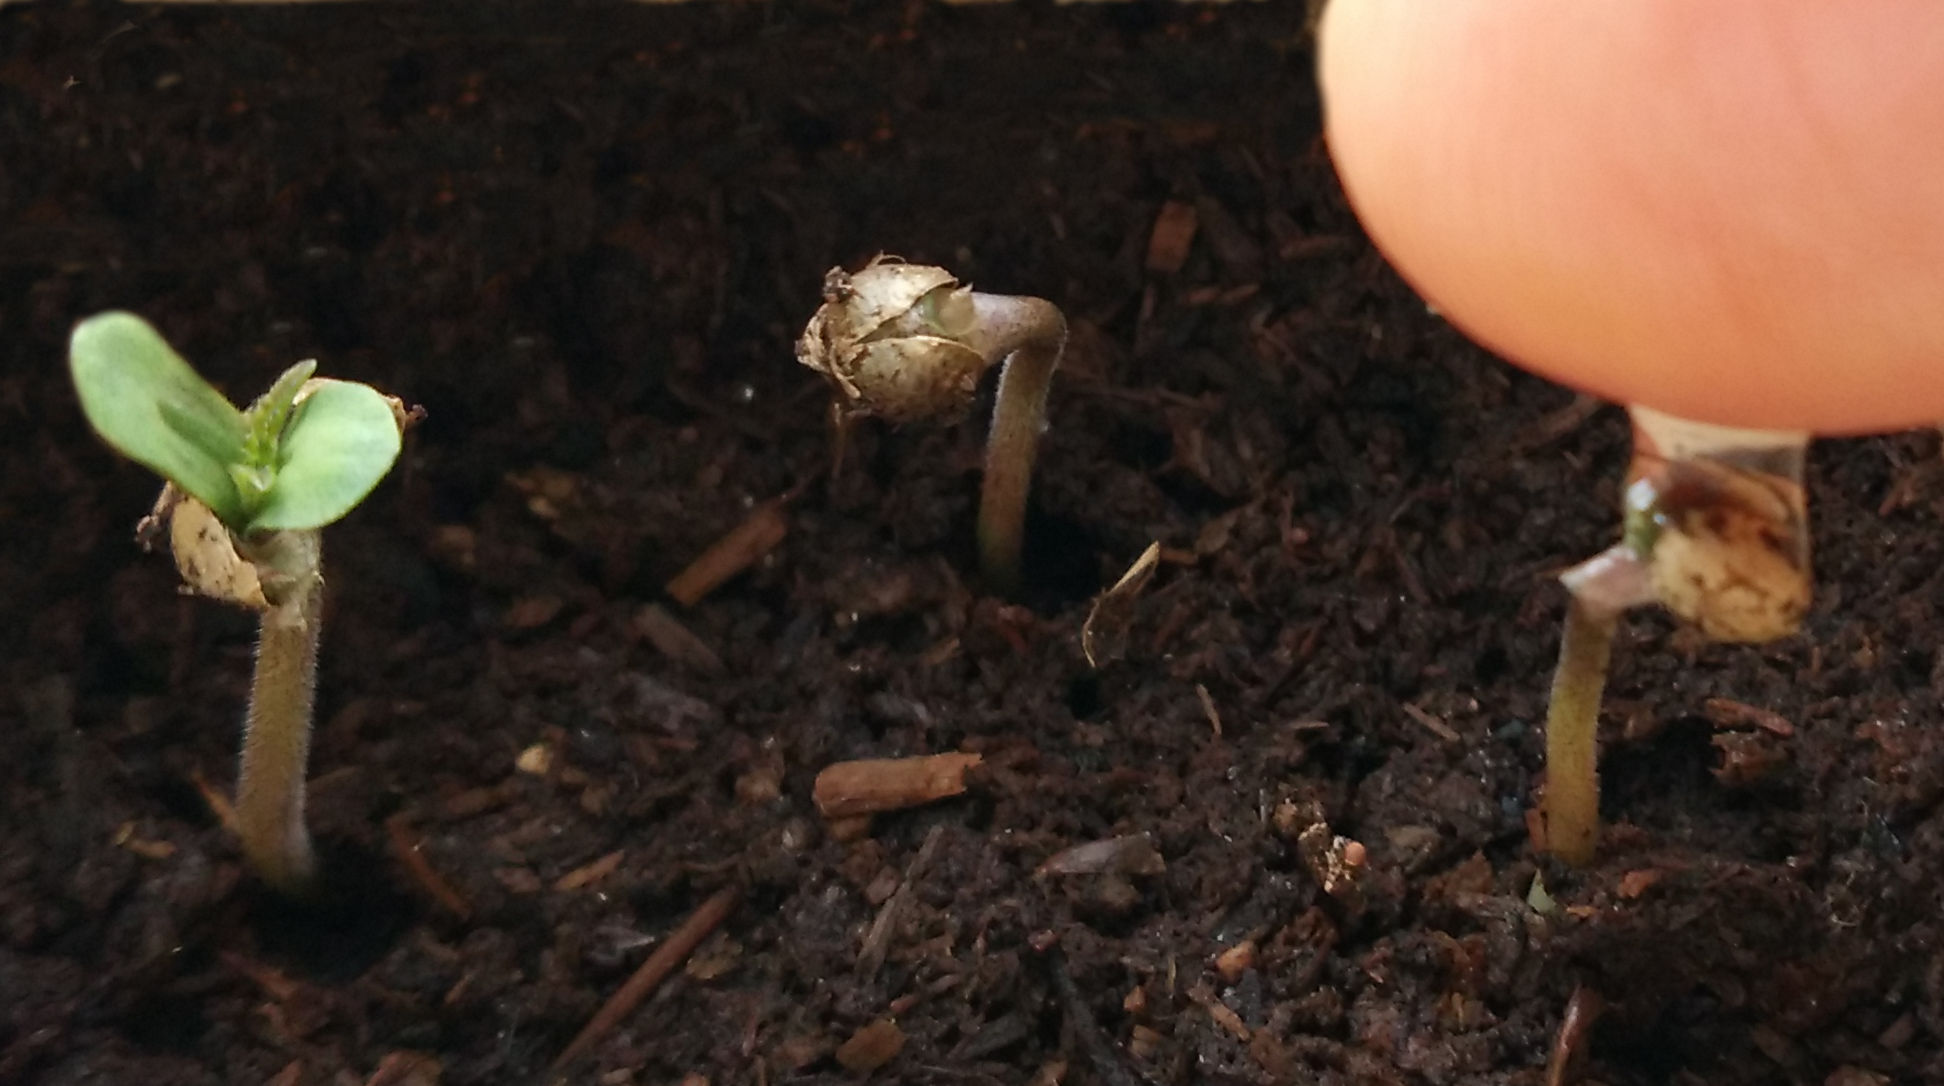
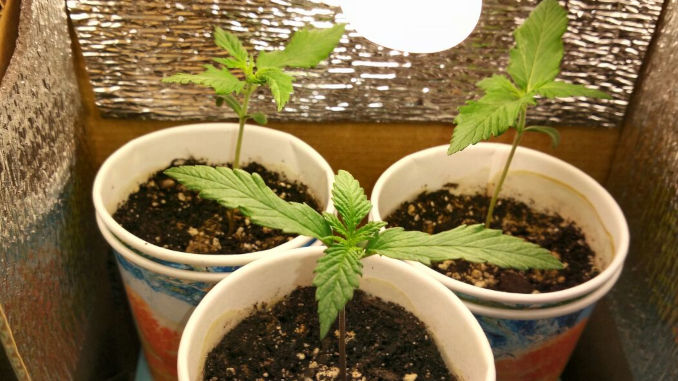
This is day 1 for three OG Kush Auto seedlings. Only one of them has cast off its shell on its own.
Probably, most seedlings will find enough strength to eventually shed the shell, but meanwhile a lot of time will be lost and you’ll see a lot of stretching. So you have to remove the shell yourself as soon as possible. Moisture is the key here. If the seedling is still tiny and can be covered by moist medium, by all means do so. Probably it will be enough. If not, the shell will be wet enough in a couple of hours, so that you can easily remove it with your fingers.
If the seedling is already too tall to be covered with wet soil, spray it with water or put a droplet of water on the shell: this will make it wet and mushy after a while. Then remove the shell with your fingers.
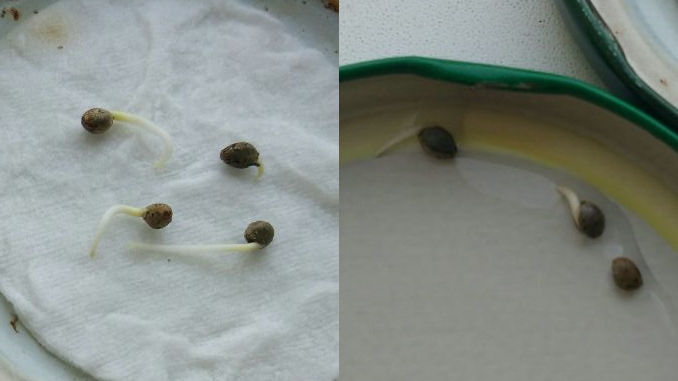
We’re wetting the shells with a drop of water. It will be enough to easily remove them from cotyledons.
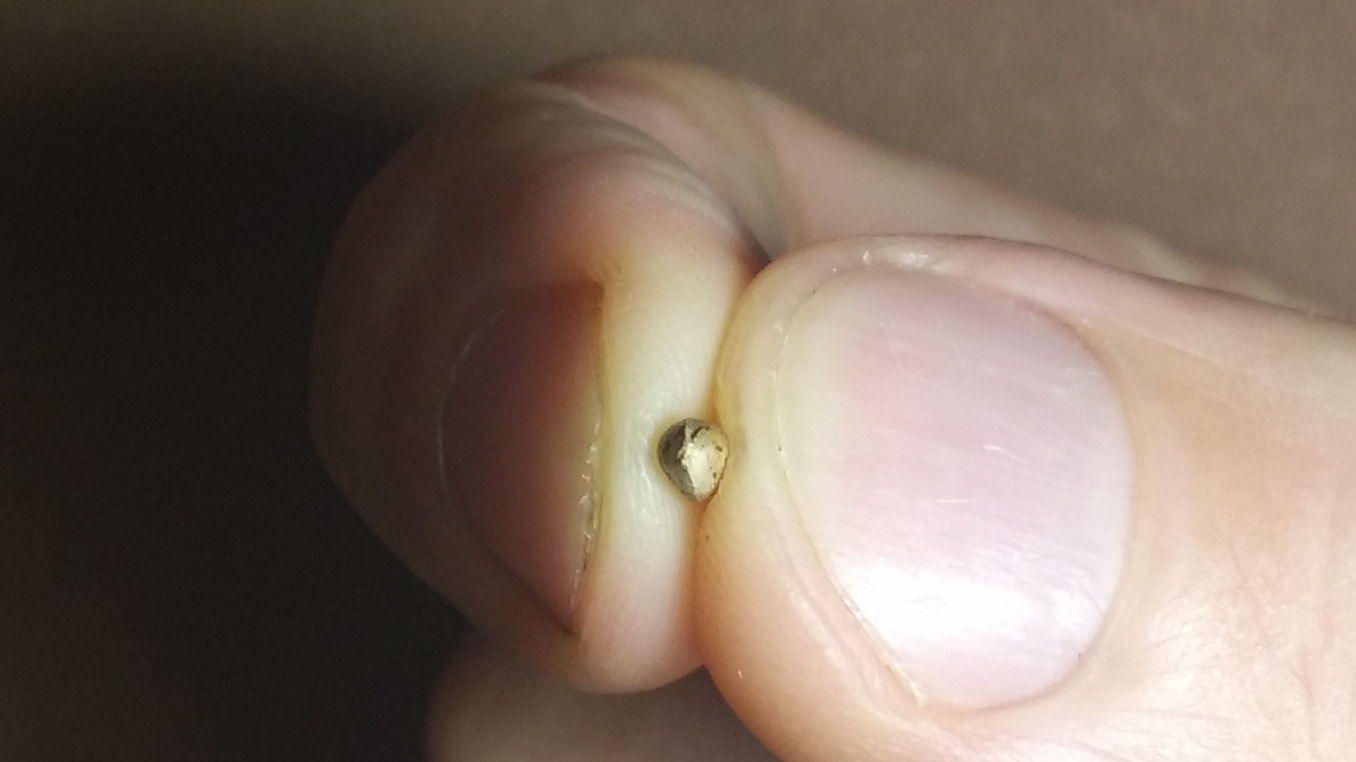
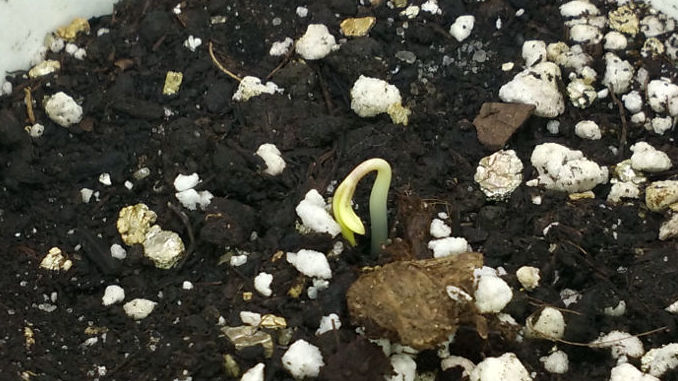
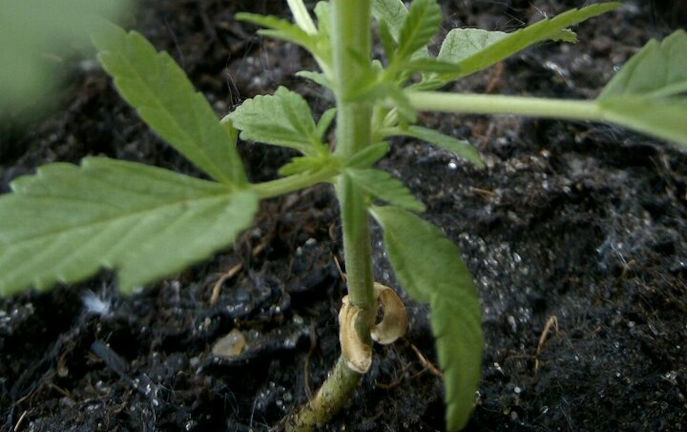
Sometimes the shell comes off, but a thin membrane covering the cotyledons remains. Usually, it’s the reason why weed seedling is not opening. The membrane is too dry and acts as a straightjacket. Make it wet and when it gets soft, pluck it with your fingers. It usually slips off quite easily.
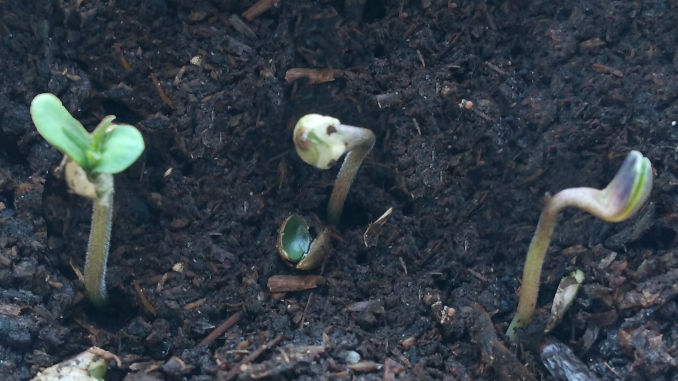
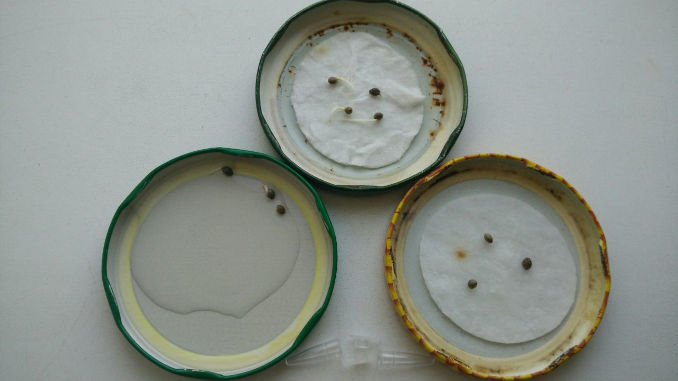
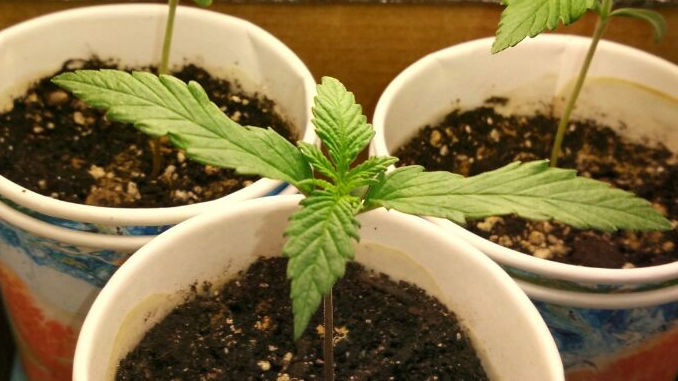
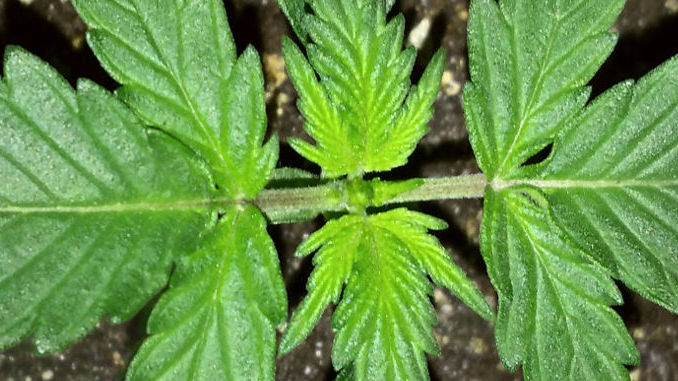
We have removed shells from the seedlings on the right and in the center. The one in the center still retains the membrane.
Warning: Sometimes, the seedling hasn’t rooted too deeply and has still a very short tap root (like an inch or so). In this case, the procedure described above can result in your plucking the sprout out of the soil completely. So never apply excessive force. It’s better to make the shell wet again and wait a bit more. If you did pull the sprout out of the ground, you can still stick it back in (probably, it’s best to remove the shell first). Most seedlings can survive this without apparent shock or stress.
In your future grows, make sure that sprouts emerge from the medium already without a shell. Keep the surface of the medium moist at all times, and you probably should think about placing the seed a little deeper than you did before. In this case, the seedling will encounter more resistance on its way up and the shell will slide off.
Seedling Stretching: Reasons and Solutions
Most seedlings are tall and skinny and look vulnerable, and generally it’s not a problem. But sometimes the stem is growing too tall, weak and thin and can’t support the weight of cotyledons anymore. As a result, the long stem is not growing straight, but sideways or even upside down. The reason is simple: there’s not enough light. Either the source is too weak (e.g. you keep your seedlings on the window sill), or the light is placed too high above. In either case, seedlings stretch toward light uncontrollably and keep falling over.
USE PROMOCODE GET 5% - WEEDKB5
GET 5%

We still recommend that you play it safe the first couple of days and keep the light at a distance. Let the seedling reach the height of 2-3 inches (5-7 cm) – it’s normal and healthy and much better than the other way around: when the sprout is stressed by too much light (and sometimes heat). Slowly correct the distance before you see the seeding bending, leaning or even falling over. In time, you’ll know the exact distance for your type of bulb.
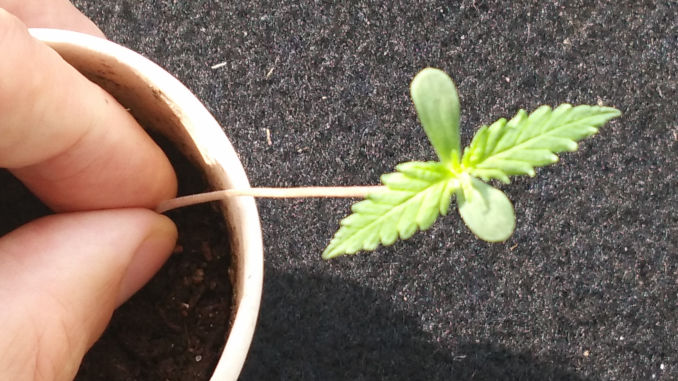
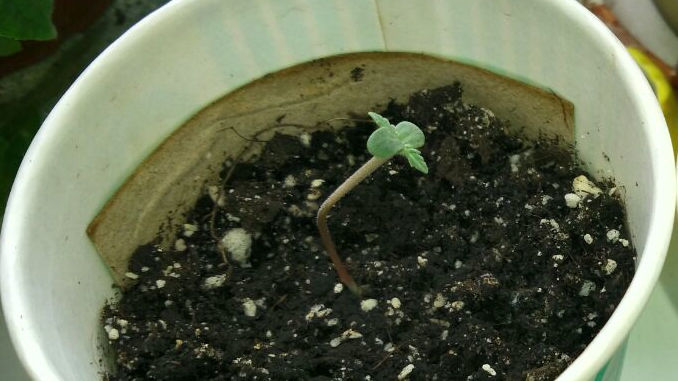
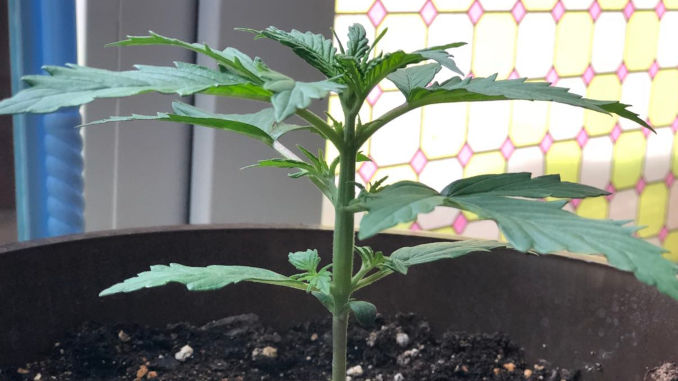
This seedling has clearly stretched too much and needs to be made shorter. Strart by crushing its stem with your fingers just above the surface of the soil and then do the same in several places above.
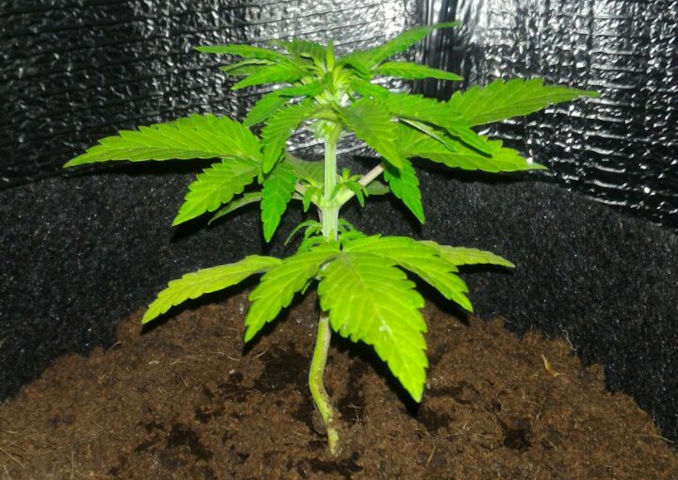
But what to do if a seedling already bent and flopped over? You can always use a toothpick to prop a weed seedling not standing up. However, it is best to make the stem that is too long shorter. You can do this by adding more soil (or coco, or other medium) – then the part of the stem that you cover by the medium will grow more roots, and it’s great. Or, if the container isn’t tall enough for that, you can press the seedling to the soil horizontally (it’s easy when the stem is already bent or the seedling fell over) and cover it with a thin layer of soil. If there’s too much resistance, gently crush the stem with your finger tips, probably just above the surface – it won’t really hurt the seedling.
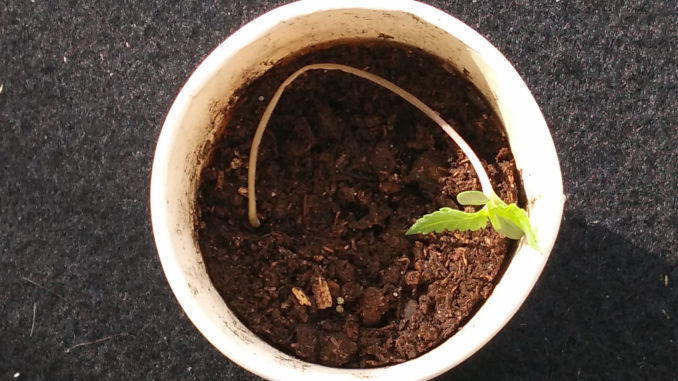
Now that the stem is soft and pliable, lay it on the soil, probably in a half-ring shape.

Now cover the bent stem with soil and don’t forget to water. Note that this procedure will slow down the growth a bit, compared to seedlings that you didn’t let stretch in the first place.
The Problem of Weed Seedling Damping Off and Other Root Problems
Stunted growth, or slow growth, is common among cannabis seedling problems. The reason can be anything: from wrong conditions to stress to shock, but here we’ll talk about problems in the root zone. Healthy root growth is the single most important factor for a plant’s well-being, and if you see that your marijuana seedling stopped growing or is growing very slow, or especially if cannabis seedlings keep dying on you time after time, the first thing to check are the roots and what’s going on with them. Are they affected by some type of fungus? Is there root rot?
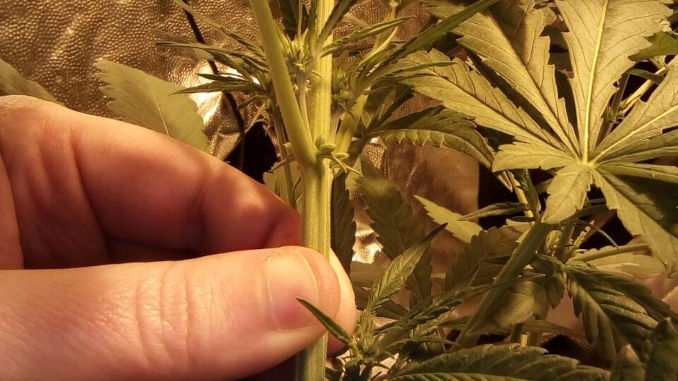
Most of the time, these problems arise when the medium is constantly wet and cool at the same time. These are ideal conditions for mold and fungi, and can lead to the weed seedling damping off. Apart from the seedling not growing leaves or its slow growth in general, you will notice that the stem gets very thin just above the surface. Next thing it will flop over. And, of course, you may notice some whitish substance on the surface of the soil. When the soil feels damp and cold to the touch, it happens very often. And the problems are not just on the surface, but more importantly deep down, too.
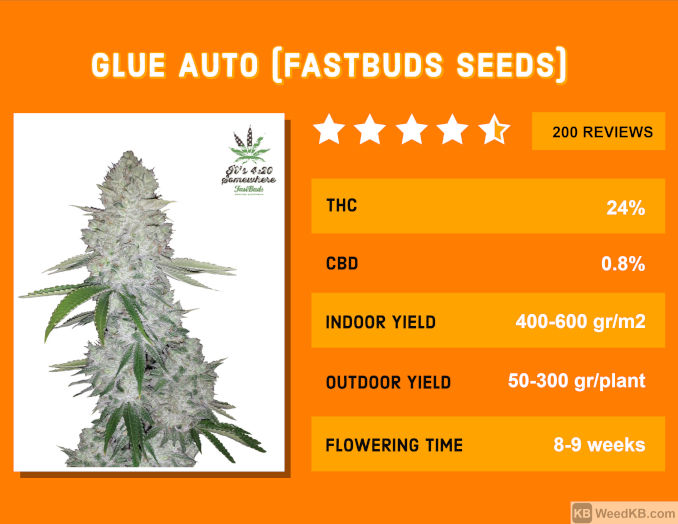
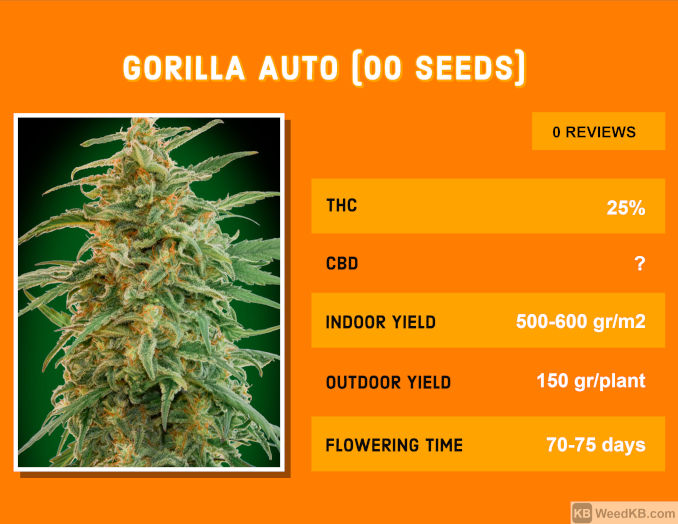
Related Post: The Best Cannabis Seeds
READ HOW
Cannabis Seedling Problems Can be Caused by Bugs
Another reason why a seedling has sprouted but is not growing is that some kind of bug living in the soil has eaten the tap root. You wonder why the seedling won’t grow without realizing that there is in fact nothing at all below the surface, no roots to speak of. This sprout will die, and there’s nothing you can do about it. To prevent this from happening in the future, kill all the parasites in the soil with heat. Just make the soil wet and place it into the oven at around 200° F (90-100° C) for a half hour or so.
A Root-Bound Seedling is Hardly Ever a Problem
Some novice growers wonder if a cannabis seedling can become root bound. It’s the situation when there is too little room in the medium, so that the roots reach the sides of the container and start to grow along them, simply because they have nowhere else to go. It’s quite a common situation for mature plants growing (or shall we say ‘not growing’?) in too small pots, but seedlings generally haven’t enough time for their roots to use up all available space. So seedling becoming root bound is hardly ever an issue.
And, of course, if you feel that your marijuana seedling is growing slow or not growing fast enough for you or is very short, make sure that you don’t expect too much. Read about the healthy and normal seedling development here.
The Seedling Gets Too Much Light
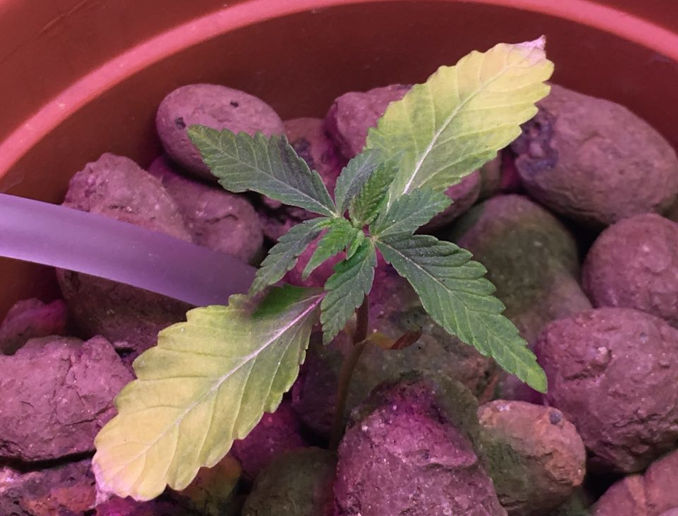
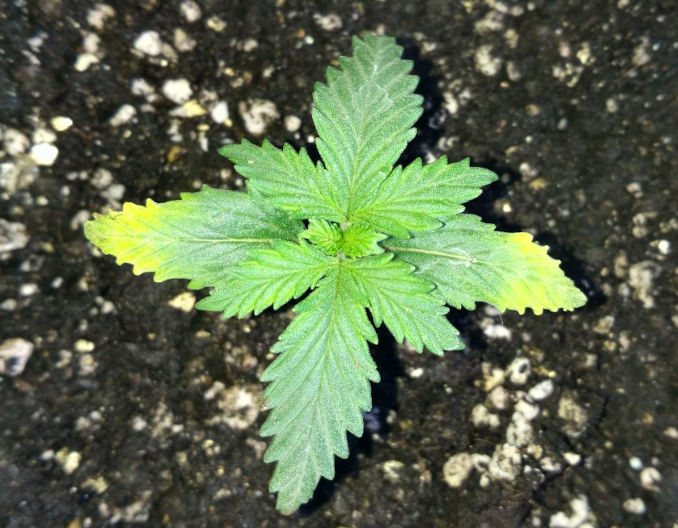
Most marijuana growers would swear that the more light the better. However, the issue of too much light is the real thing, especially for weed seedling. We have been sent countless pictures of seedlings showing the signs of stress from too much light. To be frank, we sometimes (erroneously) diagnosed the issue as potassium (K) deficiency which is often manifested by the lower leaves turning yellow at the edges. However, if you see this symptom in sprouts, the first thing you should suspect is that you have a source of light that is too intense or too close.
You may ask why then this symptom (yellow spots along the edges) appears not on the topmost leaves, but on the lower ones? Well, it’s because the lower leaves have had more exposure to the stressful levels of light (simply because they are older and have been around longer). Leaves yellowing due to too much light are very rare if you use CFL or T5 lights, but with HID (high intensity discharge) bulbs, like HPS or MH, or with the LED technology, these problems are very common.
Too Much Light and Heat Stress Often Go Hand in Hand
If you see seedling leaves turning white, sometimes to the point of complete bleaching, it also can be caused by too much light, but also made worse by heat stress (see below) and maybe calcium deficiency (these two often come hand in hand). Remember that for plants grown in coco calcium deficiency is especially common.
Another sign that your light is simply too much for this stage is that the seedling stays very short. It not only has no reason and motivation to stretch toward the bulb, but the dense flux of photons is constantly pounding on it, causing it to keep close to the ground.
If you see any of these signs, simply raise the lights, or use weaker ones.
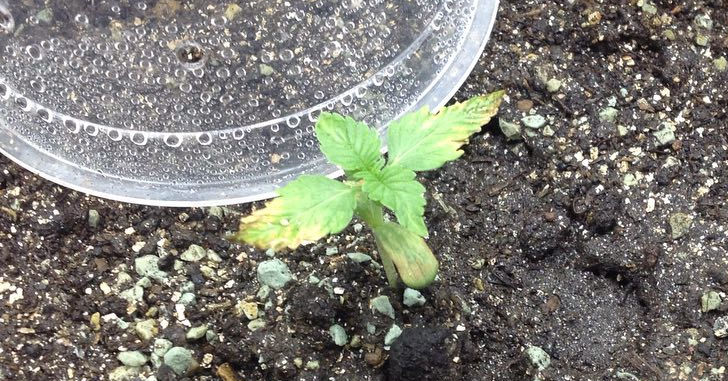
This seedling was exposed to the harsh light of a LED bulb for too long. That’s why its cotyledons and the first pair of true leaves look yellow, dry, and brittle.
Another severe case of too much light. Again the culprit is a LED bulb that was kept too close to the seedling.

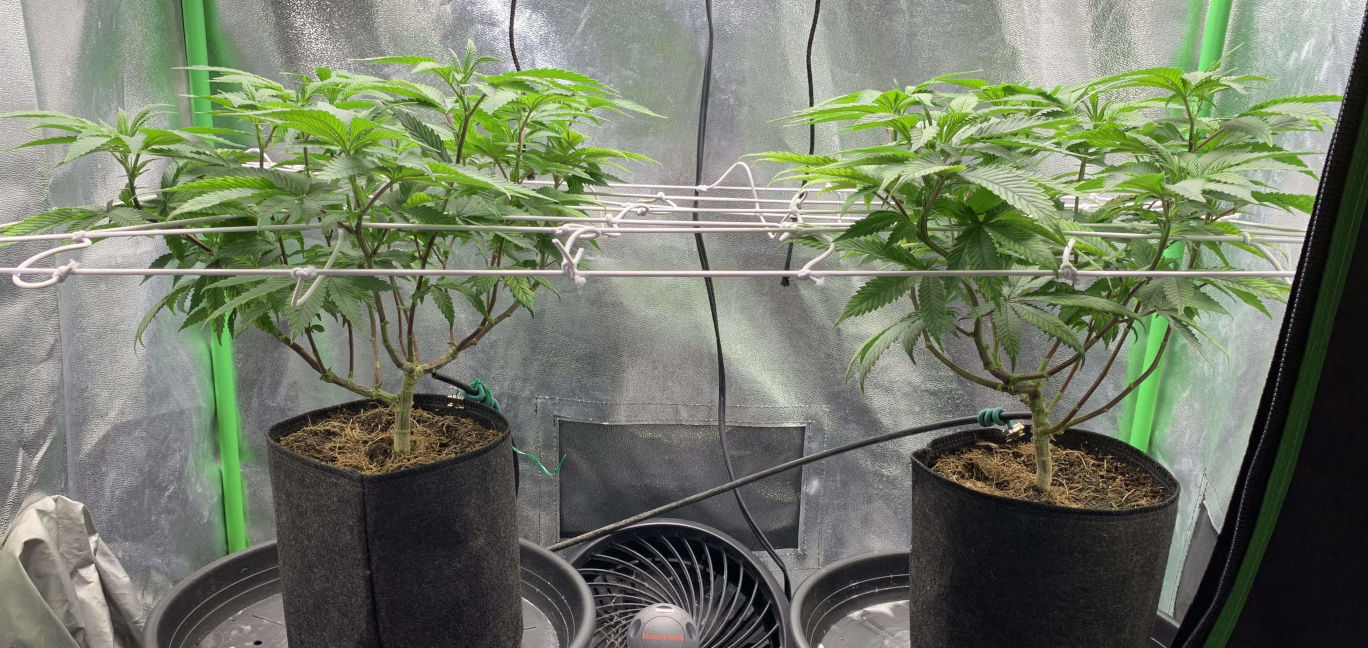
These two plants stand next to each other under two CFLs each. There’s clearly something wrong with their lower leaves. Our guess is they have received too much light. See how compact and dense they are.
Cannabis Seedling Problems with Nutrients
When you see a yellow leaf on your seedling, it’s not necessarily the symptom of too much light (as described above). It can also be a nutrient deficiency. It is seldom the case in soil, because soil mixes come preloaded with fertilizers, organic or synthetic, and it’s enough for the first two weeks or so. But if you use some sterile medium like coco or rockwool, it’s your job to provide your seedlings with plant food. Unfortunately, it’s more than easy to make mistakes here.
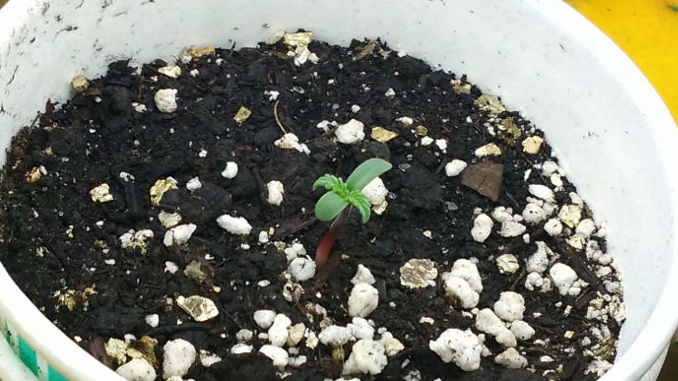
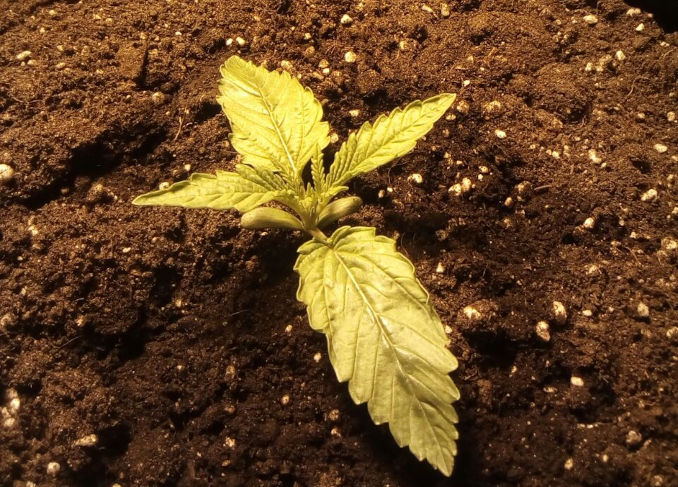
This seedling looks yellow and sickly. Most probably, it suffers from many deficiencies, including N deficiency. Note that the medium here is coco. In soil, you can give your seedlings only plain water and still see no deficiencies whatsoever.
Read carefully the instructions for your nutrients formula and follow them, not forgetting to adjust the dosage for various stages. Look at the color of your seedling: its leaves should have a healthy and vibrant green color. If leaves are light green or yellowish or you see yellow cotyledons, it could be nitrogen (N) deficiency. Although sometimes, if you overwater your young plants for days and weeks, they can show the same symptom (but there will also be others, more specific; see below).
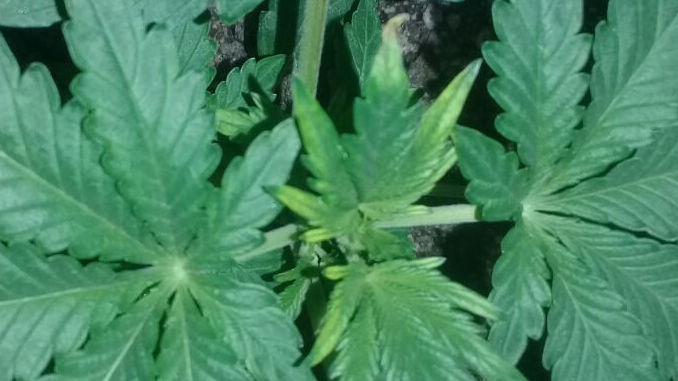
If the seedling is dark green, it looks more like N toxicity (too much nitrogen). In severe cases, seedling leaves will also be curling down.
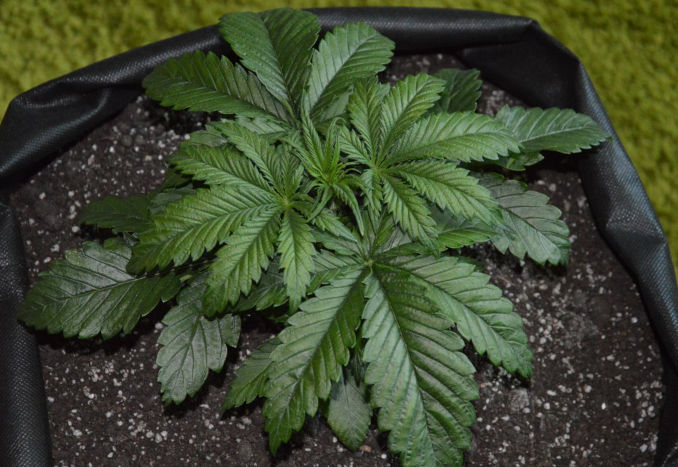
If you see such deep, dark green color of the leaves, probably you’re feeding your plant too much nitrogen (N).
This is how nitrogen toxicity can look in a mature plant. Also check if it’s not a wind burn (if there isn’t a fan too close to the plant).
We already mentioned seedling bleaching and white spots while discussing the problem of excessive light, and mentioned that it could be caused or made worse by calcium deficiency, most common in coco.
And surely there is this widespread symptom of leaf tips turning brown which is a sign of nutrient burn. It simply means that the dosage of fertilizers that you give your plants when watering (or that is present in the soil mix) is way too high, and you should lower it when you see your seedling burn like this.
Discoloration Isn’t Always a Sign of Trouble
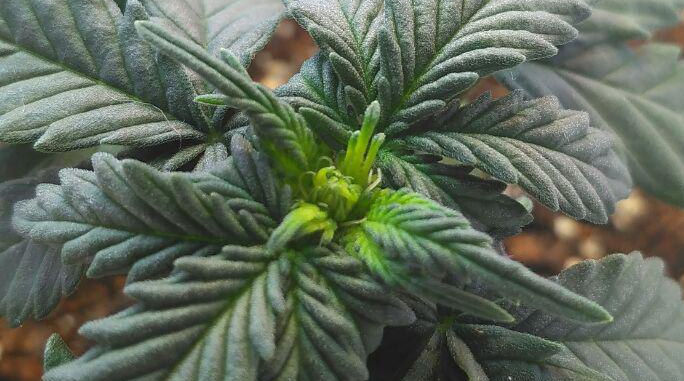
When you suspect that the color of your seedling is not quite normal, maybe you’re wrong. Of course, yellow hues should always raise a flag. The exception is when you look at a plant the first thing in the morning and see yellow in the middle of uppermost young leaves or yellow veins. It could simply mean that this is the new tissue that has grown in the dark and simply hasn’t had a chance yet to be filled with green chlorophyll. Expose it to light, and it’ll become green in no time.
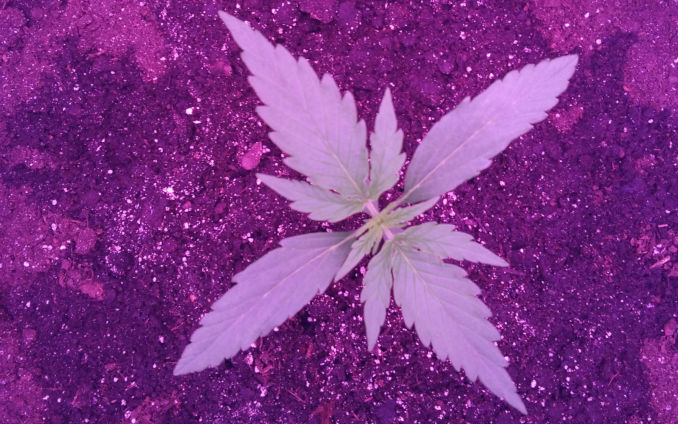
Stem color can vary from plant to plant. It can be white, red, purple, and sometimes even brown. If there are no other worrying signs, it’s probably natural and caused by the specific genetics. Purple stem, veins, or whole leaves can also be due to colder night temperatures (in genetically predisposed strains). So when your seedling is turning purple, see if it doesn’t get too cold at night.
Heat Stress is Common Among Cannabis Seedling Problems
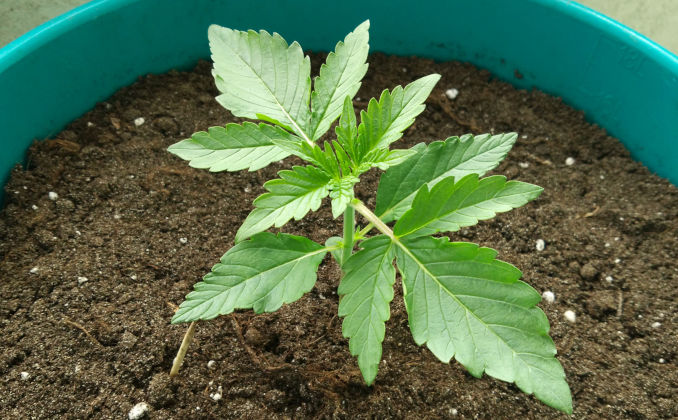
If your weed seedling experiences heat stress, it affects the shape of leaves in a very specific way. You may see the leaves pointing up.
Back in the day, we used to keep CFL bulbs too close to the seedling, and, instead of shying away from it, the seedling seemed to try and hug the bulb with its upper leaves. Other growers see it differently: to them it seems as if the seedling were praying. Still others name it ‘cupping’.
Related Post: Top Cannabis Stores in Your Country
READ HOW
The underlying cause is the same though: not able to move away from the light, the seedling tries to position its leaves in such a way that the light falls on them only obliquely. This helps them absorb less heat energy. If you continue to expose your plants to heat (be it hot air, or the energy from the light), you’ll see a more sinister symptom: leaf edges curling up. The heat often aggravates calcium deficiency and vice versa.
To combat this problem, always try to maintain the correct temperature range in your grow room and make sure the light isn’t close enough to burn. The ‘backhand test’ can help you with that. Place your hand palm down under the light at the level of plant tops and hold it there for some time. If you feel the light ‘bite’ or there’s any discomfort, it’s best to raise the light.
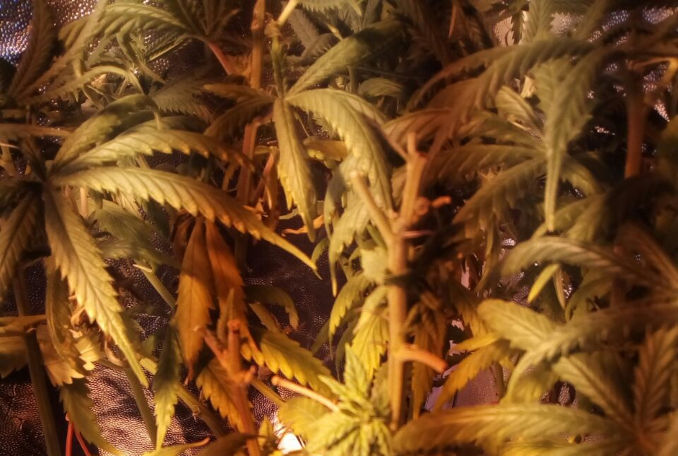
If leaves on your cannabis plant (at any stage) curl up like this at the edges, it means they are overheated by light or hot air.
This young plant kept under a CFL has grown so fast overnight that it actually touched the bulb. Hence the burned leaves on top.
Water Stress (Overwatering / Underwatering)
Newbies overwater marijuana all the time. Luckily, the plants have a way of showing their caregivers that they overdo the watering. The first sign of overwatering is clawing of the leaves, of their curling down. When you touch the leaves on an overwatered plant, you’ll feel that they are quite rigid. Conversely, if the leaves are pointing down, but feel limp and lifeless, the seedling is probably underwatered.
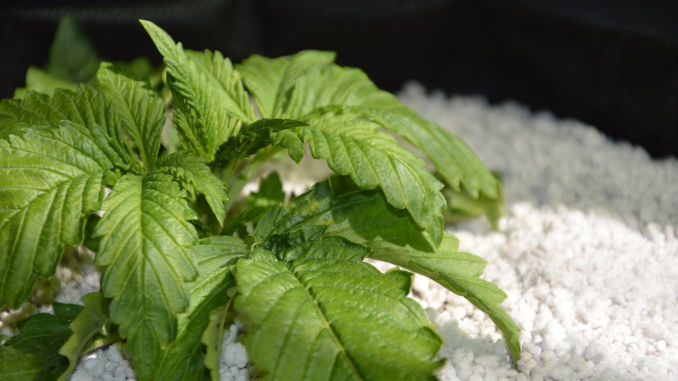
Leaves on this seedling are shriveling up and curling down. The plant has clearly been overwatered. At the same time, it shows signs of heat stress.
Leaves can even change color because of water stress. If you keep them overwatered for long periods, they’ll begin to yellow and eventually die off. The bottom line is: when you see marijuana seedlings shriveling up, correct your watering schedule.
This chronically overwatered cannabis seedling has leaves that look yellowish and lifeless along the edges, almost as if they were touched by frost.
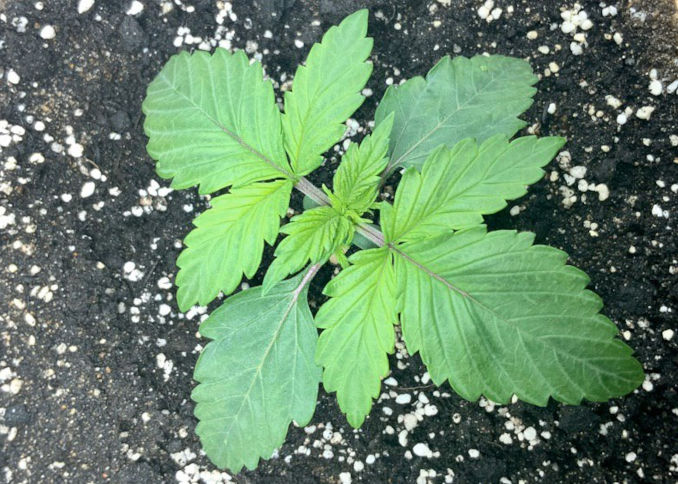
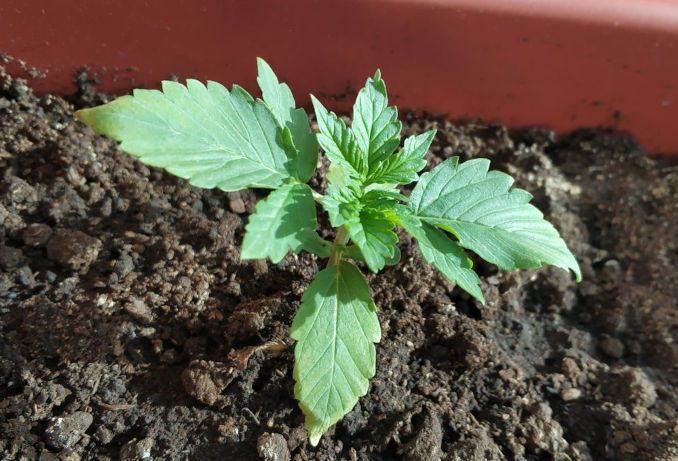
Sometimes, weed seedlings have wavy leaves. We don’t know the exact reason why it happens, but have this theory that the issue is due to irregular watering. No one has yet disproved this theory, and we continue observations. In any case, it’s not a grave symptom. Seedlings with wavy leaves may not look fit for a beauty contest, but are otherwise healthy and vigorous.
All of these seedlings have wavy leaves: a not uncommon symptom. Probably, at some earlier point, the grower has overwatered these plants.
Wind Burn
Another reason weed leaves can become deformed is when there is strong wind blowing on them all the time. For instance, you may have placed a fan close to a seedling, and it’s blowing straight at it and not above it. After a while, it may cause wind burn. Leaves that are stressed this way are pointing down and forming ‘claws’ similar to overwatering. But in this case, they also curl at the edges in the shape of tubes. Often, they also have dark green color, like they do when there is too much nitrogen in their feed.
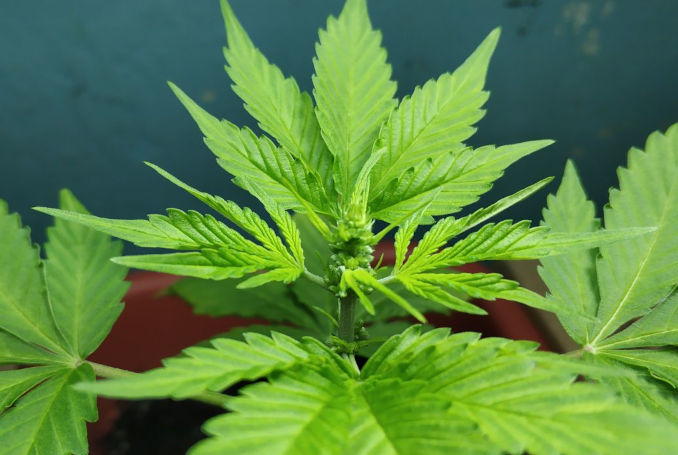
Weed Seedling Mutations
Deformed, twisted, shriveled leaves – these symptoms can appear in marijuana seedlings for no reason and should be considered mutations. These plants are never the best specimens in terms of growing, but, if you bring them to harvest, the smoke may surprise you. It’s up to you to choose what to do with mutants. Seeds don’t come cheap, and you may decide to grow every one of them. That said, breeders always discard seedlings with leaves twisting, as well as with other mutations. There is one interesting mutation though that we personally wouldn’t mind to keep and propagate: weed seedlings with 3 leaves. Usually, leaves grow in pairs, opposite each other on the stem. But here you have three leaves growing from every node. Delightful!

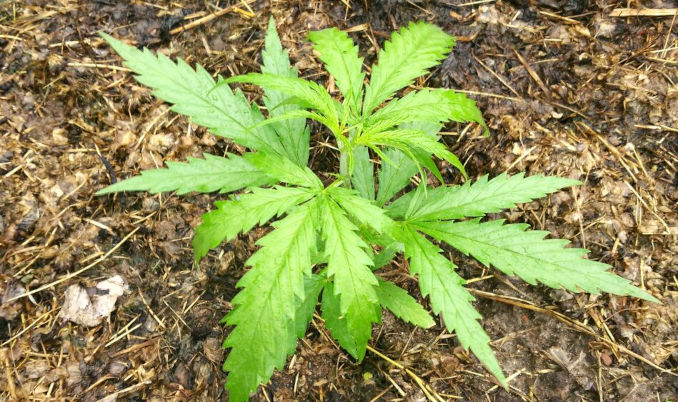
Twisted leaves point to some kind of mutation. You can still succesfully bring this plant all the way to harvest, but it’s not the genetics that you’d want to keep.
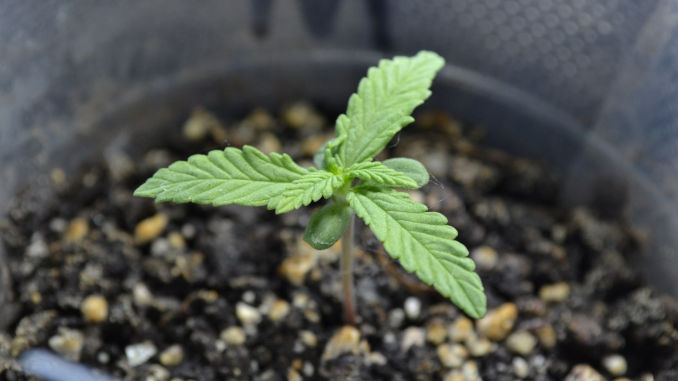
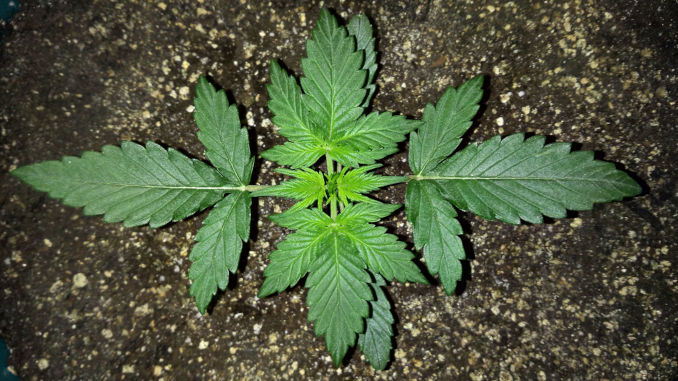
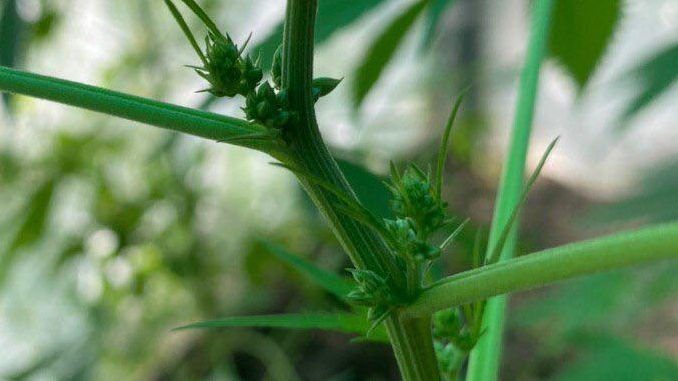
A rare and cool-looking mutation: a cannabis plant with 3 leaves.
Physical Damage: When a Seedling Can and Cannot be Saved?
A special case of seedling problems is when a grower damages it by mishandling. A seedling can be knocked over and uprooted. If you don’t disturb the root system too much, the more vigorous sprouts can survive the repotting without even slowing down their growth.
Root damage is a bigger issue. It often happens during transplant when a piece of soil falls off, tearing off a part of the root ball in the process. You just put the rest back in soil, and hope for the best. When the root broke, it’s a significant stress for a seedling, so try to make its life for the next couple of days less stressful. You can do this by creating milder conditions, like light and temperature, and, of course, refrain from any major changes (repotting, switching to 12/12, or moving outdoors) until the damaged seedling resumes its growth.
And what if the stem broke? Partially broken stem can heal, no doubt about it. Just make a splint and put a bandage where the seedling snapped, and the tissue will not only heal, but even be stronger. Even if you break the stem clean off, it arguably can be made whole again in this way.
What you can’t do is make any use of a seedling that only consists of the roots and the stem, but no growing point, in other words no leaves, as when something has eaten them. The thing is that cannabis doesn’t grow from roots. There are simply no growing points there, so you can’t salvage such seedlings.
Say Goodbye to Cannabis Seedling Problems!
Most cannabis seedling problems can be resolved, and quite easily, too. Just don’t freeze with panic and use common sense. After all, there’s nothing magical about cannabis. It’s just a plant, and one that is quite hard to kill. And if you fail to save a particular seedling, learn not to repeat the same mistake next time.
The Best Cannabis Srore
Fast ship US only - 1 day